
I finished cutting my last linocut of Lesson 1 last Wednesday but didn't get around to printing until yesterday afternoon. That's my repeat block and you can also see the paper version where I was testing various permutations. Remembered a trick from my Mariner Compass-making days and got out my mirrors to get an idea of how the repeat might work. In the background you might be able to make out the oak leaf block and the paper testing the design with a rubbing. I have to say I really like working with the Inovart Eco printing plate much better than the Blick Readycut Plate.

Since I am using what is supposed to be the master bedroom for my studio, there is a full bathroom off it at my disposal. I've played with painting and discharge in a similar extra bathroom in a previous rental so set up my print station in there. I wish the counter was a bit wider, but for what I will be printing right now, this will suffice. My print pad on the right consists of nothing more than some newspaper on either side of a piece of fleece, the dense kind that is used as padding in suit shoulders, not the soft kind that goes into robes and blankets. It's more like a dense poly batting than anything and seems to be the perfect balance between too firm and too soft. It's really nice having the water source right there.

So here we go. This is the 12" sample block, the paper proof in the upper left, the first print on fabric in the upper right. I didn't need to tweak the block but I did need to put more ink on it. The second print on fabric in the lower right came out perfect and I plan to brush Dye-na-flo paint over them later to add color. But I won't be printing more of these. I'll be cutting the block up into individual texture blocks as I anticipated.
For this first round of printing, I'm using Speedball Fabric Printing ink which is oil-based but cleans up with soap and water. It smells so the bathroom fan was running and a window slightly open. Also, it needs to air-cure for a week rather than being heat set within 24 hours in order to be permanent on fabric. Had I known that before I ordered it, I probably would have opted for something else. A week is a long time to wait if you know what you plan to do with the fabric once printed. And black - it was suggested to get black but I wish now I'd gone for a dark brown or a navy or even a dark purple. Well, I'm using it up quickly so it won't be long until I can replace it with a paint of a different color.

On to my leaf blocks (one on either side of the same block) and the repeat block. Here is my paper proof. The leaf in the upper right is the first proof which showed I needed to cut away more between the veins. Lower left leaf print shows the improvement after that tweak. The background "noise" in the other leaf, however, is intentional - a suggestion of the teacher's to lend more organic interest. I must say I really like the effect. And you can see my traditional quilt background coming to the fore as I rotate the leaves around the center not unlike so many applique designs of the 1800's. The repeat block also shows my penchant for classic traditional quilt designs - I have a hard time moving away from symmetry and grids.

Here's how they look on plain white fabric, the repeat block turned in different orientations than in the test print. The leaf blocks are on a 6 inch square, the repeat block is a 3 inch square.

Do you recall the fabric I tried to improve with overdyeing that I refused to show you because it was still pretty awful? I decided it was the perfect candidate for sacrifice, nothing to lose by using it here. I was curious about how opaque that printing ink was and also thought if so much of the ugly fabric wasn't showing, it would lend an autumn air to my leaf. The top one had a lot of ink on the block, the other was a second print without re-inking. The repeat block is printed in between the two - you may have to click for a larger picture to see it as I was using up what was left on the roller and pulling what ink I could off the blocks at this point.
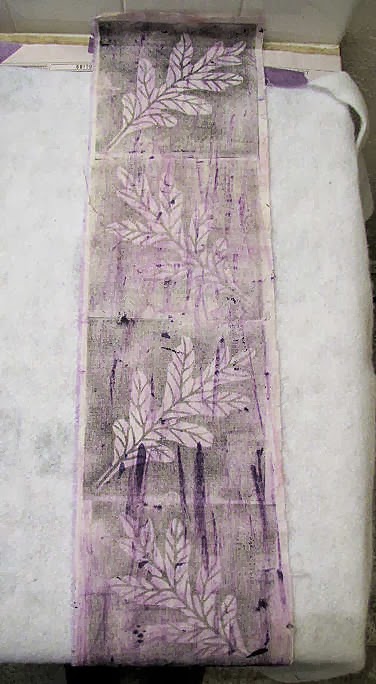
I also dug out some random fabric I'd used the last few times I'd played with my paints - trying out some rubbing patterns, cleaning off brushes, that sort of thing. I can't reconcile what seems to me a lot of waste when dealing with inks and paints so this is my way of capturing all that I can before cleaning brushes and rollers and eventually I have something that can be used as a background in a postcard or other small piece. That's what this lavender strip is and again, I was just trying to get as much ink off the roller and plates before quitting for the day and washing everything up. "Purple oak leaves?" I thought to myself afterwards. What was I thinking???
6 comments:
Hi Sheila, beautiful prints!
It seems that your online classes were very effective.
Lavender leaves, why not?
Have a great week!
I'm loving all of it........it's inspiring....and your results are fabulous!
Wow, I'm loving those prints!!
Thanks! Now to figure out what to do with them... ;-)
I especially like your gridded sampler block. I love geometrics and the orderliness of the grid, and you have some interesting texture going.
You have a nice library of patterns to start with. The oak leaf on point is wonderful! Very well put together with the various block prints. I know it's not easy to line everything up "just so."
Post a Comment