Wednesday, October 31, 2018

Wrapping up #Inktober 2018

I always find it interesting the trajectory any finite project takes, whether it be an idea for a design or a challenge of a specific length. There's always excitement at first, lots of energy and enthusiasm. Midway there is often a slump, a stagnation of ideas, a wondering if this will ever wrap up. Then there's the race down the home stretch, ideas percolating again, maybe more than can be squeezed in, and a gratification of having completed the challenge when all is done. So it has been with my month of daily drawings.

Here are the Zentangle drawings from the 29th, 30th and 31st. I like what I did on the first one, although it is pretty busy, nowhere really for the eye to rest. I had Halloween on the brain as I sketched in some cobwebs. I also tried a new variation on a familiar tangle, that one in the lower right. I think I'd like to play with that some more. 

The second I consider another one that got away from me and got a bit messy. The center tangle is one based on a grid, and depending on how you spiral the lines in the triangular spaces, you can get different effects. But it is easy to get confused, and that is what happened in the larger squares. The Zentangle people encourage you to use mistakes as an opportunity to add something different to "fix" them, which is what's going on in the bottom square, but it makes no sense to what else is going on around it. I wanted to use that over and under woven pattern before the challenge ended so I put it on this one and really should have put it in all 4 corners. Oh well, they all can't be successful.

The last shows more slowing down and thoughtful approach, a nice way to end. I've been saving that feather, a similar technique to the pine bough, only using pointed ends instead of squared off ends and adding the feathery barbs at the base. I was noticing the other night that one of the fabrics in the quilt on my bed has a similar pattern to the tangle I used as background. I'd like to try a variation based on it. But for now, it's back to what's lingering in  my studio. I've been doing a bit here, a bit there on that bookbinding challenge, and it's time to give it some undivided attention.

Sunday, October 28, 2018

#Inktober Adaptations to Tangles

Once you've learned the basics of Zentangling and mastered some of the "official" tangles (here's one source for reference), the Zentangle people encourage you to look for patterns as you go about your daily life that might be adapted into a tangle. Last week while paging through a magazine, I ran across a photo of crystals that reminded me so much of the tangle "reef" (used in the middle Zentangle here), the difference being that the crystals have pointed tops and more than one side showing while reef's tops are flat and the sides one-dimensional. I pasted the photo into my sketchbook and played around a bit with this idea for my October 25th drawing.

Continuing with this theme of adaptation, on the 26th I turned to my little notebook of tangles and the pages showing a pattern I'd clipped from a catalogue that I thought could be used as an alternate to the basket weave pattern on the facing page. Rather than use it as a fill across a wide space, I decided to try it in a border with great results. I added different variations of the tangle "rain" (honestly, the name makes no sense to me) in the center, without much thought to design aesthetics. I was a bit tired and uninspired that day once I tried out my border idea.

In for a penny, in for a pound as they say, I decided the next two squares would also be adaption tryouts. In 2013, Wisconsin friend Michele, who is into photography as much as she is fiber, sent me a photo of shadows cast by a lacy curtain, thinking it could inspire a Zentangle. I agreed and printed it out to file away in the cigar box where I keep my Zentangle supplies and printouts of step-outs. Well, this hasn't taken me long to get over its intimidation, has it? On the 27th, I broke down the elements, recognized tangle-like areas and started drawing swooping lines. I think I've stumbled upon a possible machine quilting design in there.

Finally, on the 28th I thought I'd see if I could adapt a snowflake image, found at the same time as the crystals. This was not very successful, partly because of the wonkiness of the center hexigon and partly because I tried to copy too closely the lines in the design. This needs work and simplification.


Here's what I was working from to try out these adaptions. Click on the photo for a larger view.


Speaking of Michele, she commented on a previous post, one where I'd taken a disappointing Zentangle and rotated it for a better result, that I might put four of them together kaleidoscope-style for an interesting design. As long as I had my photo software program open, I decided to see how that would work. What do you think?


And of course, I had to tray the opposite configuration. It's more of a fan design, and if I could scrunch each one up to meet along the vertical and horizontal center lines, I might have something.  


Thursday, October 25, 2018

More #Inktober Zentangle Borders

You know it when you've found that thing that makes you smile, makes you eager to dive in. That is what has happened with these Zentangles where I've started with a border or frame. While the swoopy, less regimented, almost free form Zentangles do appeal on a certain level, my comfort zone and aesthetic is so obviously tied to a more contained and symmetrical style. I've been encouraged throughout my creative journey to loosen up, throw out the rules, etc etc, and I give that a go from time to time. But it's an uncomfortable experience usually that does not produce results I am thoroughly happy with. Usually but not always. It doesn't hurt to get outside your comfort zone now and then!

But for these three from the 22nd, 23rd and 24th, I could hardly wait for the time slot I've set aside to work on my daily drawing, could hardly wait to try the next border and find something to put within it. I suppose this is the way it goes if you truly have a daily practice of anything. There will be days when you'd rather skip it, feel uninspired, even feel that you are only repeating yourself, and then days when your ideas and enthusiasm are overflowing.

And in these three you also see the way I gravitate toward adding circles, given half a chance. Is it any wonder I often gravitate to adding them in my machine quilting backgrounds as well?

Sunday, October 21, 2018

#Inktober Zentangle Borders

There are tangles that lend themselves to making frames or borders around what else is going on in a Zentangle. For these three from the 19th, 20th and 21st, I wanted to try this idea out. 

These frames appeal to my neat and contained aesthetic while allowing for some looseness in conforming them to a square border. 

It then encourages me to use tangles within to form a vignette that may be recognizable as a landscape or a formal grouping. Or, if in a hurry as I was today, merely to help showcase a single tangle almost like a still life.

By the way, this group started just past the midpoint of this month-long challenge. That is the point where the novelty and charm of a daily challenge usually starts wearing off for me, starts feeling more like drudgery, and my "fun" ideas for what to draw start to wane. Sometimes just adding color to my pen and ink drawings is enough to spark my enthusiasm again, but I'm trying to keep at this without resorting to that. Focusing on frames/borders is doing the trick!

Thursday, October 18, 2018

#Inktober Zentangle Trial and Error

Click on the photo to see details in a larger version
Turning the page again, it was time to try out and practice some new tangles. I have to confess, I was feeling no love while I worked on those on the 16th and 17th. This process, both Inktober and Zentangles, is supposed to be meditative and affirming, but I only felt frustration and defeat. Could not get a nice symetrical shape on the first one, could not follow the step-out of the second one which is just starting with 3 rice shapes placed in a triangle and continuing to add rice shapes to form an overall flower design.

So today I pulled out one I was sure I could do because it starts with a grid of dots like a peg board. Shoulders relaxed as I added the curves dot to dot to form the rice shapes. Joy returned adding the diagonal rice shapes overlapping each other. There was too much error in my trials.

The more I worked, the more ideas came to mind for variations which I eagerly tried. Some are looking very quilty. I think I could do something with these besides include them in a zentangle.

Monday, October 15, 2018

#Inktober Zentangles With Grids

Quite a few of the "official" tangles are based on grids. You can work with something with straight lines like a tic tack toe grid or you can curve the lines to produce either a pincushion or barrel distortion. Filling these distorted squares can lead to some interesting effects. You can also make the lines in the grid curve off at odd angles or keep them nice and symmetrical.

On the 13th I wanted to use a tangle that in the past has worked well in these odd shaped grids. Ack! I did not look closely enough at my step-out and filled in the triangles formed by the extra lines (called a star grid) wrong. I left too much space between the grid line and my fill shape plus did not round it off at the point. I went over it several times to try to rectify this but it just didn't look good to me. What's in the lower right corner is very pleasing to my eye, nice and neat and organized.

On the 14th, I gave that problem tangle another try, using a slightly different curve to the line defining the edge of the grid. Ahh, much better. This is what it's supposed to look like.

On the 15th, I wanted to cover the tile area with a single grid with the center lines straight and the lines on either side curving outward, then find different tangles that would fit in the grid working from the center out. Except for how I finished the last row of grid top and bottom, I'm rather pleased with this one. I'm wishing now I'd filled those leftover squares top and bottom with leaves or circles.

Friday, October 12, 2018

#Inktober Zentangles With Foliage

After my free practice #Inktober drawings, I flipped the page and went back to filling in squares, starting with one of the new tangles, Icanthis. I like that one a lot and added a background tangle behind it that I hoped would read as bark. It all looks busy to me and I very much want to color it in, although most Zentangles are left in their inked state. We'll see if I can hold out.

Onward to a different idea that had been floating in my head. At one time I experimented with putting a circle in the middle of the tile, almost like a porthole where I could tangle in a little scene. Lately I've been thinking about turning that circle into an elongated diamond shape. The predominant tangle around that opening is one that is somewhat like a petal shape, so again, I am adding flora to my scene.

To finish up days 10, 11 and 12, I played with a leaf tangle, trying it out as an undulating border. The lower right corner is a spiral shape that is filled with spiraling leaves, an idea I got from an on-line variation. It all looked to lack contrast when I shaded everything in, the leaf border lacking definition, so I added an echo line around the outside. That too seemed to do nothing much so I filled it with "perfs", and in frustration, darkened the space around the perfs. Not so very happy with it, but the idea of working with the Zentangles was to draw and analyze because tangles, just like fabrics, have varying values and can be drawn in a variety of sizes. The goal for me is to keep working at this to get better at striking a balance and putting together tangles that compliment each other while also providing contrast. It's that design thing we all strive to get better at.

-----------------------------------

I was looking at these on my Facebook posting, noting how no one (including me) was drawn to the last one when it occurred to me I had not checked to see if rotating would improve things. So here are two rotations that I think do indeed make the October 12th one better. I really like the first one. What do you think?


Wednesday, October 10, 2018

#Inktober Tangle Practice

I thought I'd give you a little insight into my process when I make a Zentangle drawing and what goes on in my head when I do one of these drawing-a-day challenges. For instance, I often am thinking what I want to draw the next day as I am finishing up the drawing of the current day. And so, as I filled the last of the 6 squares on the first sketchbook page of my #Inktober drawing challenge, I had an inkling that the next page would bring a different approach. There were several tangles I wanted to try out, but not within a formal Zentangle 3-1/2 inch tile. So I turned the page, let go of boundaries and approached my drawing on October 7, 8 and 9 as an opportunity to practice. If I liked how a tangle went, I'd incorporate it into a tile later.

As you can see from the photo (click on it for a larger view), these tangles do not come out of my head. I have that small little notebook where I've drawn in "official" tangles and their shadings and variations. The more complicated ones have "step-outs" - a guide to the sequence of lines to more easily produce a tangle. If you play a keyboard instrument, you could relate these to fingering notations. Yes, you could play that tune using your own fingerings but the suggested ones usually make it much easier. Same idea with continuous line quilting designs. So it is with the tangle step-outs.

The ones in my little notebook are from the book that taught me Zentangling (see this post). I've added a few more that have come in the Zentangle newsletter and on their blog. Some of these newer ones have more complicated step-outs and came with beautiful examples of how to use them so those have gotten printed out. That is what I was working from as I practiced on this page. 

Sunday, October 07, 2018

Three More #Inktober Zentagles

Here are the Inktober Zentangles for October 4, 5, and 6. Again, I have a favorite and a non-favorite. The top one includes one more variation of the Well tangle which I like the best of those I've tried. It essentially uses echoing and shadowing with pencil to create an iron grille-like effect. I'm very happy with what I added and how it all came together.

The middle one is defaulting back to an easy tangle very much like our quilting feather and adding a simple net-like background. I didn't have a lot of time to fuss that day.

The last one turned into a bit of a jumbled mess in my opinion, with the inner shape becoming lost as I added some circular designs in the undulations - too similar to the tangles in that center. I was watching some motorcycle qualifier sessions as I drew and used a "string" in a shape like a racetrack in the center, filled with Crescent Moon tangles shaded a bit differently to resemble a motorcycle tire. Or so I hoped. But I felt I lost all that with what was added directly around it.

However, as in the last group of three where I was somewhat unhappy with the last one but rotating it seemed to help, I rotated this one too and really like the look. Now it looks a bit like an ocean scene.


Saturday, October 06, 2018

Cobban Bridge Slice Quilt Done!

Historic Cobban Bridge Slice Quilt
I got an update this week regarding the collaborative slice quilt project I contributed to earlier in the year. It is now quilted and bound and at its first outing this weekend as an entry in the Chippewa Valley Quilt Guild show. Mary, who organizes this, sent along pictures for all of us to see how it finished out, and I am still amazed at how we managed to do a dawn to dusk transition across the 4 slices while working independently from the same photo.


Mary added some additional information in her email to us - be sure to look for these features when you click on the photos for a larger view. "If you zoom in, you will see the beautiful quilting Pat did. She did the bridge reflections on Wanda's and mine, but it is very subtle. She made many thread color changes also, as seen on the back side. Alice, thank you for doing the binding. She added some puffy 3D rocks to hers." Mary is also the one who found that marvelous bridge fabric for the backing.


The label on the back includes a photo transferred to fabric of the historic marker at the bridge site. Unfortunately, I understand the efforts to save this bridge from demolition were not successful. But it lives on in our quilt!

Wednesday, October 03, 2018

Inktober Has Begun

I won't be posting daily my #Inktober drawings but I did want to let you know I have been working on them each day now that October is here. I've decided to go with Zentangles, at least for now, and can get 6 on a page in the big sketchbook I've used for the last two years participating in Inktober. So 6 squares all marked and dated, the first a kind of reacquainting myself with the practice and warming up with a couple of familiar and favorite tangles. As a general rule, Zentangles tend to be filled with tangles, very little white space, and I definitely could have added a few more things to this one, but I rather liked this effect and stopped before things got out of hand.

Yesterday I decided to try a new tangle called Well. No practicing beforehand which I somewhat regretted. But once I added lines and shadings plus the additional tangles acting like a border, I decided it wasn't all that bad.

Today, I decided to stick with Well and try some variations, a totally different look that gets away from the petals design. The one in the bottom left extends out the original 4-square grid to 2 by 8 and eliminates the mirroring lines that form the petals. The one in the upper right uses a 9 square grid on an angle and all the lines from corner to center spin the same direction. Then it was a matter of deciding what other tangles to add to fill up the space.

One of the advantages of working on an individual tile is that after you have filled it, you can turn it to see if it looks better in a different orientation than the one you used while working on it. In this case, I like this quarter turn to the right better. But it is trapped in the sketchbook in the direction in which it was worked. Maybe I'll draw arrows and make a note.


Sunday, September 30, 2018

Practice

"How hard could it be to draw a dragonfly?" I asked myself as I pondered what the pages in my recycled bookbinding challenge project needed to complete them. Part of me says, "Keep looking for ready-made dragonflies to cut out and past in place," while another part of me is kinda tired of that hunt. And so with brush pen in hand and eye on some printed examples, I gave it a go, filling in the wings with a  metallic gel pen. Hmmm, not terrible, but I still don't have the hang of controlling that kind of pen.

Did I really think my first try would be perfect? Yes and no. Realistically, if I have not drawn one before, I couldn't expect perfection right out of the box, but in one's dreams, it just happens, beautiful and exactly what one has in mind. After all, I've been upping my sketching game over the last few years. Imagine it and it will flow magically out your pen. Well, not always. Sometimes one really does need to practice. And try different pens, and different colors and different sizes. And note where the trouble lies that keeps one from the image one desires. For instance, I was reminded of how hard I've always found it to draw mirror images. Right side great. Left side wonky and certainly not a mirror when compared.

I've never liked to practice, starting from age 4 or 5 when I bribed my mother into teaching me how to play the piano. Practice scales and fingering? How boring! I want to learn by playing songs I recognize. I wasn't much better when I got old enough to join band. I'll practice while we play in class. This became a recurring theme as I tried other things, including crafts and quilting. I became relatively good at all sorts of things, but perhaps only gained the level of expertise I have in the quilting realm, not because I practiced a lot before diving in but more because of the hours I put in making things. I practiced on "the real thing" and moved on to the next. (The exception to that might be hand and machine quilting - I have the samples to prove it.) There have always been too many things to do and make to "waste" time on practicing! Well, age has brought a bit of wisdom about all this, and I shall be practicing more dragonflies to get comfortable with shapes before adding any to my pages.

So with these thoughts in mind, I thoroughly enjoyed Austin Kleon's recent post, A Willingness To Be Bad. It starts with this quotation:

“It isn’t so much that geniuses make it look easy; it’s that they make it look it fast.”
—Sarah Manguso, 300 Arguments

And then continues with a section from a 2010 piece by David Wong called “How The Karate Kid Ruined The Modern World” where Wong laments how movies with training montages give us a skewed vision of how hard it actually is to get good at things:

"Every adult I know — or at least the ones who are depressed — continually suffers from something like sticker shock (that is, when you go shopping for something for the first time and are shocked to find it costs way, way more than you thought). Only it’s with effort. It’s Effort Shock.

We have a vague idea in our head of the “price” of certain accomplishments, how difficult it should be to get a degree, or succeed at a job, or stay in shape, or raise a kid, or build a house. And that vague idea is almost always catastrophically wrong.

Accomplishing worthwhile things isn’t just a little harder than people think; it’s 10 or 20 times harder."

I just loved reading that, and truth be told, it is what made me ok with my dragonfly practicing. As Austin says, "the switch towards taking on a practice and discipline is admitting to yourself that you suck and you want to get better." And as a friend of his said about taking up drum lessons again, " he’d forgotten the joy of the practice –> suck a little less –> practice –> suck a little less loop." Oh, wouldn't we all like to suck a little less?

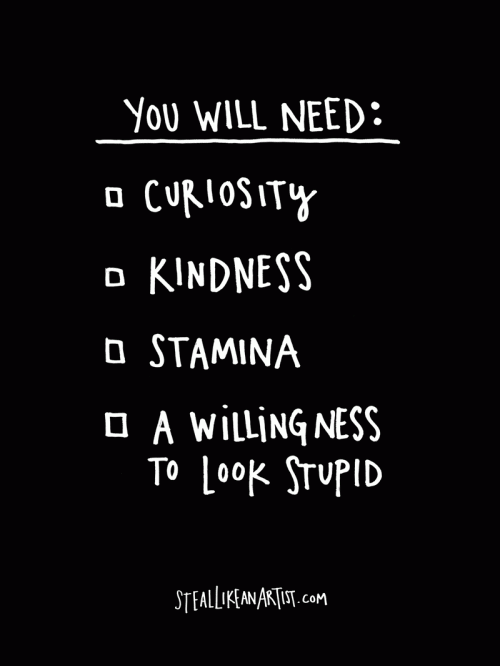
To wrap it up and point back to the title of the post, he quotes part of an interview with actor Jason Segel where he talked about his willingness to be bad for as long as it takes. Now there's a thought. Do pop over to the post and read the elaboration of that attitude as well as other Kleon observations. And perhaps be inspired by this checklist of how to cultivate that willingness to be bad, found in Austin's book, Steal Like An Artist. Inktober starts tomorrow. What better way to start practicing to suck a little less!


Thursday, September 27, 2018

New Stuff And A Really Good Day

I may not buy much if any fabric anymore, but that doesn't mean there aren't other things out there tempting me. I was reminded to check one of my favorite online shops, Connecting Threads, to see if they had next year's AQS Engagement calendar, and in the process found that they carry Kraft-tex, something I've not been able to find locally. When I first heard about this product, sturdy paper that mimics leather, I could not imagine what use I might have for it. If I want to work with leather, I reasoned, I'll buy leather. I kind of have a built-in bias against faux things. Anyway, over the years, it kept cropping up, I kept rejecting it, until finally, the Facebook bookbinding group I joined started talking about it, how great it is for book covers. Hmmm. Well, what the heck. No harm in trying it. And as long as I'm at it, let's get these Sakura Gelly Roll Stardust Galaxy sparkly pens that are on sale. I'm SUCH a sucker for a sale!


So my order showed up this week, and although I haven't opened that Kraft-tex package, they do conveniently staple a small sample to the outside. I plan to put it through its paces, cutting small pieces to use as samples, trying out all the things it's supposed to be good at. On the surface though, I'm not convinced. It strikes me as thick paper with texturing on one side. But I'm mostly curious about sewing through it so we'll see. In the meantime, I got out those pens to make a sample in my multi-media sketchbook and thought for sure they would show up well on the black Kraft-tex. Well, not really. But boy, do they ever sparkle off the white paper. And at least one of them shows up ok on the brown paper I'm using in that recycled bookbinding challenge project (which frankly is why I bought them). Lots of experimentation could be on the horizon.

As long as I was at my work table, I decided it was time to quit dithering over the placement of a few dragonfly images on several of the spreads. I really need to go through my small bin of catalog and magazine pages to see if I can find more dragonflies. In the meantime, it took only a few minutes to paste down these that were ready to go and muse some more about further additions.

You may have to click for a larger view in order to see the faint pencil sketch

After lunch it was time to hit the beach . . . city beach that is. Still enjoying such beautiful fall weather, and I was having a good day physically which often is all I need to have a good day confidence wise. Time to revisit the accordion sketchbook drawing of the view from the park. I think I started this last fall, getting what I thought would be the hardest part of buildings at the start done and then some of the boats in the marina, filling out mountains and some trees in the background. The park itself juts out into the lake in a semi-circle and I thought I could get the entire 180 degrees in this sketchbook. I soon discovered I was wrong; after yesterday's bit of sketching, I think I will only get half way. I also discovered that all of the sailboats in the marina were more difficult to suss out than the buildings had been. I added enough to have to flip to the back, ending with the jetty. When I fill both sides of the sketchbook with this pencil sketching, I'll go back over it in ink and probably add some watercolor.

You know it's Easter because of the rabbit
Once home, I had a wild hair about those family slides I want to start scanning (remember, it's on THE LIST). They've been airing in the garage and I thought I'd take the opportunity to identify which carousel(s) harbored The specific time period I need first while I had good light with the garage door open. Mom had written on most of them in the first few carousels and then failed me after that! But what fun holding them up to the light and spotting ones I remember so well from the many evenings growing up when mom would make popcorn and dad would set up the screen and slide projector to view the family slides. One carousel had three years all intermingled and that orderly side of me could not stand leaving them that way. All chronological now and ready to scan!


As I eyed the calendar, noting how quickly September is passing, I suddenly remember that with October comes Inktober, that challenge to draw something in ink every day in October. Yikes! I think I pondered a theme for this year as soon as I finished my shoe collection last year, but now I have no idea what it might have been. Maybe something with rocks? Oh well, I'm not feeling like I want to be tied to a theme (whereas in 2016 & 2017 I found a theme very helpful to keep me sketching each day and interested). I have several thoughts and am leaning towards Zentangles. I have the step-outs for quite a few that I have not tried to do yet and it's been a long time since I've put together a Zentangle drawing so that almost has a killing 2 birds with 1 stone feel to it. Also on my mind is adding more in my "and then add red" sketchbook, practicing more with the brush pens I've bought but not mastered and rather than sketching from a model of any sort, more working with possible quilting motifs. I generally like to be so organized and logical but at the moment I feel more spontaneous and whatever the day brings. I did take a look at the official prompts for this year but no, they turn me off more than they help. I do hope some of you will join in. You don't have to be good. You don't have to be fancy. You just have to draw, and in the process, get better each day.

Sunday, September 23, 2018

It's Autumn

Yesterday was officially the first day of autumn but our weather has been cooler and crisper for a week or more, and some trees, including the birches behind my place, had already begun their colorful turn. I've been enjoying this maple, for instance, for at least a week. I wasn't planning on taking more fall color pictures to add to my files, but I know I hadn't captured this tree yet, which is by far outshining the other nearby maples I've photographed before.


But what really caught my eye yesterday, as I returned from shopping and turned onto my street, was the warm colors glowing from this marshy patch on the corner. I immediately thought of my piece Adrift, that these were the very same colors I'd put in that quilt!


I looked across the street at a smaller marshy patch to see if it was showing the same rich colors and it was not. Once I'd pulled into the garage, I raced upstairs for my camera and returned to capture this before the bit of sun that was out dipped back behind a cloud.


Not sure what all is in there but I did spot some cattails. But just look at the variety in the palette displayed in these grasses.


It was quite breezy too, causing the grasses to bend and sway in waves. I remember thinking when arranging the "grass" on Adrift that it needed to bend a bit, not stick straight up, just as I was now observing.


How do you capture that movement in a photo? I took a lot of snaps trying to do just that. And then I had that "duh" moment, the muse no doubt reminding me that my camera DOES have a video mode. Here's one of the short movies.


It's been awhile since I've been so taken with a scene that I just kept looking and taking pictures. Didn't I say in my last post how autumn inspires my quilting palette? Sucked me right in again yesterday!

Another artist inspired by nature is the macro-photographer Daniel Sroka, who often picks up leaves on his walks and takes them home to study and photograph. Here is a post from last fall about "some leaves of autumn" as shared on his blog. Also see this grouping of "breakaway" leaves.

In an e-mail where he shares from his Forthright photos, Sroka says something I can so relate to: "I sometimes wonder if I will eventually grow tired of photographing leaves. But every year when autumn arrives, I find myself inspired all over again. In this case, it was the color of the leaf caught my eye: a deep dark red, as if a glass of wine had spilled on a tablecloth." A few years back I thought I was done collecting leaves until that leaf cluster caught my eye, equally deep dark wine red. The moment ended up in one of my artist statements: " I will NOT pick up one more leaf because I have plenty. And then I spotted not a single leaf but this cluster, dark and inviting. Ok, I said. I have nothing like you in my collection so you can come home with me."

And so it goes with us artistic types. Forever at the mercy of the nature that so inspires us.  

Friday, September 21, 2018

What Floats Your Boat?

Spruced up Sandpoint Historic Train Depot
Do you have a good idea of what inspires you, makes you choose to work with particular colors or designs? I thought I did: clean lines, interesting angles, symmetry, repeating geometric shapes, everything orderly. I often think it's that traditional quilting background of mine and the study of antique quilts underlying this tendency in so much of my work. The curves and texture and autumn palette I know comes from my long time habit of walks in nature. So imagine my surprise when sorting through some photos of our recently restored historic train depot that I found them less interesting to me than the ones I took of the station in its dilapidated state. Here are some before and after shots to show what I mean.


Most of the restoration has been to the outside of the building, to stop damage from a leaking roof and crumbling mortar. I'd tried to capture the crack running down one wall under the window near a loading bay. The rest is a bit of a mess.


Here's the wall "better" and I must admit I rather like the way they painted that loading by door. Except for that, this area has lost that "worn" character that theoretically I should not be drawn to. All neat and pretty and orderly design elements which I always think of as my core inspiration.


The brick platform along this side of the building and wrapping around to the front was falling apart, some bricks missing. It reminded me of some quilts I'd seen where the geometric pattern started falling apart and off the quilt. Could I do this, I remember wondering?


I was glad to see that the brickwork had been restored and in some areas replaced with new bricks. But now in a photo it struck me as rather boring from an inspiration point of view, although quite lively from the perspective of placement and value


Here is where old meets new. I realized how much more I preferred the old. Maybe the new will weather over time to be more appealing to me.

Before
So what exactly is the charm of these worn buildings with structural cracks and peeling paint? I realize now how many peeling paint, weathered doors show up on the internet and how drawn I am to them, very much not alone in this.

After
And as much as we admire a building that has been saved from destruction, what about its smoothed out surface and straightening up soon has us moving on?


Well, I can't say that is a hundred percent true for me. I still stare at newer buildings and want to sketch them, still entranced with their lines and angles, especially ones that soar into the sky, and dream of capturing that perspective in cloth, if only abstractly. But now I see better this other thing that can draw my attention, things opposite to what I think I prefer, the gentle decay that says "Look again. There's a lot going on here even as I slowly disappear."

Wednesday, September 12, 2018

On The Trail Again

Yesterday the trifecta of what I've been waiting for finally happened. Smokeless air, cooperative weather and improved shoulder coincided at last and found me heading for a short walk along the Pend d'Oreille Bay trail. Can hardly justify calling this broad smooth and mostly flat trail a hiking one, but it was just what I needed and could handle. Look at that smile! (See more about this trail in this post.)


Granted, it was a coolish sweatshirt sort of day, with the sun straining at times to show through a thin high flat cloud cover, but at least rain was not in the forecast as it was for today. On the drive to the trail head, I'd noticed these puffy clouds against the flat gray sky, how many values of gray were represented, and was reminded of an "Ode to Gray" I'd recently read on The Paris Review. I agree with the author, by the way, on many of her points about what makes gray so great. I could definitely use the Paynes Gray in my little watercolor set to paint these clouds that seemed to lean towards a blue tint.

I've been wanting to get back to this trail because of a tree formation I'd discovered just off of it, one I thought I might like to sketch. I decided to leave the sketchbook home this time and take the camera instead. Just getting out to walk seemed enough of an effort for now. What caught my eye was the way the tree that had bent (but not uprooted) to rest on the nearby incline had sprouted a new trunk that has shot far into the sky. I've seen this one other time when I lived in Wisconsin.


And in this case, not one but two new trunks grow along the angled one.


They both go as high as the surrounding trees, straight and tall, their tops hidden in branches and leaves.


Moss grows on the rough bark, and the base of one of the new trunks undulates and creates a visual texture not unlike as if it were growing straight out of the ground.


After capturing these images, I walked a bit further up the trail before deciding not to press my physical luck and head back to the car. My eyes were mostly on the trail and the lake, but by chance I happened to look the other direction where these bright Mountain Ash berries glowed as if electrified.


For such an otherwise somber and shadowy walk, this splash of color was a great way to end it.