Showing posts with label Recycling. Show all posts

Monday, November 15, 2021

Patience

This quotation, found here on Austin Kleon's Tumblr, seemed an appropriate follow-up to my last post about free may not cost you money but it does cost you time:

“I don’t want more, I want less. I want to have less, so I will have more time to devote to this gift that I have. Because in the final analysis, the only thing that we have that is not renewable is our life. When I am dead, they will still make money. My time, I have decided, is more important. To claim my time to do what I want to do in that time.”

After posting, I hoped readers would not think I fancied myself above or not in need of more information at all. No, I have several blogs I follow, like Austin's, where I find much that is thought provoking and sometimes, useful quotations I'm not seeing elsewhere. As I worked on my current book project (part of my slow cleaning off of my work table), this post on The Principles of Patience popped up on Austin's Tumblr. It's short and I give you its bullet points as a teaser, hoping you will follow the link and read the explanation under each one. They all seemed to apply to my current project.


Embrace radical incrementalism.

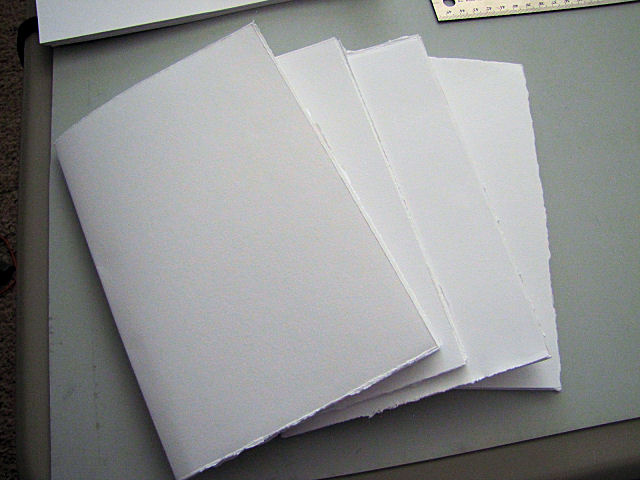
First let me say, making books leads to as much leftover bits and pieces too good to throw out but sometimes head scratchers to figure out what to do with as making quilts. After finishing the last leather book, I had 8 perfectly good signatures from the bottom half of the paper I was using left over. Shorter than the signatures for the long stitch link stitch leather book but still a decent height for another leather book I wanted to try. I cut a piece from the smooth leather bomber jacket had for 99 cents, fused a heavier batik to it with Steam-A-Seam (hoping it would prevent fraying along the edges which Heat and Bond did not do), chose the handspun hemp thread I'd used in a Japanese stab stitch book, punched holes in the spine and started sewing in the signatures.

This is supposed to be one of those easy and relatively quick books to make, and with the signatures already cut and pressed, I should have been able to finish it in a couple of days. But instead, I found myself doing small bits at a time, stretched over an entire week. Working incrementally. After the first signature was sewn in and I had the hang of doing the "packing" around each long stitch, I moved my materials to my office so I could do that meditative wrapping of the thread while watching, or at least listening to, videos on my computer. I think I did that for 3 days before all five signatures were sewn in.

As a side note, I had to laugh when listening to an interview with a bookmaker while I worked on the covers. She had attended some sort of class herself where she was introduced to the idea of "stacking" which I realized is just a new-fangled term for multi-tasking and was actually exactly what I was doing at the moment. In other words, find another thing you can do while involved in something else - say, do some sketching while watching tv (her example). Lordy, I've been "stacking" for all my life! 

Develop a taste for having problems.

Well yeah, anyone who has sewn or quilted or done any kind of craft or art should be familiar with running into problems as one works through a project. In fact, I can remember a few times when things went flawlessly and quickly and it absolutely unnerved me I was so used to issues cropping up. As you can see, I was incorporating seams into the cover in a different way from the first leather book, not stopping to think that by centering a seam horizontally, it would become a problem when I started punching sewing holes and adding a closure. Too late now - forge ahead.

But that was minor compared with what I discovered when I sewed the last signature in and closed the book. The spine rounded pushing the signatures with it to make them uneven and not what was supposed to happen. The spacing between long stitch stitches was too wide (or the signatures could have been fatter). The whole structure was unstable and wonky.

And the first and last long stitch was visible on the front and back. I'd have to come up with a solution. Oh yes, I definitely have a taste for having problems! And for the most part, I am a patient person, not that interested in immediate gratification, so bumping up against issues that slow me down become welcome challenges. But there IS a limit to my patience!

More often than not, originality lies on the far side of unoriginality.  

So here we go, analyzing the problem to determine its cause and how it might be fixed. I had used 5 of the 8 signatures instead 4 as shown in the directions because I wanted the remainder for yet another kind of leather book calling for 3 signatures. I placed the 3 between the sewn-in signatures to see if adding more would fix the problem.

Even just the 3 showed that, if I could figure out a way of adding a signature between the ones already attached, my book should behave as it's supposed to.

But adding with more long stitches with packing won't work - just not enough room between the stitches already there. I've been muddling options for days, as well as trying to work out how to attach some kind of wrap for a closure (that dang center seam!) and may have hit upon something (which hopefully won't leave me with even more unused signatures). Whatever I choose, it will take me from just following a set of directions into original territory for this binding. Originality from unoriginality. 

If you are interested in giving this book a try, the instructions are free over on Ali Manning's Vintage Page Designs website here.  And video instructions are here.

Thursday, March 26, 2020

Sketchbook Revival and a New Sketchbook

Handmade journal modeled on the purchased one on the left
When the e-mail arrived announcing this year's version of Sketchbook Revival, my first thought was to sigh. I still feel like I have so many things I am frantically trying to catch up on; do I really want to commit chunks of time for 13 or so days watching videos and doing exercises in a sketchbook? But I had to admit that I enjoyed the information and discipline learned from last year's immersion so opted in, knowing I could skip what wasn't helpful or things I already knew, and take advantage of whatever new info from a wide range of instructors might be presented, all for free. One small catch of course. The Strathmore multi-media Visual Journal that I used last year got pretty much filled and my many other journals wouldn't quite fit the bill. Am I going to have to order one, I asked, sighing once more. Heck no! Of course, I could make my own while trying out a new binding from my Handmade Book Club. Yup, kill two birds with one stone.


I studied that commercial journal that had served so well for last year's lessons and decided it would be my model in terms of kind of paper and size. Not needing it to be any more sturdy than for use here at home, I decided to reprise my cereal box "boards" covered with tissue paper. Boy, was I excited when I found the teal tissue paper and the beautiful printed one. Not enough of the teal to do two layers scrunched and I didn't really want to add a lot of texture anyway. So after gessoing the boxes, only one layer of tissue paper was smoothed into place and it was enough. The smoothing wasn't perfect so there's a bit of wrinkling here and there but basically, not much texture. The teal became the outside of the covers while the print became the endpaper on the inside. Taking a cue from a tutorial on how to use paper napkins on substrate, I used acrylic varnish to cover both sides of the board to give the tissue paper extra protection. What I have on hand is high gloss, which probably would not have been my first choice, but it actually mimics the gloss of the commercial journal covers.


I checked my paper supply because yes, I'm starting to have a stash of it, and had a couple of choices in multi-media paper. The least waste when cutting down to size would be in using a pad of large sheets where I could get 4 pages out of each sheet. Rather than cut, I tore the pages to size which left rough edges (deckles) and I decided there was no point in trimming them smooth once they were stacked and folded into signatures. These four signatures would have given me about the same number of pages as in the Strathmore journal but at the last minute I decided to add four more signatures to accommodate the binding stitching I'd be doing. Besides, all that tearing was a bit therapeutic considering all the closures and stay at home recommendations finally descending on my little community.


Once the boards dried and they, along with the signatures, spent some time under heavy books, everything got their sewing holes punched, and I set up on the small table where my laptop resides so I could follow the video tutorial on what the teacher was calling the dragonfly stitch.


That dragonfly stitch - I'm not the only one that struggled with it. I was wishing we'd added the back cover first since I did a much better job on it than I did the front cover. Just look at the beautiful printed tissue paper! It makes my heart sing when I see it.


Once the front cover was on, the rest of the signatures went on much faster than I anticipated and quite easily. On each end is a kettle stitch which is what we used on the first books - 2 and 4 needle coptic binding - and supposedly is a sturdier stitch than the chain stitches in the middle which are more what I think of a coptic binding looking like, all done with a single needle.  If you look closely along the edge of the top board, you will notice a slight buckle. I had the same thing appear on my other cereal box board book. I think it's a failure to get the paste evening distributed and all the way out to the edge before putting to two pieces and their cardstock stiffener together. Recycling is a nice idea, but I may have to rethink using these boxes in the future.


I think my stitches got tighter with each signature I added so the book doesn't close totally flat. But flat enough for my purposes. This is a working sketchbook, not meant to be fancy although those deckle edges make it a little bit so.


I nearly used the French Link binding again because I know for a fact how nice and flat the pages all open and that is pretty important in a sketchbook like this. However, I'm still catching up on binding tutorials so I didn't really want to repeat a binding yet, and I'm not sure how rugged that French Link would turn out to be over time. Decided to trust that this Dragonfly Stitch binding, essentially a coptic stitch binding, would lie just as flat. And it does! The dark line down the middle is the stitching thread in the center of the signature, a grey thread which was the only color of the appropriate weight of thread I had on hand. Yes, if I keep this up, I will no doubt be accumulating a different kind of thread stash from the quilting one I already have.


And in spite of feeling like my stitches got tighter as I went along, the spacing between signatures is fairly consistent and not too much of a gap. I am very pleased.  The book, by the way, measures 8 by 5-1/2 inches.


It's a bit exciting to be starting this year's Revival in this book I made myself, covers in my favorite color. Better get cracking and see if it really works. The videos started on Monday and I have yet to watch one.

Saturday, January 26, 2019

It's Done

I've put the finishing touches on my recycle bookbinding challenge at long last. Frankly, my interest was waning and I am SO tired of dragonflies that I don't want to see another one for a long time! Talk about a learning experience though. So many things I should have thought through before forging ahead with parts of it. Things I discovered about pens and adhesives through trial and error. Overall, it did not turn out too badly. But I really didn't think I'd be fiddling with it for so many months. This first post about it from last May sets the scene: Evolution of a "Simple" Project. And the rest of this post is photos of each page in all their recycled/upcycled glory - packing paper, paper made from junk mail, used teabags, images from catalogs, magazines, tissue and wrapping paper, and fabric, security envelop patterns, salvaged cording and crewel yarn, and of course, the cover which was the start of it all, made from a shopping bag. Click on any photo for a larger view. Apologies for the few that are out of focus.


If you have questions about process, see these additional posts:

Monday, December 31, 2018

Wrapping up the Year

I've hardly posted this month, busy with holiday things, slowed down by a cold that sapped my energy as it went through its stages over two weeks, not spending the sort of time in the studio I thought I might. I'd mentioned that I was saving the reporting of progress on the recycle bookbinding challenge project until it was done, but it now looks like done isn't going to happen very soon. So I may as well show you how things went with my tissue paper dragonflies applied along the flaps with matte medium. It went great!


I adhered those two larger dragonflies onto the spread almost like a test run. The matte medium didn't always get to the edge, hard to see how well it is covering, so there was some going back in to make sure all edges were held down. The trimming around each dragonfly went fairly fast, then it was only a matter of deciding placement. I'm pleased with this arrangement of them all angling the same direction toward the center.


I'd been considering doing something different on each spread's flaps but now I want to add these dragonflies like this to each one, or at least as far as my supply will allow. Perhaps the dragonfly gift wrap my friend passed along will get me there.


I've decided on the sequence of the spreads with their accompanying handmade paper, and I am to the point where I want to fully complete a set and stitch it to its pleat in the binding before doing anymore work on the next. I still have a few dragonflies to add to the front/back of the handmade paper along with some fussycut fabric (which will be fused) but because the back of one is facing the front of the next and so create a sort of spread of their own, it will be easier to keep all straight and cohesive if I approach these finishing steps in the order the signatures will be sewn in place. Not sure if that makes sense. But anyway, the first spread is now done and I've been looking through my threads and yarns for something to bind with. I've settled on this leftover wool yarn from an embroidery kit of long ago because it seems to blend the best overall, being off-white like the teabags. Honestly, here was another thing I did not think ahead about, that whatever I used to sew the signatures to the binding would be so visible along that center fold. It may cover some of my text.

So as the year winds down, I find myself with many partially finished projects to carry forward into the new year, and I am not stressed or concerned about that. I've had a most pleasant month actually, a peaceful holiday week, a few special gifts that awed me for their thoughtfulness and appropriateness, and the trickle of Christmas cards with warm greetings and year-end reviews I so enjoy reading. For all its ups and downs, triumphs and challenges, this year has ended on a mellow and uplifted note. I couldn't ask for better, except perhaps to wish that your year, dear reader, has ended equally well for you in spite of what may have come before or perhaps because of it. Pause to reflect . . . then onward!

Monday, November 26, 2018

Test Test Test

While I'm still babying my shoulder and thus unwilling to give any actual sewing a try, I did test out something multimedia-ish that I've been meaning to try for awhile. I watch a lot of videos on Joggles.com that, granted, are tutorials featuring products she sells but which really give a lot of good general information about how to do a lot of multimedia techniques. And while the majority of the ideas are geared towards use on paper, a lot of them involve paint and could easily adapt to use on cloth. That's my justification for watching them. One thing she showed was how to remove design elements printed on tissue paper without using scissors. I recently realized that I had some tissue paper printed with dragonflies and maybe I could use it in my recycle bookbinding project. Step one is to take a wet paint brush to "draw" around the image, making a damp line - you should be able to see a bit of reflection around the lower dragonfly.


Now the tissue paper has been weakened and you can gently apply pressure to cause the damp line to tear. Ok, so far so good. I'm guessing that soft uneven edge is part of the reason that, when adhered to your project, the unprinted part of the tissue paper "melts into the background and virtually disappears." Yes, that is what it appears to do in the video, but that tissue paper is white. Mine is this tan, but since I'd be adhering it to my brown paper pages, I assumed the disappearing act would still take place.


But I have learned over time that many techniques that work so beautifully in videos and other instructions, don't always work the same when I attempt them. So time to test on a scrap of paper, along with trying out adhering with matte gel medium. Everyone uses this almost interchangeably with regular glues and pastes, and I could see that my preferred adhesives would be a pain if not downright impossible to use on tissue paper. So out came the medium and the brush and I tried both putting it just on the underside and as well as underneath and over the top. I didn't know what kind of visual change the medium might make on top but it literally looked and felt no different from the one just underneath, and the brushing on top helps to smooth out any wrinkles and give a nice even stick. However, as you can see in the picture, the unprinted portion of the tissue paper did not "virtually disappear."


So I will be going back to scissors and cutting these various sized dragonflies out leaving just a small margin of tissue paper. Here you can see an example of how they might fill some space on some of the pages - these are not adhered to the page yet.

Speaking of Joggles, look what came last week - a box full of goodies to play with. Joggles was having a closeout on Marabu paint products and I decided to get some more of their opaque textile paint. And try the textile paint in a spray. And while so much on their site was marked down, I checked my wish list and added a few more things like another stencil. And then because I had the paint and stencil coming and I'd watched so many videos using these on a gel plate, I added one of those to my shopping cart too. I bought enough to get half off shipping and two free Marabu crayons. Yeah, I have a bit of new supplies to play with.