Saturday, December 31, 2022

Dead Week

You saw a shot of my sticky buns for Christmas morning, and here are the Raspberry Ripple cookies I made on Christmas day. I used to make these every Christmas but haven't for quite awhile for one reason or another. Determined not to let another year go by, eating up the jar of raspberry jam bought just for them on other things instead, I got them baked before preparing the turkey breast for the oven. They turned out particularly good I thought. A great start to "dead" week.

I'd never heard of this term before last week and I'm not sure I agree with it, but here is the explanation according to Helena Fitzgeraldin her piece All Hail Dead Week, the Best Week of the Year":

Dead Week… is a week off from the forward-motion drive of the rest of the year. It is a time against ambition and against striving. Whatever we hoped to finish is either finished or it’s not going to happen this week, and all our successes and failures from the previous year are already tallied up. It’s too late for everything; Dead Week is the luxurious relief of giving up.

All I could think of reading this is that she surely doesn't know any quilters or other creative types. How many "dead" weeks did a scramble to put the finishing touches on a quilt so it could be counted in that year's tally, not slop over into the next year. I don't do that quite so much anymore, but found myself pushing to get the Peace II quilt's sleeve on so that I could say I finished it this year. Not ready to "tally up successes and failures" until at least New Year's Day. I have to say though that as I lay in bed one night going over in my head the steps to making a sleeve, I found myself floundering in remembering the steps. Could it really be that long since I've had to make one to hang a quilt? Apparently. But it eventually came back to me and I put the last stitch in not long ago.

Fortunately, cutting and applying the binding so I could feature it in my Christmas blog post did not pose serious memory lapses. I opted to do the stitch in the ditch from the front with the same gold twist thread I'd used on the satin stitching. I wasn't totally sure about that but decided to take an "oh well just go for it" approach, knowing I could always take it out and redo with my other choice, black thread. It's a subtle touch I think I like just fine.

Forgive the hastily taken photo but I did want to show the complete quilt here, even though it really should be steamed along the edges after applying the binding and have a proper length of dowel or slat for it. Done done done . . . and on "dead" week!

How have you spent the week between Christmas and New Year's? When I was in school or working for schools, it was always a vacation week so a chance to relax, read, knit or crochet, and enjoy the extra sweets that the holiday always brings. This last week I've caught up on a few things, including adding notes and quotes from the book study selection I've been working through to that coptic journal I just finished - very satisfying. I'd planned to find time to play with these two new Zentangles because they looked so holiday-ish to me but somehow it didn't happen. But I felt like I caught up on a lot of little things that make me feel more ready to welcome the new year.

Speaking of, it's about time for me to go fix my traditional turkey enchiladas and crack open some bubbly. Aren't these two bottles of Prosecco cute? I opted for splits this year since a medication prohibits me having alcohol tomorrow or Monday when the Rose Parade will be held, something I generally watch while sipping orange juice and champagne. So a full bottle would go flat before I'd have a chance to finish it. I couldn't resist these as Prosecco is what my racers pop open on the winners box at the end of a race. Have never had it so I'll see what the big deal is. ;-) Hope you are having a good end to your "dead" week!


Saturday, December 24, 2022

Wishing You . . .


Wishing you joys old and new.

Peace Quilt II bound

Wishing you peace.

Homemade Walnut Sticky Buns

Wishing you merriment that good food, drink, family and friends can bring during the holidays.

City crews hard at work

And especially wishing you and yours safety this Christmas.

Monday, December 12, 2022

Caught Up Yet Behind

Santa arrived early at my door (along with another 8 or so inches of snow) - a sweet treat from my sweet cousin and a reminder that I've done nothing toward Christmas preparations, save for the turkey breast bought early and stashed in my freezer. The plan was to at least work on cards over the weekend but I was also determined to finish the book challenge first.

And I did at last, only a week late! The stitching of the signatures was going really well when I noticed I'd be running out of thread before the back cover could be secured. I wasn't the only one with this issue and several theories surfaced, including that the original example from the teacher had two less rows of that chain stitch so her directions for figuring how much thread to reel off may have been based on that rather than the directions she gave for punching the additional holes. I partly blamed my shortage on the heavier and waxier thread I used. At any rate, she'd shown us how to add thread using a weaver's knot so all is not lost.

Except that I couldn't get the weaver's knot to "snap" and hold the thread the new length was being added to. I tried several times, even getting out a photocopy I'd taken from a library book showing several useful knots. I had to laugh that at the end of the instructions for the weaver's knot, it said that if you couldn't get the knot to hold, just make a square knot. So that is what I did. A little messier but since this is a book I'll be using, I really don't care, especially since it is in the last signature of the book. In the picture you can see I remembered a couple of helpful things when sewing in signatures: 1) use finger cots on thumb and second finger to help pull the needle through - there's always a bit of tug of war, and 2) clip the next signature to be sewn to the previous signature to keep it from flopping around until you get a few stitches sewn into it (lower left).

There it is, all neat and tidy from the outside. One problem though . . .


I tend to tighten my stitches quite a bit because of a disappointing experience where I was not careful about that and ended up with a wobbly book. However, too tight and the covers spring open. Not equally this time, and with a little pulling and jiggling I was able to even up the amount of spring front and back and think the rest will resolve as I use the book.

The book was designed for the addition of tabs. I didn't really think I needed tabs for the way I plan to use this journal, but as long as the covers were sized to accommodate them and I had some of the cover paper leftover to make a few, I went ahead and added them.

 cover measure 5.75 tall x 4.75 wide

So there we go, all done, and I'm already collecting the bits of paper I've scribbled thoughts and quotations on that will now be transferred into this book. Not done in 5 consecutive days nor even 5 non-consecutive days, yet done within a two week period where life managed its usual intervening. Pretty pleased with that and now onto the holiday preparations and binding the Peace quilt.

Monday, December 05, 2022

Too Many Shiny Objects

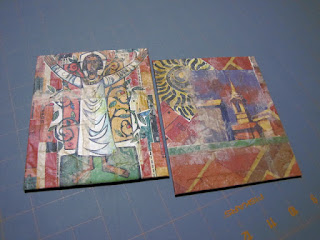
Front and back cover paper collaged on one sheet

So much for focus last week. I had little, and rather than work the daily lessons of the book challenge DAILY, I did day one on day one (which took a little longer because I fiddled with making a file that would print lines on my paper before cutting and folding into signatures), then allowed other things to take up my time the next few days. Too much on my mind right now, a yoga class I didn't think started until next week, too much reading to do, and too many things in the first few lessons that I either dread doing or was uncomfortable trying. Day two dealt with making cover papers by collaging on printer paper and adding a layer of decorative napkin over the top - it goes translucent so the collaging underneath melds with the designs on the napkin. Well, I didn't have any such napkins and wasn't interested in tracking down and buying a whole pack, but knew decorative tissue paper would give the same effect. Unfortunately, what I had of that was too dark for anything underneath to show through. But I have a plethora of saved used teabags which I thought should work the same, and I had a particular theme for this book so really didn't need to layer additional designs over the top. Or so I told myself. I used a big chip brush and matte medium to stick all my pieces down and had a terrible time with it. I was just following what was demonstrated and had forgotten how magazine pages (where my collage elements came from) react with matte medium . . . not well! Curling, wrinkling, and parts of the bigger pieces not staying glued to the substrate once dry. It also didn't dry very clearly making for some cloudy areas I didn't like. I overlapped some edges of the tea bags and that didn't work quite like I anticipated. It's been too long since I last did this sort of thing, and belatedly remembered a different kind of medium and brush that works a lot better for me. I need more practice more often at this collaging bit! On the bright side, the collage elements were quite bright and I liked that the teabags knocked that back a bit.

This project required book board for the covers and I really struggle with cutting it. You have to use a metal ruler and unlike my quilting rulers, my metal ruler has cork on the back which still slips on the board and raises the edge of the ruler a bit off the board such that the cutting blade can slip under it giving you an uneven cut. So this time I followed the suggestion to flip it over, then realized I could run painter's tape along one side to help hold it in place. Really helped but I still had to make more than twice the number of cuts to get all the way through the board than the teacher does when demoing. I really do hate cutting this board . . .

Covers are 4.75 x 5.75

But once that was done, the next steps were ones I've done before and pretty straight forward. In spite of the issues I had making the cover paper, it wrapped around the boards just fine. The teacher showed a new step of inserting a filler paper cut from a file folder in the center where the edges of the cover paper end and otherwise create a bump when the end papers are added on top. That was a neat trick.

Before turning the cover paper to the back, you cut away triangles at each corner so you can have a nice neat unbulky miter. I have a lot of these corners saved, not sure what to do with them. I guess I was in a mood; I kept looking at them on the table, not wanting to save them but knowing I would and wondering how I might use them when it occurred to me I could glue them in each corner over the end paper. Oh, I really like how that looks. I may find something to add to the center but for now, the boards were done.

Yesterday I made my template for punching sewing holes in the boards and signatures, then got them all punched. I thought I might even start sewing things together, but I also wanted to watch some of the question and answer sessions held each day. And of course, I had to get out thread choices and ponder which color to use. I decided the orange was too matchy matchy and not the color I wanted showing inside the signatures (that paper is a mint green). I'm going with the black.

I'd still like someone to explain to me where the time goes . . . I never get to everything I think I can accomplish on a given day. Always a step or two behind. Of course, sleeping in on several days didn't help. ;-)