Saturday, January 29, 2022

Another 5-Day Book Challenge

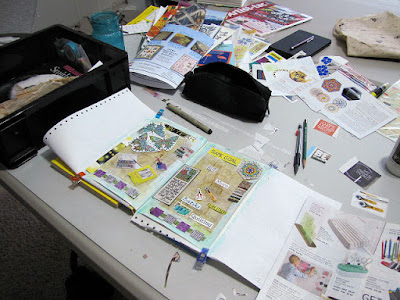
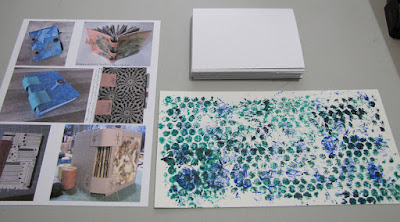
Examples of participants' books, my signatures & spine paper

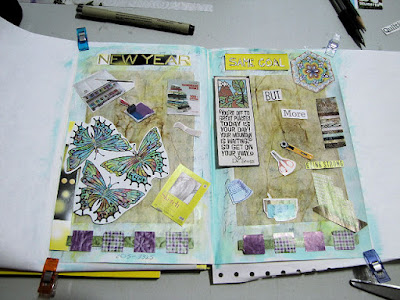
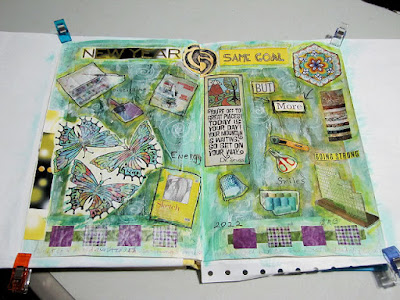
I'm pretty pleased that I've kept to some of those things I wrote on my resolution word art journal page that I was sure would increase my productivity and keep me on track to do "more". This week it was the "dive into things I've been curious about but keep procrastinating giving them a try. When I watched the videos associated with Ali Manning's 5 Day Mixed Media Journal Challenge back in November, I wanted to try some kind of surface design technique on the watercolor paper that would be used to create spacers between signatures which I'd already prepared. Using bubble wrap painted with acrylic paint to transfer dots to the paper was high on my list. I've seen it done so effectively by others, but I was disappointed in my own efforts. I think I was in too big of a hurry and didn't put enough paint on the bubble wrap, and not evenly enough either for a clear stamping. Or maybe my bubble wrap had lost some air in those bubbles. I know the first piece I tried had big bubbles that flattened down quite a bit. The second transfer was done with a piece that had smaller bubbles but I had similar problems with not enough paint on the wrap I think. But I decided it was good enough because only small portions of the paper would be seen at any one time which you will soon see.

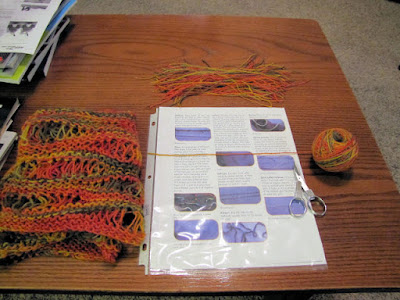
The spine which is cut the same height as the signatures is folded accordion style into 1 inch folds. Very handy that I have this 1 x 6 inch ruler to use as I guide for marking score lines for the folding.

Then the signatures are sewn into the valleys of the accordion using a 5-hole pamphlet stitch. You can see the "mountain" of the painted spine as it creates a spacer between signatures. This space will keep the book from bulging as collage elements or other things are added to the pages.

I alternated dark blue and teal green thread when sewing in the signatures to go with the blue and green paint on the part of the spine showing in the book. Not sure if you can tell that in this photo. This went under weights so it would be more manageable for the next step with it. 

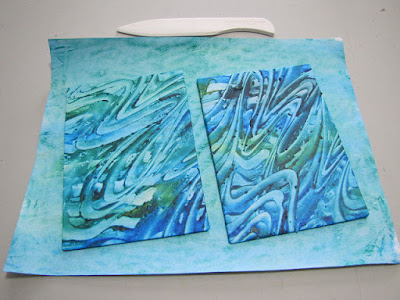
Sylvia Weir's interesting paste papers

Day 4 of directions included the cutting of bookboard followed by gluing on cover papers. There aren't many, if any, people in the book club who enjoy cutting bookboard, not even Ali! It is very tough to cut and takes multiple passes with a knife to get through.  I was rewarded with perfectly square boards which hasn't always been the case. Then I got a bit too cocky and cut and glued my cover paper without rewatching the instruction video. After all, this isn't my first, or even my second time covering boards. The paste paper, the result of Sylvia Weir's experiments and passed along to me when I asked for more details when she blogged about it (not sure if this is something I want to try myself), is a little heavier than the cover paper I've used before and I didn't leave enough on the corners when I trimmed it for the turn to the back. Oh, the dreaded miter gap! But Ali has shown us how to fix this literal shortcoming and I will know better next time. The covers are sitting on another piece of Sylvia's paste papers which I will use for end papers after having spent time under weights.

Day 4 also included instructions for gluing the folds of the spine together (and why there was no point in decorating that side as it would never show.). I have had such good results in following the other thing I journaled on my resolution page - putting work in the studio first in the day - but I had a morning appointment which threw off the entire day. By the time I got to the studio, there wasn't much time left, and covering the boards took me longer than I anticipated. While the gluing process did not take much time today, I just couldn't fit it in yesterday. It too has to go back under weights to dry so I was unable to do the final steps to complete the book today as I had planned: attaching the covers to the text block, adding straps and closure and gluing on end sheets. Still mulling what I want to use for those straps anyway. I may or may not work in the studio tomorrow to complete this little journal since I often take Sundays off, but I have to add that I am pleased that I'm sticking so far to one other resolution I mentioned, that of putting away things as I go rather than waiting to the end of the project or just shoving them to one side or onto the floor. Gaining some good habits again!

Saturday, January 22, 2022

A Stab At Art Journaling

I've been hanging out with Laly Mille this week, or at least the videos she provided taking us through the process of art journaling about your word of the year. I was first introduced to Laly back in 2019 when I took part in my first Sketchbook Revival (here's my spread from her class which looks better to me than this one.). I got on her mailing list and have enjoyed keeping up with her soft quiet way of enjoying life and incorporating it into her mixed media. It's just possible that she is at least partly responsible for the collection of ephemera pulled from magazines, words and phrases cut from same and the saving of other odds and ends that could be potentially used in art journaling. And if you think starting a textile project creates a mess on the worktable, I'd have to say this art journaling certainly does the same! In the above picture I've sorted through that bin on the left to pull out some things I think might be usable, and have some catalogues out too in order to find some specific items that are not already in the bin. This counts as a "finish more" project in that I am working in a discarded library book per several art journaling and altered books instructions, something I've been meaning to try for several years, the pile of usable discarded library books having gotten quite tall by now. I will keep working in it as I try another artist's journaling prompts on a specific topic.

Laly encourages thinking about your word and why you are choosing it as well as what emotions it may evoke. She was all calm and comfortable while I knew I wanted to infuse energy into my spread. I started by putting down some gesso that I added a few drops of green ink to. I too want a little calm on my page. Then we were to journal across the spread in pencil, she writing gratitude statements, me more statements about what I want to do this year and how I might achieve it.  Then I added some yellow art crayon here and there for my energy. Finally I glued down a large teabag on each side of the spread - centered because I can't seem to do otherwise. Yes, most of that journaling was covered up, just a first layer for yourself that would only peak through here and there. Then I started picking and choosing and arranging bits and pieces, basically things representing what "more" I want to do. Right side is getting all the sewing and quilting things while the left side is getting those other artsy things I like to play with. Those butterflies . . . I just loved the color and a certain energy coming off them so while they are not specific to anything, I couldn't NOT use them. Kind of the same with the hexagon over on the right. Wanting to add color and anything that reads energy to me.

Let me be the first to say I'm not very good at this sort of thing. The layering and covering up of things drives me just a little crazy, often asking what was the point if it can't be seen? I concentrated more on balance as I arranged and glued down my individual pieces, especially with the ones that read very yellow. I think I did ok with that but everything is very scattered compared to the way Laly composes her pages. That DOES evoke some energy though, although it may be a little chaotic energy! Another round of mostly unseen journaling was next and I added attitudes ("doing things that make me smile" for instance) and some what if's (such as "what if I dived into those things I'm less familiar with but curious about instead of procrastinating?). And then I made my first blunder. Wanting to bring in more of the green which was now only showing around the edges, I tried dropping some green ink in here and there between the pictures, forgetting that I had mixed it before with white gesso. I thought those drops would run (they didn't) and they were far too dark. Using a wet brush, I tried moving them about and in the end, pretty much covered up all of the teabag's brown, as well as some of the yellow art crayon I'd used around each picture. That led to more experiments to "fix" all that darkness, including dabbing some of the ink off with a paper towel, rubbing on more gesso, and adding more yellow. Also outlined many things with black ink, wrote some of my attitude words visibly in open areas, and added some spirals (more energy) with white graphite. It looks a bit of a mess to me, but all the individual reminders are there and hey, you've gotta start somewhere with a new technique.

And now I have a big mess to clean up and put away! I decided that should be a secondary resolution in order for me to truly get more done. I'm too prone to heaving a heavy sigh after completing a project and shoving the  leftovers and tools to a blank place on my worktable rather than sorting through them and putting them back where they belong or tossing some of it. Eventually I barely have any room left on the table to work. Or room on the floor to walk around it! Wish me luck with that one!

Saturday, January 15, 2022

This Week's "More"

Honestly, I've been at this "art" and "craft" thing long enough to look askance at any project labeled "quick and easy". But I liked the look of this "Quick & Easy Leather Journal" and that it could be adapted for the 3 leftover signatures waiting to be used. I'd settled on who to give it to, my hair stylist who is also an avid hunter, thus the digging out of some fabric with moose on it. Not wanting to deal with seams again, I found a seamless spot on the leather bomber jacket from the thrift store big enough to cut the cover from.

And even though the video showed that it could be made in under an hour, and one of the members on the Handmade Bookclub Facebook page reported she had made one in 30 minutes, it was more like 3 hours over 3 days for me, once I dithered over fabric choices, waxed up the handspun hemp thread, cut and fused the lining to the cover and fiddled with learning how to make an enlarged copy of a curved flap template.

Once I got to the stitching, it went fairly fast, although attaching 3 signatures through one set of holes takes a bit more maneuvering than if they each were stitched through their own set of holes. A simple pamphlet stitch that ends with the thread coming to the outside through the center hole, there is plenty of thread left to do a little "packing" of the multiple threads on either side before knotting off and using the excess thread as a closure, wrapping it around the book and then a few times around the elk horn button on the flap.

I'd originally thought to put a snap on that flap per another small leather journal in a book I have on hand, but since I so perfectly lined up the lining fabric for a moose to fall in that area, I didn't want to cover the moose up with a snap. The small bit of stitching to attach the button hardly shows at all. And unlike the last leather journal I made, there are no big gaps between signatures.

I really like this little journal and am sure I'll make it again, probably a little quicker next time. If you'd like to try making this journal yourself, the video instructions are here

Using the width of the plastic sleeve as guide for cutting fringe yarn.

Also this week, I started cutting the over 100 strands of yarn for fringe on the mobius scarf I finished up last January. At least, I reported that it was my first finish of the year, although it still needed blocking and maybe the addition of fringe per the pattern. I got a real shocker when I finally took it up to the studio for blocking but first tried it on, only to realize the binding-off stitch I used must not have been right, no stretch in it at all which meant the scarf did not drape like it should. Over the next few months, I tried it on again several times to convince myself it was ok as is before finally checking the pattern directions to see that indeed, I'd not used her binding-off directions. There it sat on my coffee table with the pattern month after month until finally in December I knew I had to bite the bullet, take out the binding-off stitches and redo them properly. I did get that done by the end of the year, got it blocked and am now slowly adding the fringe when I watch one of my afternoon news programs. Yes, I find this embarrasing that my first finish of 2021 has now become one of my first finishes of 2022!

Friday, January 07, 2022

And Then This Happened . . .


More snow! It snowed from super early yesterday morning to some time this morning - I'd say a good 24 hours - before turning to rain. Big storm with tons of emergency warnings and snow accumulations in the area predicted between eight and twelve inches. 

As I watched the small flakes coming down, I doubted those predictions but last night I left the curtains open so I could see out the back and actually witnessed the snow building from the original height about even with the top step to the deck to definitely higher than the deck itself. 

And this is what greeted me when I opened the blinds in my upstairs office. Part of the garage juts out in front and the snow piling up on its roof is surpassing the bottom of the window.

All I can say is this is one of the reasons I love winter and wanted to live where there was a real winter. After all, I grew up not far from here so winter snows, especially in January, are no strangers to me. And to prove it, above is a picture of one of my brothers with me when I was quite little, setting me atop, I believe, a snowman near our house during a typical winter.

I must say though that I am thankful that my landlord sees that the driveways are plowed! That hasn't always been the case and I really can't shovel mine by hand like I used to.  I could do without that drenching of rain - it was really poring down most of the day and causing issues for the snow plows trying to clear the streets in town, not to mention creating a lot standing water. Guess better than if it had been snow?

Getting Off to a Promising Start

Remember my "GoGoGo" resolution for 2020 that I printed and taped to my studio door? All last year I had meant to pen in between the lines the 2021 resolution "Finish" but never did. Now in the first week of the year, I quit putting it off and penned both last year's and this year's resolutions between the GO lines. I like its energy and I hope it continues to entice me into the studio on a regular basis this year.

I had thought I might work on another leather book this week, one to use up left over signatures, one I had thought to gift to either my goddaughter or my hair dresser but I just didn't find the time in December to work on it. Nor have I started on it yet this week but it is high on my finish more list. Instead, I needed to trim some printed pages to insert into a journal I'm using for a series of webinars I've been watching before I start the next series this month. It's ridiculous how much I enjoy cutting paper with  that big paper cutter I bought last year. I realized how it was lulling me into serenity with lining up the paper and then that satisfying snick as the blade cuts through. The actual gluing not quite so seductive but it did clear a spot off the table so I could start on that book.

Then I got totally sidetracked while picking up leaves that have fallen off my money tree. I noticed for the first time that there are not just veins running out to the edge from the stem but an amazing pentagonal thing going on. How had I missed that? I saved one that had not dried too much and took it up to my studio thinking this would be an interesting leaf to add to the sketchbook designated for sketching and stamping leaves. Not now, but set aside for "when I have more time".

NO! I stopped myself right away, reminding myself of how many leaves have withered away or molded in plastic bags because I'd set them aside for a better time to use them. Nope, no reason not to sketch that leaf today. I also like to get out a stamp pad and using the leaf like a stamp, transfer its image into the sketchbook too, picking up even more detail (click on photo for a larger view). I didn't have inkpads in colors to match the leaf so I tried first stamping the image using sand ink, and then over-stamping with the green ink. I did an amazingly good job of lining up the two stamping goes.

So that's something. Maybe not textile, maybe not exactly finishing an old project (although this idea to fill this sketchbook with leaf sketches IS an old project), but definitely fulfilling on the level of I actually did something rather than put it off. It doesn't matter what I do in that room as long as I do something and go there often.

In an e-newsletter sent today from Lisa Call, she talks about the disruptions in her 2021 and how she doesn't let them derail her for long. I know this wisdom is true but I do need to be reminded of it often:

Showing up, day after day, doing the work. 
The time away was wonderful.  And then I show up again.  That's how progress is made.
Just showing up.  Again.
And Again.
And I'll keep doing it in 2022 because something else is guaranteed to come along and interrupt my routine.
 

Let's hear it for showing up! I'm really going to try this year, especially as I navigate the interruptions I know will come. Showing up, catching up, keeping up, making progress. Do you have any tricks or saying that get you back on track and into the studio?

Saturday, January 01, 2022

And Now It's The New Year

We are deep in snow and arctic cold - look at those slanted icicles! Perfect weather for holding up inside, thinking about the year just past and what the future might hold. I'll be honest, I'm quite disappointed that I didn't live up to my resolution word of 2021 which was "Finish", meant to spur me on to wrap up projects left midstream to languish for years rather than forge ahead with new projects. Couldn't resist those handmade book challenges mostly, was slowed down by the nearly 2 months between the first cataract surgery and getting the new prescription glasses. Also slowed down by a health challenge not to mention a bit of lack of discipline in my daily routine. And then there was the deep dives into books and David Whyte seminars the last half of the year that had me doing some serious and much needed soul searching. So what do I do about 2022's resolution word?

Well, I've decided it will be MORE, as in more of the same, more working my way through neglected projects, more finishing. This thought pleases me a lot. It feels like a new challenge even though it is an old theme. And as I read my resolution post of 2021, I see this is right in sync with the quotation from Michelle GD I included there, that "fresh starts [can be] a continuation of something already underway . . . no drama . . .just carrying on." I like the thought of carrying on, not just with my projects, my creative journey, but all facets of my life.

It's been another difficult year for the world but not quite as dismal as 2020 was. Still, things are not back to what we expect them to be, to what we think of as "normal". Like many others, I'm thinking we must just toss out that idea of returning to what we remember as normal and just get on with the new order, making the best of it, and doing our best to seek out the positive and the rays of light. That's what I plan to do, and I wish it for you, my readers, as well. Let's make it a grand New Year in spite of any obstacles!


 __________________________________________________________________________________

Previous resolution words:
2008 - Freedom
2009 - Calm
2010 - Focus
2011 - Refocus
2013 - Perseverance
2014 - Explore
2015 - Fearless
2016 - Light
2017 - Endure 
2018 - Refresh
2019 - Wing It!  
2020 - Go!
2021 - Finish