Monday, March 27, 2023

More Art Journaling

I'm somewhere between restless and listless, focused and dreamy. Maybe it's a bit of spring fever, me needing a change of scenery when the scenery isn't seeing much change. However, I was quite delighted last week to see that the access road running from my sidewalk route along the dog park was now free from snow, even the big pile at the entrance gone and I could spend at least part of my daily walk on softer (but not muddy) ground.

Part of my restlessness no doubt is tied to these art journaling spreads I want to complete before clearing the work table so I can cut binding and square up the baby quilt. This first one goes back to the altered book I've been working in, that smaller format that sometimes feels cramped. The theme is the one I thought I was going to use for Laly's retreat but turned out to be unsuitable for that. Still, I had images set aside and a few things I wanted to try out in this place where it doesn't matter. First up, covering the text on the page with teabags. I keep saving them, keep wanting to use them because their color is part of my personal palette, but so far I haven't been terribly happy with what I've tried with them. I had really hoped they would knock back the text more but once the gel medium was dry, they were very transparent.

Next I arranged my images and there went any interesting things the teabags might be adding as my images pretty much covered the spread. I used a pen similar to a Flair pen to write around the images why what they represented would never be pursued. You can probably make out the "Get Real!" I wrote at the top which was the thing that dawned on me after I'd collected them as dreams I could pursue. The image in the lower left is cut from a postcard. I'd wondered if perhaps it was too thick to use, and it definitely was. Now I know. Sorry for the glare.
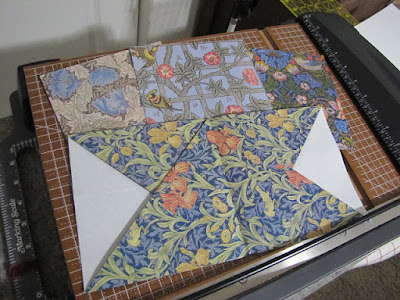
Now I wanted to see what would happen if I covered the spread with the thin layer of a napkin, something that was shown in one of my handmade book club lessons. In that case, everyone was using white napkins with colorful images. The white turned translucent when adhered with gel medium but I wasn't sure my plain dark teal napkin would still let the things on the page spread show. So I did this small sample and it looked like it would work.

What didn't work well was getting the napkin on the page. I used the suggested ways of gluing a little at a time but a napkin is quite unruly, would not go down where I wanted and I kept pulling it up to rearrange. I think that caused two things to happen: 1) I think the gel medium on the napkin pulled up some of the ink off the images and 2) I think even though I tried hard to get an even application of gel medium over the page, some of it may have dried before the napkin hit or wasn't there at all. Most of the images are very difficult to see and some text showed right through while other didn't - a very uneven application. Well, I DID want to knock things back and give a dreamy quality to it, as evidenced by the two words I added on top of the napkin: Me Dreaming. The camera had a difficult time deciphering all this and I tried to fix it as best I could so you could get the idea. But overall, this was not a successful experiment and I am very unhappy with the result. But now I know - using napkins is not for me! Teabags are still in the mix.

I had better luck moving on to my big art journaling sketchbook. I'd not done anything with the covers initially, but had since come up with an idea for them. I have some spray acrylics and lots of stencils so I went to work. I used a light and a dark blue, repositioning the stencil 180 degrees before spraying with the second color. Very pleased with how this came out. Again, the camera was struggling, making the left edge of the cover much lighter than it really is.

Never one to waste, I decided to see if I could transfer the paint on the top of the stencil after each color application onto the back cover. Not a lot of paint so the transfer is very light but that's ok for the back.

And now while the paint was out, I opened the sketchbook to a blank spread and created my first layer for a new journal page. I'd been thinking of ways I could add paint as a first layer other than with a brush which I'd not enjoyed or had much luck with during the retreat. I had planned on trying a brayering method I've seen but now with the success of the spraying on the cover, I decided to spray away on this spread. And I am SO happy with the look.

That dark blue is just what I wanted to set off that moon image that I'd wanted to use on my retreat page. Now it works perfectly for a new optimistic travel spread and I've started "auditioning" more images. Maybe collage isn't really the look I want, as I find myself reluctant to even think about what could go in the "blank" spaces around my images. We'll have to see how this evolves.

Monday, March 20, 2023

National Quilting Day

So did you remember that Saturday was National Quilting Day? Share with me how you spent it, whether it was working by yourself, with a group or out in public. I used to do the public demos with my quilt group but lately I just make sure I spend at least part of the day in the studio working on a quilt, generally for someone else. This year I used that time to finish the quilting on the border of Naomi's quilt. Now to tear off all that paper!

I did get brave and quilt her name into those four corners of the center area where the quilting design did not reach. Now it is ready to square up and bind. Gotta put away a LOT of art journeling stuff first - the table is still strewn with ephemera and supplies. By the way, are any of you still struggling with the time change? I have enough trouble getting up in the morning as it is without moving the clocks ahead.

Sunday, March 19, 2023

My "Hope and Freedom" Art Journal Page


Well, here it is, finished at last, my rich and image-laden version of Laly Mille's retreat theme of "choosing a focal image evoking a feeling of flight, lightness, hope and freedom in your heart." My "dream" for my page was to revolve around my desire to improve physically enough that I can get back out on the trails and even travel a bit; that's my idea of hope and freedom right now. I'd originally wanted to use a particular moon image, but it ended up being too big and just not right for everything else I was doing. It dawned on me though, as she suggested birds, butterflies, dragonflies, kites or even balloons, or perhaps something that is akin to a talisman, that my encounter with a blue heron when I lived by the lake became a symbol of so many positive things for me. I hunted through my bin of ephemera and came up with a heron to add to my page.

In contrast, I can't help but share with you Laly's finished page, which might help you better understand why this became such a struggle for me. I honestly didn't care for it very much, not nearly like I cared for other of her pages I'd seen. There were so many things I couldn't buy into for my own page. Like those flowers, growing from the "seeds of our dreams" represented by dots of paint in the ground portion. I did however extend the reeds stamped on my "ground" papers where they had been cut off.

In her wrap up session, Laly summarized the three steps she'd taken us through: working intuitively (I'm so poor at that - I usually have concrete ideas in my head), working intentionally (that's more me and this part went better), and finishing touches (a chance to step back and see what needs fixing, adding details and magic, no more big decisions - well, I'm not sure I was there yet on the no more big decisions). The first thing I realized when I stepped back was that she had worked all the way out to the edge of the page and I had not. It was a place I could add light as she encouraged, framing a bit with the bright green on two sides and the ocher yellow on the other two sides. Then I inspected the images I'd laid down, noting that even the ones with torn edges (which I never thought I'd do but really grew to like the look) did not look integrated, but just stood out too much. I worked a little green around the edges of the heron image (and also went over the gray lines of heron itself to help it show more, ditto on the legs and reeds) and got very brave in trying my hand at extending out the waterfall with acrylic paint. Somewhat successful.

On the other side of the page, I had that square of the hiker standing between two trees and my attempt at blending with paint wasn't getting me anywhere. Then while watching that extra page Laly timelapsed for us, I saw how she dealt with the same thing by collaging along the edges. Shortly after, I came across some pictures in one of my magazines that had ferns just like the ones in my image. Sure enough, I could tear portions of them to add on two sides to extend out my image and blend it better into the background. If you look closely at the larger image, you can just see the torn edges of what was added. Hard to believe that little bit of added fern made so much difference.

Here's that timelapse page of Laly's, much more of the style I like and what I'd hoped she'd be teaching. I don't so much need lessons on art journaling as I need more help with the technique of collaging. But one of her bits of encouragement to just walk away when stuck and come back later with fresh eyes turned out to be very valuable as my time "ignoring" what had become a frustration became time when new ideas and solutions like this one presented themselves.

Another example: Perhaps my favorite part of art journaling is adding text, and I was chomping at the bit to do so. While waiting for the retreat videos to be posted, I'd torn some pages out of the altered book I've been working in, laying them on the table (cardinal rule of multi-media work apparently is throw nothing away). In one of those serendipity moments, I looked down at the page on top to see the first sentence of the first paragraph starting with the words you see above. Oh yes, this was going to be the central text of my page. It really spoke to me of changing attitudes and seasons and how soon the snow will suddenly be gone and it will be warm enough to hike. The flower from the tissue paper I'd glued in the middle of the page for some reason but never got covered up as I'd hoped now became the sun with the addition of the collaged swirl, outlining of the petals and some yellow paint. But I'd not settled on anything else for text.


And then during a break in working on my page, there I was in the car, listening to a Moody Blues cd and I heard the perfect words for the rest of my text additions, and the perfect encouragement for my slightly gloomy demeanor lately as I wait for healing and good weather. A few more "fixes" with colored pencil here and there and I decided I was done.

In the end, I did much of this my way, but really did appreciate what Laly had to offer. I took the plunge to try incorporating a lot of different mediums to learn more about them and if I liked them (I still really like those Marabu Art Crayons, need to learn a different approach to acrylic paints, love how much better gel medium works as an adhesive than the thinner matte medium, enjoy Art Graf water soluble blocks over watercolor paint, never would have thought to use colored pencils had she not mentioned them, was pleased with the way both Micron pens and my fountain pen worked over the gel medium but drops of either ink or Dynaflow paint took forever to dry). I laughed at her description of that middle stage when you get stuck as the "awkward teenage stage" and that you just have to quit listening to the inner critic and either focus on what IS working or just go away for awhile. And ultimately remember that "art journaling is a time for learning and for growth. It will make you a better artist." I will have to add that to my reasons for art journaling, which have been mostly to get a thought or concern onto the page with something other than writing. Finally she stressed that these pages are not for masterpieces (and mine surely are never that, even when successful).

I'm sure you've run into plenty of references to the inner critic, but I'd not heard it described quite this way before and loved the image it evoked: 

"Sweet voice of the inner critic! This little gremlin is the part of your brain whose job it is to keep you safe from change, ANY change, even positive change. The best way to silence it is to keep going, keep showing up, take action and get creating."

Oh my gosh, the gremlin sure has my number because I really do hate change! Pretty evident during this retreat too, as I kept fighting against suggestions and directions I didn't want to take. It was all better when I took a break and quit fighting back. Will try to keep everything in mind that I experienced and learned when I dive into my next art journaling page.


Monday, March 13, 2023

Progress and Some Theories


My first layers "hot mess"
 
“I begin with an idea and then it becomes something else.”
― Pablo Picasso
 
So encouraging to run across this. It definitely describes my creative process. And it particularly seems to be true about my art journaling. I've been mulling over an idea for a page in the altered book I've been working in, collecting a few images and words, wanting to try something for the background layer and then topping it all with a translucent napkin layer like was taught in my Handmade Book Club recently. It's kind of a negative theme, a group of things that I think I want to buy, would look good in, an opportunity to travel. And then I realized, none of this is going to happen so I might as well be realistic about it. A case of who am I kidding. Thought I'd use this for my retreat art journaling page. But wait, Laly wants us to dream, dream big, bring light to our pages and maybe surprise ourselves when the dream comes true. Ugh. Not the mood I'm in at the moment, but I resolve to play her game. I think about being able to get out on the trails again, and even to travel a bit now that I've had some work done on my back. Spring is not here yet so I still have time to heal more, hoping I can indeed do some of these things I did all the time before the pain stopped me.

Example of painted and stamped papers, only willing to spatter with ink

But as you can see, even following her bright and supportive and inspirational guidance, I ended up with the same dark overall appearance that shows up in a lot of my work instead of a more light and airy look. (She kept saying not to worry at this stage - if it looked like a hot mess, then you were where you were supposed to be!) And as I progressed through the videos I realized I'd been adding steps before they were presented, an overlapping of instructions. And both made everything else about working on this page harder. For instance, my chosen collage papers made a lovely little vignette across the lower half of the page when I was supposed to be choosing strips and bits to create "texture" and then paint and draw over them. I do not want to paint over these nor add much over them. (A big thanks to Kathy Loomis for her comment on the last post mirroring my own feelings about this practice of "disappearing" beautiful papers and images.)  Her own page was so different from others I've seen her do and I didn't care for it much, but I still let her get into my head, influenced by the composition she was developing even though she kept saying not to copy her exactly. My original idea envisioned multiple images clipped from magazines scattered over the page; she only required we use a single focal image pretty much centered. Ah me. So it was a frustrating week that at times left me totally undone and the page is still not totally finished.

A saving grace: in her wrap up video, she showed a time lapse of another page she'd just done and it was exactly what I thought she was going to teach but hadn't (perhaps she felt that technique would be too complicated for many of the students trying out art journaling for the first time?), and I picked up a few ideas of how I can improve the things about my spread that are still bothering me. And she has this thing about wings representing your creativity taking flight, so her last little ritual was having us close our eyes, focus on our shoulder blades, and feel our wings. "Are they starting to flutter a bit, open up?" she asked. Ironic smile from me. I didn't want to make her feel bad by responding that my wings felt a bit crumpled, maybe even with a few holes in them. ;-) But learning has happened, sparks and epiphanies emerged seemingly from nowhere, soaked up her positivity and encouragement, and I'll be showing the results soon.

Before I ran across the Picasso quotation, I'd been over on Austin Kleon's tumblr where he posted an "In Conversation" video you might find interesting and talked about The Centre For The Less Good Idea, pulling this quotation off its website:

"Often, you start with a good idea, It might seem crystal clear at first, but when you take it off the proverbial drawing board, cracks and fissures emerge in its surface, and they cannot be ignored. It is in following the secondary ideas, those less good ideas coined to address the first idea’s cracks, that the Centre nurtures, arguing that in the act of playing with an idea, you can recognise those things you didn’t know in advance but knew somewhere inside of you."
 
And yeah, this has always happened to me and I used to fight it, determined to make that good idea work even when I could see it wasn't. A longer version of what Picasso said. And I am hoping this is what's happening with my journal page and the others that are already brewing in the back of my mind.
 
I also found interesting because it happens to me all the time, his post about "We all have three voices." How often does the voice inside your head (the thinking voice) compose a perfect few sentences but when you go to write them (your writing voice) or speak them (your speaking voice, you can't capture those exact thoughts in those words again? I can definitely see how this relates to the difference between your good idea for a work of art and what actually tumbles out into reality. Funny things, our brains.

Monday, March 06, 2023

More Diversions

There was more motorcycle racing this weekend so the stitch camp piece got a few more lines of whipped running stitch added. I did quilt the top border of Naomi's quilt to see how the way I ended up turning the corner looked and it looks pretty good. Click on the photo for a larger view. I thought I'd get at least one more side quilted before the weekend and spend the race watching time tearing off the paper, but a bigger diversion arose keeping me from any more quilting. What might that be, you ask?

Another free class. Actually, this was billed as an online retreat which started on Friday. Laly Mille was offering this opportunity to create your own weekend retreat and learn how she approaches creating her lovely art journaling pages. I've admired these ever since she was one of the Sketchbook Revival teachers my first go round. But I've never figured out how to make my art journal pages look blended and ethereal like hers so here's a chance to learn how she does it. Leading up to Friday there were things to gather and think about and one of the things I decided was that I've been trying to do this journaling in a small space while she works in a large sketchbook she makes herself. Well, I know how to make sketchbooks now, and I had the size watercolor paper she uses to make her sketchbooks so I spent quite a bit of time cutting and folding and sewing together my big 3 signature coverless book to work in. The picture above shows my setup and some of the supplies I started to gather. I only made it through day one of the retreat, watching the "first layers" video and feeling very uncomfortable and out of my depth adding paint to the pages and totally freezing up when the next step was to collage a few things on the page. Not your main images which I had at the ready but background things that may end up being covered in the end. I struggle with this concept - spending time and thought to put things down only to have them disappear. What's the point? Guess I'll learn. I couldn't quit thinking about this though and between races, I kept popping into the studio as I thought of something else I had that might work, finding some papers I'd painted that could be collaged, adding a little gesso over the swaths of paint I'd applied (which helped more than I could have imagined). Laly warned not to be discouraged at this point if you thought your piece was a hot mess because it probably is, but it will get better. Thanks for saying that - I definitely relate to the hot mess! The good thing is though that she is giving us all this week to catch up, work through the videos, add touches to the page before a wrap-up session this Friday. So much for quilting . . .

While digging out my big pads of watercolor and multi-media paper, I stumbled upon yet another set of directions for a book from the Handmade Book Club, paper clipped to one of the pads so decided to cut the paper to size while I was in a cutting mood - more diversions!. I can't believe how many books I now have lined up to make, directions paired with paper. Of course, I want to know how I got so behind on the club projects, but I'm pretty sure it was the two years in succession of surgeries - first for cataracts and then for back. I don't want to put any of this back in the closet, so once I'm done with the art journaling retreat and the baby quilt, I may have to go on a bookmaking binge.

I noticed when I popped into Laly's website that she is still encouraging people to sign up for this retreat. See her blog here if you are curious.

Monday, February 27, 2023

A Hodge Podge Week

There was focus. There were diversions. But things got done. I made my final choice of border quilting design for Naomi's quilt. Was intending to do the one on the left but it ended up not being wide enough, so I opted for the more elaborate one on the right which is the perfect width . . . and has hearts! I cut strips of the quilting paper, folded it into fourths accordion style and taped one end over the design. As I finished tracing that section, I folded down the next quarter and continued tracing, repeating until the entire strip had the design transferred to it. This length is for the side borders.

Then I unfolded it and taped it to this cutting mat, laid a blank strip over it, taped it in place and traced the design onto it. (And discovered a glitch in my method of transferring from the book which resulted in several of the heart loops being stretched - but I like it.) Repeated one more time for a top border which was longer to include the corners. And that is where I got stuck. No matter how many times I tried, how many breaks I took, how much mulling when not in the studio I did, I couldn't figure out how to turn the corner of this border design. Yes, I could just continue the design straight across the corner but you know me. I wasn't about to be defeated, and finally last night I came upon a solution that I think will work. Need to transfer it to the other corner, then trace the complete design onto the last paper strip. Quilting should resume this week.

In the midst of this preparation for border quilting, I switched gears to work through a video class offered by my Handmade Book Club. The video was going to disappear at the end of the month so I had a deadline pushing me along. Here's my setup for working on botanical drawing with India Ink.

The first part of the class was devoted to making a small Japanese stab binding book. Luckily, I had one on hand that I'd made back in 2020 when this binding was an offering of the month. I made three different ones, with this one having signatures of rice paper so that I could experiment with gelli prints in it. Hmmm, never got around to trying that so was happy to use it for this class.

Before drawing in our books, it was advised to make some marks on a scrap piece of paper to get used to the way the brush and the India Ink played on the paper, and seeing the difference between full-strength India Ink and some that had been diluted.

Then it was on to painting/drawing in our books, following what the instructor, Amy Maricle of Mindful Art Studio was doing in making leaf shapes and stems. I'm using a pretty hefty rock to hold down the cover and pages as I go. I also inserted parchment paper between the page I was working on and the next page. Even though I doubled over each page before inserting into the binding, sometimes the ink bled through.

I couldn't seem to get my brush to do the thin-really thick-back to thin strokes that she was getting. After a few more pages of copying her designs, I did as she suggested and struck out on my own. I quite by accident found myself making these "broken" leaves that I really liked. If you look to the left, you can see how the dark ink shows through the two layers of rice paper. I rather like that as well. Interesting to see the faint image of the following page showing underneath the current one. I'm thinking of ways I can capitalize on this as I add work to this book.

This is perhaps my favorite page, simple and minimalist.

Finally, a really big diversion: the start of motorcycle racing season this weekend. I watch most of the races on my computer, and there is always content before and after the race that doesn't require me keeping my eyes glued to the screen. Since this computer is part of my office setup, sometimes I can work on bills and paperwork, sometimes I can do something creative, and this time I picked up my stitch camp piece and added a few more stitches as I listened. I really haven't done much with it, but it does sit on my printer so I see it everyday, pondering what to do next. This time it was to add running stitch spirals in more of the dark blue circles, and some whipped running stitches, a stitch that is new to me. I use a single strand of embroidery floss to make the running stitch, then "whip" this shiny 3-ply thread under the running stitches. It's a little like couching. I honestly can't remember where that thread came from and I'm only guessing that it must be rayon, but it is certainly my favorite teal blue. I still have no sense of where I'm going with this, just trying to read the marks and envisioning what stitches might enhance them. I've always thought there was a sense of water flowing through the center so hope my stitches bring that out.

Wednesday, February 22, 2023

All But The Borders

I didn't manage to do something in the studio every day last week - life intervened at the beginning of it - but I did make good progress on adding quilting to Naomi's quilt. There's a real temptation not to put any quilting in the 4 inch borders but that would just be laziness on my part. I'm considering a looping design which I would trace out on strips of the Golden Quilting Paper. I really like the look of the diagonal quilting through the diamond areas, deciding after all not to free motion any design in the light area.

In the end, there wasn't much dithering over which thread colors to choose for the quilting. I think I knew from the beginning that these two - a variegation of light lavenders and the darker one of blues and purples - would be my choice. If nothing else, I could tell they were favorites by how much thread was already used up off these spools.

Once all the walking foot quilting was done, I pinned the papers with the free motion designs in place with flat flower head pins - it worked really well.


The design fills the corner areas nicely.

The center design though doesn't reach out into the outer points. I'm considering either adding a heart in those spaces or quilting in Naomi's name - or both!

Of course, when you quilt through papers, the paper needs to be removed and I saved that task for Monday of this week, when I checked out a local charity quilting group. I've known about it for quite awhile but they meet on the same day as my art group met, the irony being that I'd invited a quilting friend to join my group at about the same time she invited me to join this group! Well, my group isn't meeting right now so no more excuses! Apparently they had a larger than usual turnout and lots of finished or near finished charity quilts to show during show and tell. A little bit of business and then it was nose to the grindstone as machines started humming, cutting began and pressers stood at the ready to iron seams and binding strips. Their quilts go two places, first to cancer patients, and any extras to a homeless transitions organization. It's been a long time since I've done charity quilting, and yes, I've felt a bit guilty about that, and I had a very good feeling about this group. AND I got all my papers removed from my quilt before it was time to go home. I'm sure I'll be back. Here's an article from 2016 that tells a little more about the group and its origins.

Monday, February 13, 2023

A Better Week

Now this is evidence of a week more like I used to put in - every day on the engagement calendar noting what was accomplished in the studio. I can think of many words to describe what got me in there each day: focus, determination, goals in bite-size pieces, discipline. As much as anything, I managed to overcome the little voice saying, "Oh, it's too late in the day, not enough time left to do anything," and just went in and did something whether it was for 15 minutes or an hour. And of course, progress was made without overtaxing myself on any one day. I still can't muster the endurance I once had to work for hours at a time, but I'm making peace with that change and doing what I comfortably can. It really helped that I set my mindset to accomplishing just one thing each day, even if it was that quick 15 minute one. I am pleased.

So it started with piecing the batik for the batting, digging out some batting, giving the top a good press, and layering it all up for pin basting. I'd been mulling how to quilt it for awhile now, knowing there'd be some straight-line quilting done with a walking foot, but I planned to do some kind of free-motion motif in the center and four corners. The last three or so baby quilts I've made I've quilted without marking, or with very little marking. It was freeing and easier than anticipated, but for some reason, I was shying away from the idea for this quilt. And thus I consulted my extensive library of books devoted to quilting designs. That yellow folder, by the way, is stuffed full of designs I've pulled from magazine. I am awash in ideas and I must say, I have some beautiful patterns at my disposal, enough to make me long to use them in some hand quilted beauties. Hand quilted wholecloth quilts still draw my attention but I doubt I'll get back to doing that sort of thing.

I settled on this design from Harriet Hargrave's Heirloom Machine Quilting for the center and decided that tracing it onto Golden Threads Tracing Paper so I can pin it to the quilt, sew through it, and easily remove it afterwards was the best plan. Generally speaking, I'm not much into hearts on quilts but I did use them on the last baby quilt and these are pretty subtle as heart motifs go. The paper is held in place for tracing with a removable scotch tape.

I couldn't find quite what I wanted for the four corners - either too big or too small or not quite the right motif. Then it occurred to me that one from Pat Holly and Sue Nickels' 60 Machine Quilting Patterns that was just a tad too big could be modified to work if I eliminated the large hearts encircling the smaller ones. Perfect! I traced away and plan to transfer the design to the other 3 papers by stacking them with this one and sewing on the lines with an unthreaded needle. But as I auditioned it in the corner space and compared it to the center motif, something bothered me about it. Finally it dawned on me - the hearts were very different shapes, the center one a bit stylized as it cinched in to a point, the other one having quite rounded and fat hearts. Hmmm. Well, I guess I have to pare down those fat ones. After a few strokes, I thought to lay the paper of the other heart design to discover that the hearts on each were about the same size so I could just trace the center motif hearts inside the fat ones and get the eraser out to remove the lines I no longer needed. Problem solved!

Now it's time for the inevitable choosing thread. I do have a lot of thread on hand and there are several of these that are good candidates. I'll do the straight line quilting in the dark areas first, then tackle the freemotion areas while I continue to mull how I will quilt the borders and the light diamond areas. They are about the same width and I'm considering putting the same motif in both.

Monday, February 06, 2023

Plugging Along

Again I have that problem with not quite knowing where the week went, but I did get borders on the baby quilt. Since I am pulling from partial pieces of the hand-dyed fabric, I did have to piece one border to get it long enough, but I don't think that will show much after quilting. Every time I work with this quilt, I am amazed at how soothing this color palette is, especially the mingling of the lights. Hoping it has the same affect on baby! Running into somewhat of a problem though as I searched through my stash of Judi hand-dyes as the pieces big enough for backing very much clash with the top, and though piecing a backing is an option, I don't have enough truly big pieces of the right colors to make that an easy task. So I turned to a stack of batiks. Judi may have dyed her own fabric and used it in her quilts as well as selling it, but she also shared my love of batiks and I came away with quite a few good-size pieces when another friend of hers and I split up her stash. But again, somehow the color I need was not in there, except for this one. There were two pieces of it, neither large enough on its own, but I plan to cut to eliminate some of those dark grayish brown areas to join two pieces with the most blue.

Monday, January 30, 2023

Naomi's Quilt Moving Along

I've not done more on that stitch camp piece, mostly because it's one of those things good to work on with something else going on like a video that doesn't take that much attention, and I managed to catch up on all of those already with the stitching I've done. It remains by my computer screen so I can think about what to add next but in reality, I now want to switch my attention and efforts back to that baby quilt. I finished piecing the rest of the blocks, spent a little time arranging them on the design wall (this time friend Judi didn't seem to mind my care) and today finished sewing them together into a top ready for borders. Was unsure about how to resolve placement of blocks on those extra rows top and bottom, probably should have sketched it out instead of just imagining in my head, but I think this arrangement works fine.

I picked up glasses last week, a new prescription that I really should have had made up a year ago, but maybe not as my prescription had changed again some at my recent checkup. I knew I'd been struggling with tiny print, but as last year wore on, I felt more and more like my eyes were straining all the time, and that change in prescription proved I wasn't imagining it. Everything is clear now with no added effort which of course makes any sewing that much more enjoyable. And since I was pretty sure I didn't want to go without glasses while the new lenses were being made (they'd have to send in my current frames to have the lenses fit to them), I spent an inordinate amount of time picking out new frames. I love the frames I've had for quite awhile now, continually get positive comments on them, but to be honest, I'd started looking at myself in the mirror and thinking, "I'm really tired of you!" New eyes in 2021, new back in 2022, I guess new frames in 2023 were warranted. I really like them!

Monday, January 23, 2023

Just Take Me Out & Shoot Me . . .


I must be feeling better. I let myself get enticed into signing up for TextileArtist.org's 5 day "stitch camp" - free of course so what is there to lose but some time? I rationalized it many ways: 1) I really do love hand stitching and haven't done any for quite some time; 2) it was billed as doable because of the way the project was divided into small segments over the 5 days; 3) I might see something new or a new way of doing something I'd already tried - you know, transferring parts to something I already do; 4) I could always just watch the videos and if nothing appealed, I wouldn't have to actually do the project; 5) did I mention it was free? Yeah, a lot of rationalization. And even though "mark making" was part of day one, something I've never liked doing in any medium, I was intrigued by the idea of "seeing things in the marks" to drive how you would add embroidery. That's pretty much in my wheelhouse, "Masks" being one of my best examples of seeing images to be picked out in stitch.

So I grit my teeth and did day one's assignment of mark making. One good lesson was the suggestion to pick just two colors (one medium, one dark) plus a light neutral. That really does simplify things. I chose teal and yellow and searched my stash for fabrics of that color as well as threads and floss for embroidery and paint for making those marks on the "winter white" kona fabric. The resulting painted fabric was of two kinds, one with dense marks and little white showing, the other with the marks farther apart with more white area. Accents of the opposite color on each area helps with a bit of cohesion. I did the dense marks first and really didn't like what I did, partly because I was learning how the paint was working with the various "tools" I tried. Before I did the less dense marks, I'd scrolled through the dedicated Facebook page to see what others were doing and spotted some really cool marks made with fork tines - I'd totally forgotten about that, so I got marks I liked better on that piece. (You can see the results and my pile of threads and other fabric in the photo above.)

But no matter, this painted fabric wasn't supposed to be a lovely composition because it would be cut into 2-1/2 x 3 inch pieces (don't ask - the teacher gave no explanation for that dimension and also said we could cut them any size we wanted). Pick and choose what to pair, looking for connections from one square to another, then overlap slightly and tack with small running stitches. Yes, no seaming here as the simple embroidery stitches suggested are meant to "blur" the joins. She was putting together up to 4 squares into a strip, but I could see others in the group were breaking from this idea of making a long strip to use more squares in rows, which is what I wanted to do. As you can imagine, after I pulled those 3 dark teal squares together as something embroidery could help make the marks flow one to another, I spent quite a bit of time arranging the other squares around them. At one point I actually had a second piece going, but dang, I couldn't help myself. I managed to use every single square in this one piece. No leftovers for this gal!

Favorite marks are the thin parallel lines made with a fork and the concentric circles from a spool end

Unfortunately (or possibly fortunately depending on your viewpoint), those of us with larger pieces immediately realized we would be adding embroidery stitches on them long past the day specified for the embroidery. But we don't really care. I enjoyed tacking the squares together, that rhythmic running stitch, and am equally enjoying pondering what to stitch where. Day 4, if one was done with embroidery, was to be time to assess the piece to see what bits of applique might be added to additionally blur joins and make the piece more cohesive. The last day talked about how to finish the piece, and I particularly liked an example where a piece like mine could be laid on a piece of fabric extending beyond like a border and where embroidery stitches could extend into it. I could see this sort of piece being framed.

This exercise of blending marks from one area to another reminded me of a quilt I made prior to 2006 I believe. A friend had challenged me to do something with a small piece of 60's polyester fabric with a bold print. I had some bias tubes left over from a Celtic applique project and they became the connectors between rectangles of that fabric, over the solid hand-dye. I'm getting a bit of the same vibe off my stitch camp piece.

Well, with watching the daily short videos and doing something each day on the piece, that took me through Friday, and knowing I could set the stitch camp piece aside, I spent some time Saturday and Sunday working on the baby quilt. Extra incentive, I was having lunch with a quilting friend today, and I'd told her the last time we'd gotten together about my plans so I really wanted to have something to show her. I completed the 4 light blocks and 8 split blocks with dark centers, plus one from the split block with the light center. Here are the rest of those blocks with their squares all arranged and ready for  joining, so half plus one done. I must admit that I feel Judi over my shoulder, telling me to quit so deliberately putting the different patches in place, to loosen up like she did once when we were on retreat and I was working on a mystery scrappy quilt. She "caught" me matching up fabrics, which I denied. She wanted me to just pull pieces out of a bag. a way of working that I do find very hard to do. So while I arranged these squares, I just told her to shush, important not to have two of the same fabric side by side! I got the impression she wasn't convinced. ;-)