Monday, September 30, 2013

Going Paperless

I am such a gotta-have-it-on-paper, need-a-hardcopy kind of gal that I often print out things that I could just as easily view on the computer screen. But one of my rationalizations for the laptop was that, unlike my big pc, it could sit in my studio at the ready and I would no longer have to print out reference pictures or directions in one room to have available in the other. It's a hard habit to break, this need for paper. I'm one of those underliners and highlighters and find it easier to flip through a sheaf of paper than scroll through a pdf file up on the screen. However, my first lino class lesson came in a pdf 23 pages long. I really wanted to print it off, pictures and all, but that's a lot of paper and a lot of ink. It has forced me to follow through with my original plan and frankly, in this case having my instructions and photo guides on the screen is working out better than the printed page. Knee jerk reaction averted.

Thursday, September 26, 2013

Ready for Class

I've been out of town, an extended weekend trip to see my goddaughter get married and then visit friends further down the line. My lino class with Dijanne Cevaal kicked off while I was away, but that is the beauty of an on-line class - you can go at your own pace and schedule. I didn't want to order my supplies too early and have them arrive while gone, languishing on the front stoop, but was a little dismayed at the anticipated delivery date when I did place the order - well into next week. Fortunately, the delivery service was quicker than that, my class supplies arriving from Dick Blick today! My first class pdf arrived via e-mail before I got home and so I am all set to dive in. I've skimmed the first lesson and already have been provided more information and instructions than I got in the entire 5 session hands-on class I took earlier in the year here in town. I like what I see and am excited to get to work.

And here is the obligatory picture of me with the bride and groom...


Tuesday, September 17, 2013

September Birthday Block

In the midst of working on the fabric postcards, I realized it was time to make another block for my nephew's "freedom quilt" - number 17! We are getting close to the end of this project. The first few years it was easy to pick blocks to represent some significant event in or tie to his life, but I must admit it is getting more difficult each year. He lives far away so I don't get in on much of what happens. This year, I knew he'd had a scary bout in the hospital and has aspirations to become a nurse, so I was tempted just to make him a red cross block. But that didn't seem like a very positive way to remember the year. Instead, I thought I could just elaborate on what I'd been doing with the postcards. I started by picking a background fabric to represent a landscape - much as I had done for Life's End. I thought I was picking a true batik, but when I peeled back the fabric, I realized it was actually a print with the "right" side much brighter than I wanted. Well, you know what they say about fabric - you've paid for both sides so you can use both sides! I used the more muted "wrong" side.


Yes, I had "mountain" triangles left - waste not want not they say. I keep going back to this theme of mountains rising out of a flat plain. Those South Dakota Badlands made quite an impression on me.  The smaller triangles are what was trimmed off where the bigger triangles overlapped. More waste not, want not.


I threw my usual caution to the wind and tried different colors of King Tut variegated thread to satin stitch my mountains to the background. No fusible here - just used dots of Roxanne glue to hold them in place and I used a tearaway stabilizer on the back of the block to keep the stitching flat.


And now to add some text. Yes, I did consider feeding the block through my printer - the carriage is wide enough to accommodate up to 13 inches - but no way was I going to risk a mishap with the otherwise completed block. Instead, I took the text formatted in Paint Shop Pro, mirror imaged it, printed it onto freezer paper and ironed it in place on the back of the block. Incidentally, the white you see on the back of the block is tearaway stabilizer trapped under the satin stitching.


Now using a light box, I could see the text in the right orientation and trace it on the right side of the block using a pigma pen. This worked so well and was relatively quick to do. Makes me look like I have beautiful penmanship!


And because I truly do have a difficult time throwing out bits and pieces, I turned this bit of thread testing for the sun on some of the postcards into a bookmark. Not sure who will get this yet, but I'm glad I didn't just toss it in the trash. 

Sunday, September 15, 2013

More Printing and Done

I wanted to finish the backs of my fabric postcards with the end of the sentiment printed on the front. This should be a piece of cake, I thought, as I could use a full sheet of paper covered with muslin and get two backs per sheet. On the recommendation of friend Mary Stori, I tried the alternate method to freezer paper - adhering the fabric to card stock with 505 basting spray. I think I tried this a long time ago and must have run into problems with it, leading me to use freezer paper instead. But Mary's instructions led me to believe this was worth a try. The basting spray goes on the card stock, the card stock on an oversized piece of fabric. Smooth the fabric to be sure it sticks evenly to the card stock with no bubbles, and trim off excess.


As an added precaution, apply painter's tape over the lead edge.


And it ran through the printer with ease. (This was formatted in Corel Paint Shop Pro, the outside lines serving as a guide for cutting apart.)


I didn't have quite the same success with the second one. Perhaps I should have put more basting spray on the card stock, or maybe I wasn't as careful with the smoothing. There were places where the fabric shifted and creased as it fed through. And when I pulled it off, my lines of text were no longer straight but rippled. For comparison sake, I ironed my last piece of fabric onto the heavy freezer paper and got about the same result - a total surprise. In retrospect, I think I failed to set one of the printer's properties to adjust for the extra thickness being run through it. I don't use this printer often and even though it is the same brand as the one that gets more daily use, the set-up screens and options are slightly different. And of course, I didn't take a minute to reference my notes from previous printing. This is what happens when you get cocky and are in a rush!


I always fuse my postcard backs to a piece of Decor Bond so I was able to carefully manipulate the wavy lines of text mostly back into shape. With that, it was time to assemble and satin stitch around the edges. Each postcard is slightly different. This one has a sun quilted on it.


Here's the whole set. I allowed myself to try out different colors of thread on each, both for the satin stitching around the mountains and around the outside edge. Now to add a personal note on the back and get these sent off.

Saturday, September 14, 2013

7 Years and No Itch

Today marks the 7th anniversary of my return to northern Idaho. I'm no longer at the original house I rented - things change, needs change - but I am still very happy with my decision to relocate here. At my current place, I've enjoyed a mostly private covered back deck where a tub of geraniums have flourished. They got a slow start, not blooming much at the beginning of summer, not at all in July and into August, while the violas and a plant covered in yellow blooms stole the show. By late August, those two started looking spent which was a disappointment because I was spending more time than ever on the deck wanting to enjoy some color.


And then the geraniums started putting forth buds, just a few at first. In the last couple of weeks they have exploded.


They are more colorful and beautiful than I could have hoped for. Fascinating to watch them unfold one small flower at a time...


...until the group of them form a ball of bright color.


They are a nice anniversary present for my soul. 

Wednesday, September 11, 2013

Giving Linocutting Another Go

You no doubt recall how disappointed I was in the hands-on linocutting class I took earlier this year. Felt I should have saved my money and taken the on-line course from Dijanne Cevaal. After reading Dijanne's course description and what each session would cover, I made up my mind that when she offered it again, I'd sign up. And I have. Anyone care to join me?

From Dijanne's Facebook page:
Updates; On-line linocutting class will start 22 Septemeber- there is still time to enroll- there are lots of exercises to hone your skills on fabric or paper. You will make more than a cute stamp... you will create linocuts from photos, combine different linocuts to make interesting fabric and collages. Cost is $60AUS- and there are four lessons delivered in fortnightly installments with a number of exercises in each lesson. If interested, e-mail me at dcevaal@gmail.com
Sample of Dijanne's linocuts in my collection

Tuesday, September 10, 2013

Adding Text

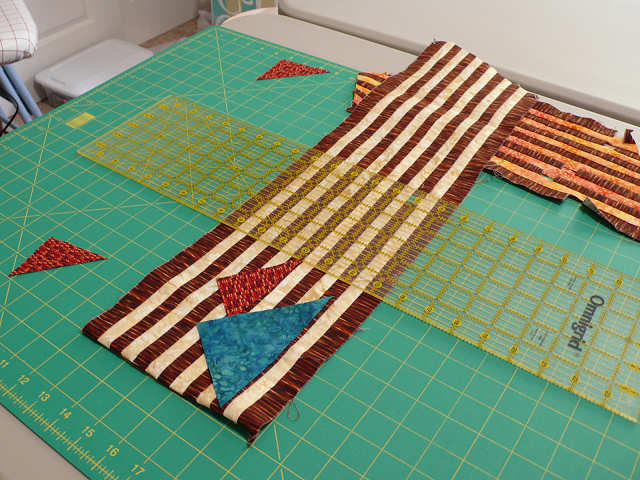
I thought I asked you guys to wish me luck? You didn't wish quite hard enough - my day of experimenting with adding text to my triangles was a bit frustrating and did not yield quite the result I was hoping for. I'm settling for the result you see above, one that does not show up as well as I'd like, but is the best I can do. Here's how I got there.


I started by making a scan of the triangle.


In Corel Paint Shop Pro, I used this as the background layer, sizing the canvas to match the actual size of the triangle. I added a vector layer to try out different fonts, wordings and arrangements of the text, seeing exactly how it would fit on the triangle when printed.


Here's another version with slanted text. The background layer with the triangle is still there, not visible at this point because I changed the opacity to keep it from printing. I could have deleted the layer, but I wanted to be able to bring it back up if I needed to adjust the text. Ready to print, I ironed each triangle onto a 3 x 6 inch rectangle of freezer paper - just big enough to hold the triangle - and adjusted the printer layout accordingly. I did print just a plain piece of paper first to check alignment and which way the triangle should be fed in, and then sent through the real thing. The first two fed through fine, although the printing hardly showed - even when I changed the text color. And then...there's little worse than the sickening scrunching sound of a paper jam. Yup, that small piece of freezer paper caught and wadded up tight under the printer head. The fabric came out fairly easily, but it took patience and gentle steady tugging to extricate the paper in one piece. Most of my employed years involved some kind of administrative aide work, meaning I have a lot of experience teasing paper jams out of a variety of printers and copy machines, so in a way, I was back in my element. ;-)


Lesson learned, I pulled out a full sheet of heavier weight Jenkins freezer paper, figured out where on the page to affix my triangle, reset the printer layout, ran a test paper through and successfully printed enough triangles for my postcards with no more jams. Good thing I have more triangles than I need because a few of them were not lined up quite right and the text positioning was off.


But as I said, the ink just wasn't showing up well on this fabric, so "enhancement" was in order. I settled on colored pencil fill and Pigma pen outlining although I probably could have gotten the lettering to pop more had I tried a little opaque paint. However, the way the day had been going, I sensed paint and a paint brush were not a good idea. For better or worse, I'm using these as is, ready to attach them to my postcard bases. (Click on any picture for a larger view.)  

Monday, September 09, 2013

First Steps

I think all the books are now out of boxes and in my bookshelf. That done, getting on with these leftovers became most compelling. My thought was to use the stripsets as the basis for fabric postcards upon which the leftover blue triangles "mountains" would sit. I could layer up the long one and quilt it, then subdivide into individual cards. The second colorway stripset was only enough for a single card. Perhaps you're wondering what the bandage rolls are for. Those are actually strips of batting left after squaring up quilts. Often they are wide enough for a postcard but if not, I just butt several together as I've had to do here. I worked upside down on the long strip, the final layer being Decor Bond.


The first time I tried fabric postcards, I could see what a useful format this could be for using up odds and ends, so set aside a small bin to keep these in: leftover batting, muslin for the backs, Decor Bond, some cut to size, fabric and scraps for the cards. When I opened the bin, it had much more in it - things from my work table I didn't know what to do with when I packed up and moved, and there was room in the bin. Out of sight, out of mind, and I'm still wondering what to do with some of it. However, there are my small easels I've been looking for, certainly would not have thought to look here.


I originally thought to have the bands running horizontally but there would have been too much waste - the bands are 7" wide. Also, those triangles are 6" long at the base, so a bit large for the typical 4 x 6 inch postcard. So I've opted to make my cards 5 x 7 and make peace with the stripes running vertically. I hoped to knock back the high contrast with the quilting, but it didn't do as much as I'd hoped.


I could get 4 cards out of that strip. Before proceeding, I applied Fray Check to the edges, both to control raveling and to secure the quilting ends. Next step is to experiment with text on the blue triangles. I've been playing in Paint Shop Pro and hope I can print the text directly onto the triangles. If not, then I will be using a printout of the text as a guide for applying the words with pen or paint. Wish me luck.


Wednesday, September 04, 2013

What to do...

I stand in my studio and don't know what to do. I so want to be in here doing something today, now that the fabric dyeing is over with, now that many of the must attend to things that have pulled me away are taken care of, now that I'm feeling like I have the oomph and clarity of mind to get something done. And yet, I don't know what to do. Last week I tried to move forward on an idea using up more odds and ends from Judi's African Quilt, but mind's eye and reality failed to match up. Perhaps I could try coming at it from a different direction today.


Or I could get back to quilting the half-square triangle quilt. I'm thinking I only have about 3 or so hours of diagonal stitching left before I can tackle the borders. Somehow, that seems too stationary of a task - I've been doing so much sitting lately.


I could work with my new shibori fabric. On my walks, my thoughts have wandered there, making inroads into ways of bringing out the illusion of rippling water, then leaping to how it might work in a design idea about intertwined. Yesterday brought another thought to build on that idea, floating an image printed on organza over the ripples. I've never printed on organza - this could be exciting...or totally frustrating. Maybe better to work with the marbled fabric, a sliver of which can be seen on the left. I have beads and a design from my sketchbook set out, waiting for me to take the first step on that.


Or, I could tidy up a bit, clear the end of my work table to make way for these other things I could do. That wouldn't take long...


...some of it actually belongs in the bookcase. I could finish bring up books from the garage, arranging the titles for ease of putting my finger on just the reference I need, maybe even culling a few more titles as the shelves get too tightly packed. Yes, that's the easy way out but something that needs to get done. Maybe it will clear my head to better sense what to do next.