Tuesday, April 25, 2023

Warming Up

I've really had a craving to get back to sketching and having this new sketchbook to work in has given me a place to "warm up" as it were. You know, like any skill, if you're not using it on a regular basis, you get rusty and lose proficiency. I'm reminding my brain and eyes and hand how to work together again, and  decided to sketch a couple of things I could see from my couch. Those yoga blocks were great for practicing getting the angle of the lines right and the part of the furniture behind it sized proportionally. That part I did in one sitting while adding the foreground with part of the coffee table with magazines the next day. Then I moved on to the more challenging sketch of my beloved wing-back chair. It is actually more squat with the back not so straight up and down but as so often happens, I misjudged as I added chair to the first lines at the bottom of the chair and soon it was squeezed into a space that needed to be bigger. It's a subject I can sketch again and from different angles, all really good practice.

Feeling a bit warmed up, I headed out to sketch one end of Foster's Crossing, an old freight depot that now houses shops and an eatery. In a recent drive-by, I was so surprised to see that large sunflowers had been painted on the outside and I definitely wanted to try and capture that. This one I did in the toned paper sketchbook that I've designated for architecture and to be honest, I don't like that toned paper. Hard for a novice like me to figure out how to get things to show up on it, although I'm starting to get the knack. The paper will not take wet media but ink and colored pencil work fine on it. I'm trying to work a little faster, not get bogged down in trying to capture every little detail, and when adding color, not fuss as much trying to get a perfect match. I made progress on all that with this sketch but it still took me a couple of hours to complete!

Just as I was ready to sit down at the computer late yesterday for my end of the day check and maybe start this blog post, the power went out. I got an alert that it was a transformer that had blown so questionable as to how long before electricity would be back on. I took a walk and then pondered what I could do before it got dark, deciding this was the perfect time to take a sketchbook and colored pencils outside to sketch this little scene next door. I'd been watching those tulip leaves pushing up but we are far from having blooms or even leaves on some of the shrubs but that tipped over watering can said, we have a story here to capture. I'm getting more comfortable with my colored pencils and so, I enjoy using them more. With this sketch I wanted to practice "cropping" my composition before starting. I pour over the many urban sketcher sketches on Facebook, noting the different styles and what people choose to capture. When actually out sketching, I tend to see a whole building or a whole scene and end up trying to capture it all in my sketchbook, but I'm realizing that is one reason it takes me so long to do a sketch. If I was taking a snapshot, I might still try to get a whole building if it were interesting, but then I'd get some close-up shots as well. So I'm hoping to focus in on subjects and details, practice that cropping as I observe and decide what to sketch.

The weekend was full of motorcycle racing to watch so little else got done. I remembered I had my stitch camp piece sitting nearby and managed a few more lengths of that twisted running stitch. I still have no idea where this is going or what to do with those circles made with the end of a thread spool, but I continue to add in the hopes that a lightbulb moment will ensue. As for studio work, I think a few handmade books are in order, that and the very needed straightening up. I might be able to eliminate some piles or at least find some things that have gone missing, and catch up on my documentation files. I might even discover what my next "continue finishing more" sewing/quilting project will be.

Thursday, April 20, 2023

Grandma's Work

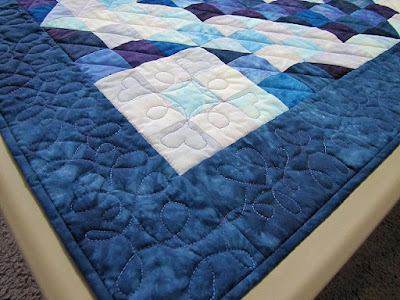
I snuck that little bookbinding project in last week between finishing up my taxes. Did them in fits and starts as usual, putting off finalization longer than necessary and letting the state ones nearly trip me up. But they got mailed off Friday and I could return my focus to finishing up Naomi's quilt. I'd laid it out on the carpet to steam the edges before squaring up and it stayed there for more than a week as other distractions presented themselves. But over the weekend I was able to cut and piece the binding strips and trim off that excess batting and backing, and then get the binding sewn on.

You'll no doubt remember that I used the quilting paper to draw out the design for quilting the borders, pinning the strips in place and free motion quilting through them. As I did so, it occurred to me that I might be quilting in some tucks since I couldn't see the surface of the quilt . . .

. . . and I sure did, in just two places though. One more imperfection few will notice I'm sure. And something to file away in my memory for next time.

Because I only had pieces of the blue fabric on hand, the binding strips were only about 28" long. That's a lot of angled seams, and even when I join 44 inch strips for bigger quilts, I always do a test around the outside of the quilt to be sure one of those angles doesn't end up right where I am turning the corner to make a nice miter. I have had those angled joins fall right there at the corner more than once and it is not a good thing. But to my surprise, not one of those joins even came close to a corner! I cut my binding slightly wider than the standard 2" so that there is plenty to pull to the back and cover the seam stitching and allow for machine stitching it in place from the front.

I decided to call it Grandma's Work because that is exactly what it is. It is made of the fabric this baby's grandmother dyed herself and that batik backing is from her stash. The pattern is of her and my design. It is a good representation of an important part of her life, a part that meant so much to her.

I'm still really glad I picked this batik for the backing - it plays so well with the hand-dyes on the front. I still need to ink in some label info on it, but then it is ready to send off along with additional explanations and memories of my good friend that will help her granddaughter learn more about her one day.

Wednesday, April 19, 2023

A Truly Quick Finish

Leather folder, original trial template, signatures, file folder for cover

I was digging around in one of my floor piles about the time I was choosing paper for signatures for several book projects when I uncovered the leather folder my cousin gave me that held a Moleskine sketchbook that I came to despise - I'd totally forgotten about it. I'd determined to use it up on some daily sketches and replace it with sketchbook paper I liked. A simple project really, but I got hung up on trying to make an exact copy of the Moleskine in terms of size, and the size was odd. It would require cutting down whatever pad of paper I decided to use and adhering to measurements not standard. I mocked up a template the exact size of the Moleskine and fussed with dimensions but got frustrated and put it aside, never occurring to me until I unearthed the folder with template inside that the Moleskine was based on metric measurements, and that I could use the closest dimensions that I had on hand. I checked to be sure the slightly smaller 8 x 10 inch paper would still fit well as signatures, and I quickly made two signatures to press under weights. I remembered that the Moleskine insert had a plain cover made from something similar to a file folder and planned to use the same. Once the signatures were ready, this little project came together quickly.

I'd recently watched a video showing a binding done with a pamphlet stitch and remembered a book I'd done where I was very surprised that one could add several signatures to the cover using only one set of holes in the spine. So that is what I planned to do here. I cut the file folder slightly larger than my signatures, especially in width to account for wrapping around the two signatures' folded edges. I punched 3 holes in each signature - one in the center and the other two a half inch from top and bottom - and lined them up accordingly to punch in the cover.

I was surprised to find that a length of linen thread still on the needle from a previous project was long enough for the stitching. With a pamphlet stitch, the needle enters the middle hole from the outside leaving a tail for tying, then back to the outside through an upper hole, wrapping along the outside of the cover to enter the lower hole back to the inside. Normally one would then enter the middle hole again to pull the thread to the outside to tie off. But when adding a second signature, you slide the needle to one side so it doesn't go through the cover but can now go through the center hole of the second signature where the stitching pattern is repeated. When back to the center, this time the needle can go through the cover, threads can be tightened and then tied off. Quick and easy! Actually I was a bit stunned at how little time I spent on this, me who can turn any quick project into a days-long affair.


And I was pleased that my new little sketchbook was a perfect fit for the folder.

The plan is to keep this sketchbook downstairs on the coffee table. I so often find in the evenings that I have an urge to sketch something but have settled in and it seems too much effort to go hunt down one of my many sketchbooks. I was particularly driven to get this ready for use downstairs right now because from my couch I'd been staring for some time at a bare tree with a splotch of lichen on one of the branches. No other color in this winter scene and I was intrigued. However, for as long as I'd been observing it, I'd only a few days earlier realized that the branch was not part of the tree, but one that had broken off and gotten lodged in this tree. It became the first sketch in my new book. Many more to follow is the plan. And chalk up another one for my "finish more" resolution.

Monday, April 10, 2023

Confessions of a Procrastinating Filer

I have another Austin Kleon blog to share, this one about pilers and filers. It got me thinking about the state of my studio and how I might operate in a perfect world of my choosing. At first, I immediately said, well I'm a filer of course. But one look in my studio would have anyone else saying that I'm a piler. Well, maybe when I'm working the piles stack up, like in the above photo when I had so much spread out working on those art journaling pages. But that all got put away, the papers especially into that bin, which is a type of filing. Piling is temporary, filing is my default action.

Binders full of quilt documentation files

I perhaps got my first taste of filing as a grade school reader when my mother took me to the library to find books, and I eventually was introduced to the card catalog. I adored using the card catalog, especially as I got older and used it to help me do research. I have to say I miss it quite a bit, even though computer searches are supposed to be faster and more efficient. You're talking to someone here who hated using a slide rule in one of my high school science classes and used to race a friend to see who could come up with calculations quicker, him with his slide rule or me with pencil and paper. I usually won. Anyway, I've always enjoyed organizing things, and most of the paid jobs I've had required filing and organizing. Right up my alley.

Pile at the end of the table example 1 & 2

So how to explain that my studio has always fallen victim to stacks and piles instead of everything neatly filed away? I DO know the answer to that and procrastination is a major culprit. I can sort what happens when I enter my studio with something into these categories (see? I even "file" my actions!):

  1. I don't have time at the moment to put/file the thing away in its proper place - I'll do it later.
  2. I'm not entirely sure where it should go - I'll need more time to decide its proper place.
  3. It is something I want to get to soon so don't want to put it away - out of sight out of mind.
  4. I've run out of room in the proper place for it and need to add more or reconfigure my storage.

These are excuses and it is why things get so out of hand. I almost laugh at number 3 which sounds valid at the time but soon those things I don't want to forget so leave out are soon buried under even more things of the same category. And how many times have I said and acted upon "If I just had the right storage units . . ." only to end up in the same quandary on down the road as I add more interests and more supplies/materials?

Some of what is in this pile is from when I moved into my current location. It's where I ran out of steam as well as ideas of where to put these last things unpacked. I've never gotten back to it in ten years, although I do occasionally dig down there to take a look, no more sure where to "file" these things than when I first abandoned them. What is on the top became a combination of #2 and #4. Those handmade books I've been learning to make? What are not gifted I really have no place for, my bookcase being totally full. I know others in that online group have made small bookcases to set on a counter or store them in a bin. I have so many bins of various sizes and uses as well as drawers that I've run out of room for more.

But in reality, this kind of chaos does bother me, especially when I go looking for something that I think I know exactly where it is and it is not. So much wasted time looking. I'd much rather everything be stored like my fabric, filed with a system I settled on long ago for most of it, several baskets for others of specific kinds and a narrow but tall chest of drawers for all my reproduction fat quarters; I pretty much can go to my stashes and put my finger on exactly what I'm looking for in short order. This goes for the majority of my tools and marking pens and tapes organized in that hardware cabinet of drawers my late husband gave me when he ran out of things to file in his work area.

And yet, there are still places where some fabrics are laid out on the floor (one of a kinds that I didn't want to fold) and bags of silk ties waiting for me to "file" them with the rest hanging by color in the closet, and a project or two that I think I will get to sooner than later, that combination of nowhere to put them and not wanting them out of sight out of mind.

According to psychologist Linda Silverman, “Filers” tend to be verbal/sequential thinkers and “Pilers” tend to be visual/spatial thinkers." But what if you're both, as I think I am? Austin seems to agree, that it depends on what you are doing whether a file or a pile suits your needs:

"All of these “versus” type situations can be rethought as spectrums and/or creative tensions. There are times when I want to access that sequential part of my brain and bring order to things, and filing does that, but there are other times I want to access my visual brain, and piles help."

I agree. I work in both worlds. But honestly, not all of my piles can be justified as furthering my creativeness. They are just signs of my indecision and resulting procrastination and I really need to clean them up. Perhaps consider it spring cleaning if nothing else.

How do you see yourself, as a filer or a piler or both?

Monday, April 03, 2023

An Optimistic Travel Spread

I finished up my art journal travel spread and it was an enjoyable experience. I am very pleased with the outcome - lots of open space, minimal added collaging to the images laid down, little covering up and layering. My tactic was to revisit plans for trips that got waylaid when my back got so bad, remind myself of where I thought I'd like to go, by car and train and boat. Whether or not I'll actually be able to take any of these trips, see any of these places, it was a shot in the arm to remember them and why they were on my list.

As an aside, I caught myself automatically using some of my quilting lessons as I arranged things on the page, thinking to balance where different items were placed to help move the eye but particularly to balance colors. Once I added that brown rock on the right, it was picking up the brown in the moon but I kept thinking there needed to be more brown making the connection. That is why those torn strips of brown paper got added, and they also seemed to add to the sense of travel with their horizontal alignment. I thought the same thing when placing the Canadian flag - need to add more red somewhere. That's why the exuberant lady in the red convertible got added. 

The sprayed acrylic background worked well, except my Uniball Gelly pen in white struggled to write over it. While perusing the small art supply section of my local Wal-Mart, I checked to see if they carried Posca pens. Posca Posca Posca is all I've been hearing for some time now from the various multi-media artists I follow. It's essentially acrylic paint in a pen that comes with various types of tips. I've often seen it used to add text so maybe I should give in and get one. I was not surprised that Wal-Mart didn't have them, but they did have these Painters pens which sounded like the same thing. Never one to really know what colors I want, except this time I knew I needed white, I decided to get this 5 pack.

Not surprisingly I suppose, my trial with the white one was disappointing. I knew from the many videos I'd watched that these need to be shaken and then the tip depressed to get the paint moving. I did this only to have the paint run freely out of the pen when I depressed the tip on a small sheet of paper. It was very thin and immediately spread off the paper. The tip was also extended quite far out after shaking so I am wondering if this particular pen has a default. I haven't taken time to check the others. Once I felt I had the flow of paint under control, I lettered over the gelly pen "Oh Canada" and was surprised at the uneven coverage. As I said, the paint seems very thin. On closer inspection, I see this brand is made by the Elmer's glue company which means at least it is made in America, but perhaps I should go for the tried and true Japanese company's paint pens if I decide this is an option I'd like to have around.

How about you? Any of you have experience with Posca paint pens?