Wednesday, June 29, 2011

Seed Head Inspiration


The wild grasses have grown tall like crazy, and are ready to spill their seeds. I've been walking by a clump for days, marveling at the purple hue of the seed head, not remembering them although I certainly must have seen them in past years. Well, you know how it is when you get an idea in your head of what things are like; I have lots of pictures of grasses blowing in the wind, pale tan or dark brown seed heads the norm. Well, these won't stay purple forever so yesterday I pulled a few to bring home with me.


I just knew I had a batik or two in that plum-like purple. As it turned out, neither are exact matches, the grass falling somewhere in between, but isn't this a fabulous palette with that green? It's got me thinking...

Friday, June 24, 2011

Invitation to ArtWalk 2011


POAC PRESENTS
"Feast for the Eyes"
All Media EXHIBITION

June 24, 2010 - September 9, 2010


Opening Reception

Friday, June 24, 2010
5:30 - 8:00 pm

Location:
The POAC Gallery, in the Old Power House
120 Lake Street, Sandpoint, Idaho

Free and open to the public


Sandpoint Summer Tradition, ArtWalk, opens Friday June 24th

Pend Oreille Arts Council’s 34th Annual ArtWalk exhibits open Friday, June 24th at 20 locations throughout downtown Sandpoint. Opening receptions, many featuring live music, are free and open to the public from 5:30 to 8:00 p.m. Friday evening. A wide range of artwork, including paintings, photography, glasswork, mixed media and outdoor sculptures will be on display at galleries, shops, wine bars and restaurants throughout town.


New this year – an ‘ArtWalk After-Party’ will be hosted by Evans Brothers Coffee Roasters at their location (524 Church Street). Live music with the RFB Band will kick the event off at 8pm. Food and libations provided by the Little Olive Restaurant.


ArtWalk brochures containing a map and self-guided tour will soon be available at all participating locations, as well as Sandpoint City Hall, Sandpoint Chamber of Commerce and the Pend Oreille Arts Council office located in the Old Power House.


POAC’s 34th Annual ArtWalk has been generously sponsored by DA Davidson & Co. and Tom Gibson, and Taylor and Sons Chevrolet.


Thursday, June 23, 2011

Preview of ArtWalk 2011

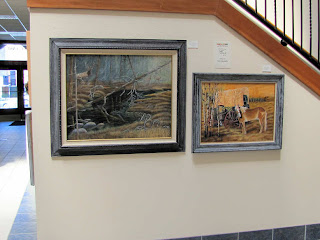
Yesterday I shared the work I'm showing at this year's ArtWalk (opening reception tomorrow night!) Here's a peek at some of the other artwork on display at the Power House now through September 9.

Leata Judd's papier mache art.

The watercolors of Randy Wilhelm.

A different take on watercolors by Gretchen Hellar.

More watercolors in yet another style, this time by Barbara Field.

Dan Carpenter works in acrylics.

These are also by Dan Carpenter.

Oil paintings by Suzanne Jewell.

Jim Furlong's acrylics.
Tina Friedman's photography.

Wonderful wood creations of Will Venard.

The very large work of Steven Scroggins - a triptych in oil on canvas.

And of course, everything looks better in person but in lieu of that, you may click on any photo for a larger view.

Wednesday, June 22, 2011

Is it Summer Yet?


To be honest, I was totally taken off-guard by word that yesterday was the first day of summer. We have had such a cold and rainy past few months - we haven't even been calling it spring, so how in the heck could summer be here? Well, the weather did turn for it, and today we were flirting with the 80's. After helping hang the ArtWalk Exhibit, I couldn't resist taking a slight detour to the city beach to enjoy the view and the warm sun - and I was not alone. The lake levels peaked back on June 17th but remain high. Typically one could sit on this cement pier and dangle one's legs over the edge and maybe get your feet wet.


Today it's a good spot for a little fishing.


Brr, brr, brr. I don't care what the air temperature is, the average surface temperature of the water right now is about 62 degrees. But that didn't stop plenty of younger folk from getting in the water.


Others took to kayaks.


And some to boats...all with a backdrop of still snow-clad mountains.


And while I was staring off into space, I noticed the clouds had that surreal soft edge to them.


I'm so glad I did this before heading home for lunch. By late afternoon, the clouds had already started moving in for the next round of showers, and our temps will be back in the 60's for another week. :-(


Ready For Artwalk


"Fracture"
Art Quilt, 12" x 16" framed
Sheila Mahanke Barnes 2011


Pend Oreille Arts Council's ArtWalk 2011 Exhibits are going up all over town this week. I am one of about 20 artists displaying work at POAC's Power House Gallery. "Fracture" is one of 4 new pieces I have in the show, and as you can see, the leaves finally won me over. I just needed to get them arranged properly! (Click on any picture for a larger view.)


To see how I made these leaves, see this post and this post.. They are attached by stitching along the center vein only so the edges can lift a curl a bit off the surface.


Here are those 4 pieces as we hung them today. If you look closely, you can see some red dots on the gallery cards - the reception isn't until Friday, but the three Strawberry Moons have sold already! They are going as a set to a lady who works in one of the offices in the Power House. I could not be more thrilled, and really enjoyed talking to her about what she likes about them and where she hopes to hang them.


Here's the rest of my display. If these look familiar, they should. They were some I had in the recent exhibit at the Panhandle Bank. That show did not get a lot of foot traffic, so I asked if I could show some of the same pieces here. The coordinator agreed, as long as one of them was the quilt on the bottom - she wanted to buy it. So there ya go - 4 quilts sold before the show even opens. I can't believe it, but I am so happy to have these pieces go to good homes rather than back into storage once the show is over.


The usual crew were on hand to set up this morning and we were all surprised at how quickly it came together. Here are two volunteers that help with every exhibit - checking in the artwork and helping to hang.


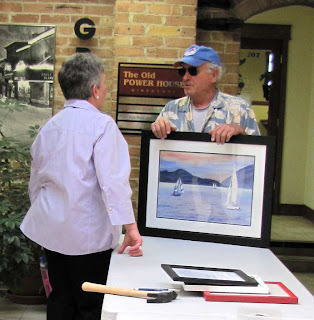
Here a visual arts committee member chats with an artist.


These mixed media shows are always so fun and sometimes a bit challenging. Here some unusual 3-dimensional pieces by a papier mache artist got a slightly different treatment.


The brick wall upstairs is always a challenge, but makes an interesting backdrop for the brighter art work.


Many of the offices surrounding the atrium have dogs keeping an eye on the comings and goings, and several of them were keeping close watch on us as we scurried about.

ArtWalk exhibits can be found at 20 locations in downtown Sandpoint, all hosting their opening receptions Friday from 5:30 to 8:00. Hope to see you there!

Sunday, June 19, 2011

A Little Book


The germ of an idea...some of the bits and pieces sent to me by Cathie in exchange for a fabric postcard, plus an image cut from a greeting card. I'm sure that had not that small piece of metallic-painted twill arrived folded, the idea that it could become a book cover would not have occurred to me. The inchie looked to have the letter "V" on it, and so I began to think of my niece Vanessa, and what the pages of a book to her might hold.


Working out the page sequencing...I remembered something I'd pulled off of Margaret's blog back in 2008: Reasons to leap out of bed. I'm not much of a leaper out of bed, but was feeling that I should be back then, so jotted down these excellent suggestions. When I asked Margaret if I could use them for my little book, she graciously replied, "
'Great artists steal' said Picasso - go ahead! Not that I regard using ideas as stealing - they never come out the same when someone else does it, and that's the interesting thing." And as I look back at that blog entry, I see that I have indeed done something different with the idea.

Working out layout for printing and test prints...I discovered that a regular 8-1/2 x 11 inch piece of paper divided up into 4 equal sections horizontally and in half vertically would produce the perfect size for the signature to fit my cover.


Working on the cover...I may have figured out the page layout, but there was still some mulling to do about them. On the other hand, I knew what I wanted to do with the cover. However, once the beads were out, I went from simply attaching the inchie with a bead in each corner and finishing the edge with a blanket stitch to something a bit more involved.


Choosing endpapers...If you click on the photo, you can see that I added beads around the inchie. Just couldn't stop with the four beads, not with lovely teal beads staring at me. I remembered some small pieces of fabric I'd marbled a long time ago, and found one with the appropriate blues and teals to compliment the cover. I little Misty Fuse holds it to the inside of the cover where it nicely hides the beading stitches.


Finishing the edges..I meant to do a simple blanket stitch with the rayon embroidery floss from Cathie, but I just kept staring at those teal beads. I'd recently watched an episode of Quilting Arts which showed adding beads while blanket stitching the edges of leaves. Oh, yes. This would make a lovely edge finish. Oh, Timothy Ely, you have influenced me greatly. Viewing the elaborate covers to his artist books was a revelation, and I spent undue amounts of time on my own. While the actual technique used in this edging is simple, my use of that embroidery thread was problematic. It's heavier than my normal beading thread so I had to find a needle with a big enough eye to accommodate it. Yet the seed beads are very small, so I had to find a needle with an eye small enough for them to still slip over. I did find one, but then ran up against the other reality of beading: the holes in beads are not necessarily consistent in size. What you are looking at here is the capful of beads I went through to find the ones that fit over the needle for that short stretch of stitching. Also, that rayon thread was a bit difficult to work with, especially since I had to peel off individual strands instead of using it in its three ply form. Nope, I'm not going to tell you how long I spent on this part - it's too embarrassing.


Cover ready to go...Gosh, isn't it beautiful though? This is the point at which I want to say, "Look, Mary, look!" That would be Mary Stori from whom I've learned almost all I know about beading on quilts. I always hope she will be proud of my efforts!


Preparing the final pages...I composed the text layout in a word processing program and printed it out on a medium weight matte presentation paper. Regular 20lb copy paper just didn't have the heft that I wanted, and I didn't have anything else on hand. I'd searched around for more images to illustrate my little book, and those that came from jpgs got printed out to size on the same paper. The rest of the images were clipped from magazines. All were chosen because of their significance to Vanessa. The text was cut into pages, folded and nested in the proper order. Then I cut out and added the illustrations using a scrapbooking double stick tape on the back.


Signature sewn to the cover...I just joined this 3-hole pamphlet style, using the same embroidery thread used on the blanket stitch. Yes, and I couldn't resist adding beads to the dangling ends after tying them off. on the outside. It is a mere 2-3/4 inches tall by 2-1/2" wide when closed.


A peak inside...Seriously, I had no idea how many decisions would be involved in making this little book. It was as bad as making a quilt, one innocent idea leading to another not so innocent one. Just deciding on size and style of font could have gone on longer than it did.


More pages...This was a totally absorbing and enjoyable process, and I am itching to take it further.

Saturday, June 18, 2011

St Hilary's Star Quilt


If you think all I've been doing lately is taking pictures of flowers and watching the lake levels rise, you would be wrong. It's just that what I was working on was presents which once done took a slow trek from one side of the U.S. to the other. I knew that the recipient follows my blog, but is also a busy girl, so some posting about this quilt was safe. Then I realized she was catching up on the blog while on vacation so I didn't dare keep talking about it, nor the other present I was making for her. But now that the gifts have arrived, I can share them with you, beginning with the stack n whack quilt I'm calling St Hilary's Star.


It finished out at about 60-1/2 x 74-1/2, a bit smaller than I would have liked, but that's what happens when you let the amount of fabric you have on hand dictate the final outcome of the design. Plus, I lost 2-1/2 inches both directions during the quilting and blocking process - a reminder to those of you used to working small if you dive into a bed-size project. Even if the batting is not supposed to shrink up when dampened (I was using a wool batt that can shrink up to 3%), you will still lose an amazing amount with the draw-up of machine quilting.

The quilt gets its name from the William Morris reproduction fabric used in the kaleidoscope centers of the stars. By shifting the template orientation with each set, each star center is slightly different. Click on any photo for a larger view.


The recipient is a real fan of art nouveau, so I knew she'd really love this fabric I used as backing.


This turned out so well - at least I think so. The lighting is a bit uneven in the pic below, but it gives you a better shot of the strippy quilt setting I chose for those big blocks.