Tuesday, May 16, 2006

Goals for Week of May 15th

I am so itching to get back to the fabric I painted a couple of weeks ago (see here). It's sitting in a place I walk by every time I head to the kitchen or living room. It nags at me daily. It tempts me with its "ignore everything else, come play with me" attitude. I heat set the tints using an oven method and I really should give them a rinse to see how it worked. Although it's been long enough now that they have probably passively set. At the moment, I don't plan to do anything else to them. They are such pretty colors and have a very delicate veining to them which should make them great for a wholecloth background or even cut up.

The painted pieces though, they definitely could use more work. I want to try imprinting a mesh design on the pink and blue one, and also stamping with the shells that did not sun print. I think I will try a flour paste resist on the leaf one to add a fine crackling to it. As for that swirly one, I think I may try something using the freezer paper discards from my contest block foundation making. Create a resist with it and either spatter or make marks with various brushes. Might even peruse my collection of stamps to see if anything there might help.

So the fabric is my main goal this week. Even though the Easter piece remains unbound (and I'm itching to get it finished too) and my room is still a mess. Hey, give me a little credit - I at least put away everything I used while making those contest blocks! Seriously, though, as much as I thought I'd be winding down work in the studio and tying up loose ends over the next few months, I feel an incredible urge to keep moving forward and start new things. Is that because I'm subconsciously trying to avoid all the mundane details that must be attended to when preparing for a move or because I truly do not want to give up my creative outlet? I think it's a bit of both. When I sensed how much I wanted to keep working, I had to ask, just how long can one put one's art on hold? How many excuses can one come up with to keep from seriously working at it? When will the perfect, right, stars aligned time finally come? Better to keep at it, make time for it in spite of life's interruptions. Let's see how much of both world's tasks I can accomplish this week.

Monday, May 15, 2006

Final Contest Block - Letha's Electric Fan


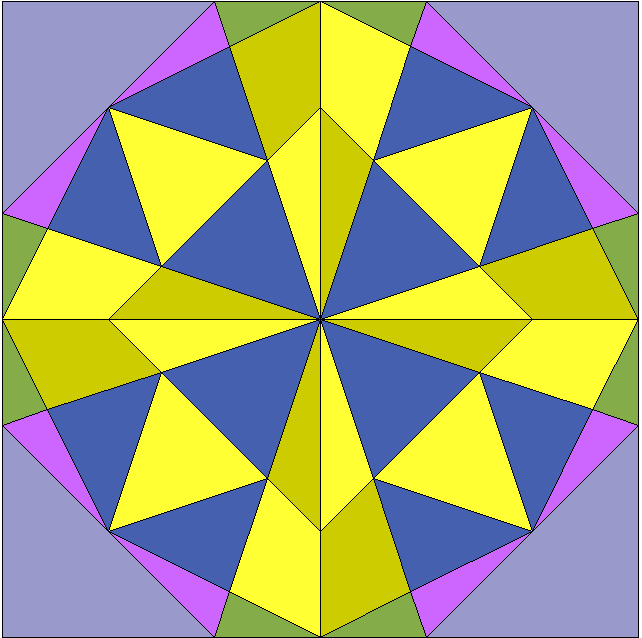
I decided to make one more block for the Marshfield Faire Peggy Beals Block Contest as long as I had the foundations needlepunched for Letha's Electric Fan (See EQ5 version here). It actually went quite well, my experience with Mariner Compass blocks holding me in good stead. I also made quick decisions about fabric selections - quick not being my forte, but happening none the less. Maybe it was because I wasn't feeling well today so didn't have the energy or tolerance for a lot of fussing, or maybe it was because I decided beforehand to use 1930's reproduction fabrics chosen from a couple of medleys. Thirties fabrics tend to blend together, not showing much contrast from one to the other because of the size of the prints and the many colors included in each.

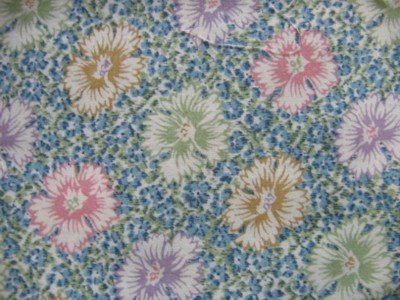
Here is the fabric that I thought I'd use for the center circle. I thought it worked well with the yellow I wanted to use for the blades. It served as a guide to pick the 5 different prints used in the arc around the fan blades. I wasn't terribly surprised, though, that I didn't think it worked at all once the block was together. This is something I learned from Judy Mathieson in her Mariner's Compass class - to leave the selection of the center circle to last and audition various fabrics through the hole remaining after the block is sewn together. From the medley packs there looked to be several good choices, at least when all was laid flat on the table for auditioning. I decided I could get a better feel if I pinned the block to my design wall and viewed the choices from a distance. Suddenly, those good choices weren't working either. Normally I would not repeat a fabric from the arc in the center, but decided to try that anyway. The green seemed the winner, so I cut a circle, ironed the edges over a circle of freezer paper, positioned with a little glue baste and hand appliqued it in place.

The background is unbleached muslin, very appropriate for a block using 1930's fabric, and the outside edges of those pieces were cut with extra seam allowance. Sewing curves always leaves room for not quite square edges so the extra allowed me wiggle room for squaring up. To my delight, the block laid quite flat. Oh, yes, and you might notice that my blades spin the opposite direction from the EQ version. I over-thought the needlepunching process - erroneously thinking I had to reverse my pattern before punching. Not so when using freezer paper.

Sunday, May 14, 2006

Mother's Day Memories

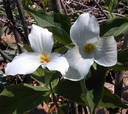
I grew up in a house perched on the side of a canyon near the base of a gulch on the outskirts of a small northern Idaho town. A dirt road wound past our house and up the gulch where three other houses perched similarly, then suddenly turned steep and narrow as it became a logging road that switchbacked to the top of the mountain. All around us was dense forests, an incredible playground for my brothers and me. One fond memory surrounds thoughts of Mother's Day - that of going up into the woods to pick huge bouquets of wild trilliums to present to Mom, who always acted so surprised and pleased. Heck, she acted surprised and pleased when her little girl proudly presented her with a handful of dandelions. Of course she'd love these beautiful trilliums. And I always marveled at how they knew to bloom just when we needed them for Mom.

I was thinking about this the other day while out walking, thinking how I miss seeing trilliums. Not that I haven't seen trilliums since moving to Wisconsin. They do grow here and I have seen them along side the road north of here. I just don't see them where I walk. And if I did, it would be a crime to pick any and bring them home. No really, I don't mean that figuratively. It really is against the law these days to removed wildflowers from their native habitat. Although I understand the reasoning behind this, I think it is a shame. While it may be teaching the youngsters of today a more responsible attitude towards nature (preserve and enjoy rather than selfishly destroy), I can't help think they are missing out on creating some wonderful memories of their own. I can't believe that the few flowers we brought home from Sunday drives in the country irreparably damaged the environment. There weren't hoards of us in the woods trampling and pulling up flora on a weekly basis. Perhaps it is different today, or at least in some parts of the country.

Still...if my mother were alive, I think I would sneak out and covertly gather a bouquet of trilliums and proudly present them to her. And she would gasp, smile and act like I'd spent a hundred bucks on roses for her. Mom - love you and miss you...

While searching around for a picture of trilliums, I ran across a couple of sites with information that might interest you: here's a description with pictures, and here's an aromatherapist and natural healer's take on the benefits of trilliums. My, I'm sure my mother would be surprised to learn that its essence is "effective for use during meditation, channeling or any time."

Saturday, May 13, 2006

Contest Block - Another Electric Fan

Didn't sew yesterday after all. Turned a bunch of errands into a day of leisurely shopping. I so seldom go into stores other than for groceries or the sort of things you get at Wal-Mart that it is a bit of a treat just to see what's available or in fashion. I wandered the aisles at Michael's Arts & Crafts after finding the one item I came to buy. I perused the fascinating array of papers and notebooks, filing options and gadgets at Office Depot before tracking down the ink cartridge I needed. I lingered among the handbags, summer dresses and luggage at JC Penney after purchasing a pair of shorts on sale (dreaming of a trip???). I dropped off a book at the library and contemplated the exhibit of black and white photos taken at a nearby falls before picking up two more books. Call it Creative Procrastination - I needed the break and different stimuli.

So today I hunkered down and worked on the "stunner" paper pieced electric fan. Foundations were ready to go and some of the fabrics chosen - I just needed to get on with it, choose the remaining fabrics and get sewing. I decided the best way to tell which other fabrics to add was to start piecing the ones I knew I'd use for sure. Fabrics do not read the same in large chunks as in small, and what sits next to them can also alter the way they read, so getting the proportions and juxtapositions in place theoretically makes the process easier. As it turned out, possible candidates I'd left out from Thursday's session weren't used at all. Here is my finished rendition:


Not sure if this is as stunning as the EQ colored version, but I like it. I'd have preferred the two yellows to contrast a bit more but I simply did not have anything in my collection of yellows that would have done that without introducing an orangish coloration. I had to agree with a friend, it reminds me more of windmills than electric fans.

I've mentioned several reason why I like doing these one-off blocks that go away - either to charity or to a block exchange - and while completing this one, I thought of another. It gives me an idea of whether or not I could tolerate making multiples of a particular block. I know many people make a sample block anyway before plunging into a project, but I've always been the type to not want to "waste" my time on a sample. I only feel like it's not wasting time if the block has someplace to go. Having a bunch of "orphan" blocks hanging about is not something I tolerate well. I like them to go away once I've learned what I need to from them.

So what was my feeling about making more of these blocks? As much as I like it, as much as I can see it has interesting possibilities, I tired of the actual making of it once I got the sections of each quadrant pieced. At this point in my journey, I am apparently in need of designs that require less meticulous sewing, fewer individual pieces, faster construction overall. I spent a lot of hours on this block, and in the final few I found my interest waning, my mind wandering, my self getting impatient and wanting to go back to pieces like "Easter in America" or the two birch tree quilts. I also marveled at how much of my fabric stash is 8 to 10 years old and the sorts of things I probably wouldn't incorporate into my current work. I'm not quite at the point of many quilters I read about who actually have cleaned out these older fabrics from their first years of quilting, but I sensed today that I was several steps closer.

I have to say that this block would have been nigh unto impossible to execute, especially with any accuracy, without the use of some kind of foundation or template method. (Although I do admit there are some excellent quilters out there with the skills and patience to make accurate blocks without that kind of assistance.) The fold-back freezer paper method worked particular well for this block because it allowed me the freedom to press my seams any direction they needed to go, including open. Can't do that with tradition paper piecing methods. It also stabilized all those bias edges so that when I squared up the block, everything was perfect. When the paper was removed, the block was perfectly flat with no distortion. Here's the back of the block showing all the different directions those seams went.


Now to decide if I want to make one more block. One part of me is quickly losing interest, another saying one more wouldn't take that much time and the pattern/foundations are already made. Ah, but then there's all the fabric choices to be made again. And I probably don't need to tell you what a mess my room is right now, how much fabric needs to be put away. The thought of getting even more out is somewhat depressing, believe it or not!

Thursday, May 11, 2006

Working in Chaos


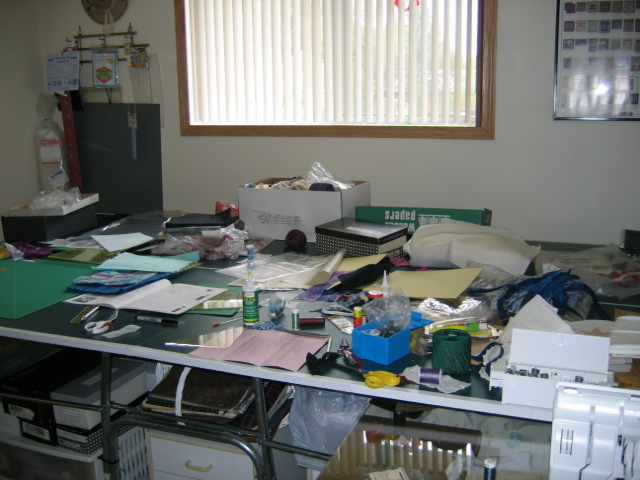
Here is what I faced when I went to work on my contest blocks this morning (see this post). Most of this is left over from the last three or four projects: things I can put away once I write up my documentation sheets on each, or perhaps the original project sparked another idea and I don't want to shuffle the reminders aside. Or I don't quite know what to do with some of it, or I just hate taking the time to put everything back in its place. I equally hate working in this much mess, but today I'd rather cut and sew. That little corner on the left end of the table, just big enough for my cutting mat, is where I managed to do what I needed to do. The clutter only got worse, by the way, as I drug out fabric options and stacked them around my little space.

Here's the first thing I worked on. Remember me commenting that I'd make this if for no other reason than to warm up on it? Well, warm up indeed! I've been too long away from this kind of work and I felt clumsy working out the cutting dimension and picking the appropriate fabric. It's one thing to settle on a color combination and quite another to actually find workable options in your stash. This is such a simple block that it should have gone together more quickly, but as I said, I was feeling a bit rusty. But I am fairly pleased with this. It reminded me of another reason I enjoy doing these one-off blocks for charity - it helps me use up some of my older fabric. The geometric in the outside triangles had a date of 1996 on the selvage. And the purple one is another heart fabric left from a teaching sample where I had no other choice. As I've noted before, I'm not much for using hearts in my work, but I do think they are fine for charity quilts. Click here to see the EQ coloring of this block.

I thought I would make Daisy Fan today, but once I got out my templates, I realized they weren't the right shape and would leave a pie shaped hole at the corners. I fiddled just a bit trying to see if I could adapt them before it occurred to me it would be simpler to print out templates from EQ directly on freezer paper. Not today, I decided.

Instead, I prepared my foundations for paper piecing Letha's Electric Fan and this version Electric Fan. I plan to use Judy Mathieson's modified version with needlepunched freezer paper foundations that are folded back along the stitching lines rather than sewn through. See this entry for more on that. As long as I was cutting freezer paper and had the old needle in the machine for the needle punching, I also prepared my foundations for Irish Eyes - a wall quilt I want to make soon for a friend's daughter.


I had lots of interruptions early in the day, so didn't have time for any more sewing, but did take a few minutes to consider fabric for the second Electric Fan. I am so motivated to make this one that I just had to do a little more prep work so I can get right to it tomorrow. I made some cutting templates, then laid out some fabric. My yellow stash is not the best but I think I have found two that will work together and have a great blue to set them against. Several options for the outer colors are still stacked around the yellows and blue - I couldn't make up my mind and figured it was best to give it a rest.

Wednesday, May 10, 2006

Creative Procrastination

This week Omega wrote a very good breakdown of procrastination (read it here). The passive and active kinds, she notes, are important to the creative process. It reminded me of Rollo May's observations in his book "The Courage To Create" written in 1975. Interviews with creative types and his own experience convinced him that those breakthrough moments - the ones where solutions pop up seemingly out of nowhere when we are not actively trying to find them - are not the product of some force outside ourselves (you know - the way we artists so often attribute our insights to the muses, for instance). These aha moments don't come unless we have been trying to work something out. In our break moments, when we go do something totally unrelated, he believes, the tiniest bit of stimulation may trigger the memory of something we need to complete our work, or just letting the subconscious brain chew on the information it has without our conscious getting in the way will result in creative solutions. This quotation sums it up nicely:

"Obviously, poetic and creative insights of all sorts come to us in moments of relaxation. They come not haphazardly, however, but come only in those areas in which we are intensely committed and on which we concentrate in our waking, conscious experience."


In other words, what we may think of as procrastination, he may term relaxation, and without doing that periodically, we miss out on the best insights.

Both May's words and Omega's are encouraging. How often are artists described as "dreamers" in a negative context? How often do I feel guilty because I'm not putting in 8 hour days actively sewing, designing, cutting, producing? A finished quilt, poem, painting, sculpture is proof of our hard work. Less easy to justify are the moments of dreaming, pondering and just getting away from the work long enough to let the subconscious mind work out solutions while we walk through the park, page through a magazine, write on our blogs. It's good to hear that our "relaxation" or "procrastination" is an important part of the creative process.

Yet let's not get too cocky here. Omega warns of a third kind of procrastination which is procrastination and nothing more. I call it avoidance mode and all it is is non-productive time, wasted time that only prolongs the inevitable and in the end makes me feel worse about myself, not better.. May alludes to that concept too when he points out that relaxation only works in areas we are intensely and actively committing our time to.

For another Rollo May quote on creativity, see my blog entry here.

Tuesday, May 09, 2006

A return to tradition

In yesterday's post, I talked about working this week on fan blocks, or at least blocks that would fit a contest theme of fans. And I was feeling pretty ho-hum about it. My mind was stuck on the typical Grandmother's fan, that quarter circle of fan blades set in the corner of the square. Last night I quickly leafed through a couple of books which confirmed that yes, when you say fan, that's the pattern that pops up. So today, I turned to my trusty Electric Quilt software to do a search of block names including the word fan, hoping to find an interesting variation or positioning.

Right away, among the numerous varieties of single fans set in one corner, I found Daisy Fan which appealed. Here each fan has just 3 blades and by setting one in each corner of the block, they delineate an interesting center shape. I'm thinking, quick and easy to piece, quick and easy to machine or hand applique to the block base. I even have rotary cutting templates for the blades. A definite candidate.


I'm also starting to see blocks that have no curved pieces. Could I be that lucky? It would seem that some quilter along the way saw fans in simple triangles and named this one Electric Fan. A snap to cut and piece, I will surely make one of these, if only to use as a warm-up.


Then I spot Letha's Electric Fan. Wow - really different and interesting. More work for sure, but I know I can print out templates for the curved sections and a separate paper piecing template for that strip of odd shaped rectangles. Shouldn't shy away from a challenge - this one is demanding to be considered, so I print out the appropriate patterns.


I go back to considering those blocks with straight seams and find this stunner, another one named Electric Fan. Oh, too many pieces, I think, too many sharp angles. On the other hand, if it can be broken down into paper piecing units, it would make a wonderful block to submit. EQ5 agrees that a quadrant can be broken into 3 sections for paper piecing and each quadrant of the block is the same, so I print out the foundations "just in case." Even if I don't make one for this contest, I think I'd like to fool around with it at some point.


Finally, I noticed yet another Electric Fan that is a combination of half-square triangle units, squares and drunkard's path units. Not too complicated, and the few curved units add interest. Again, I have some rotary cutting templates for the drunkard's path pieces that would make those quick to cut, so I might give this one a try.


So much for ho-hum fan blocks. I think I found plenty to play with that will hold my interest.


Monday, May 08, 2006

Goals for Week of May 8th

For once I have nothing to carry over from last week, but on the other hand, I couldn't think what I wanted to do this week when time allows. The mind-wandering went something like this: Oh, I suppose I can bind the Easter quilt (see previous post) or perhaps take a day to get the paints out again and add some elements to the sunprinted fabric I was less than pleased with. Maybe I should just catch up on notes, or put stuff away, wash a stack of fabric...because I feel at loose ends and not at all like working at something creative. On my way to the computer this morning, I took a quick glance at the studio calendar and suddenly remembered I should be working on blocks for the annual Peggy Beals Block Contest.

I found this contest through an ad in a quilting magazine, back when I first came to Wisconsin and started looking for places to send my quilts. The idea of making a single block ( or two or three) instead of an entire quilt was very appealing, and if you were willing, your block(s) would go into either a raffle quilt (of the winning blocks) or quilts that would be given to Ronald McDonald house. This was in conjunction with the Marshfield Fair in Marshfield MA and organized by Peggy Beals. I came to find out that Peggy pretty much ran the contest by herself with some years receiving as many as 75 entries. Yet she always added a personal note when notifying of winning blocks or responding to requests for entry information. She was always so encouraging. After Peggy died, helpers rallied to see that the contest continued and renamed the contest in her honor. I'm guessing I've entered several blocks every year for over 10 years now and for the last seven, one of my entries has made it into the raffle quilt. Making blocks for this contest is a tradition I enjoy; it allows me to experiment with different patterns and fabrics (a few guidelines leave room for lots of interpretation) while contributing to a worthy cause and can even reward me with a cash prize. Win, win, win!

This year the designated theme is "fans" with no color suggestion (some years they pre-determine the sashing color). Fans are not my favorite, and I pretty much got them out of my system on this quilt made in 1998. If it looks familiar, it may be because it recently showed up in the Readers' Quilt Show section of Quilters Newsletter Magazine November 2005 issue. Amazing how long they hold on to photos before publishing! This picture is not the best but you can see a larger version by clicking on it. Every block in this original design is some variation of a fan block.


So in spite of my feelings about fan blocks, I refuse to let Peggy down. I'll peruse likely candidates in my EQ5 program and no doubt have fabric strewn everywhere before week's end. "Easter" & painting may take a backseat after all this week but we shall see.

Saturday, May 06, 2006

Progress on "Easter"


I was in a rebellious mood today, determined to ignore what I "should" be doing and spend some time in the studio. Since my painting play day on Tuesday (see previous post), I've not done anything "creative" and in fact, have had one of those weeks again where interruption after interruption kept me from getting much done off my regular "to do" list. Zip, and the week was gone. So it is with great pleasure that today I can cross off both remaining items off my goals for the week: Easter in America is quilted and the journal version too!

When I last reported in on this quilt (see here), I was wondering about the proper batting. The journal size has been layered with Thermore for awhile so I started with that to test both how I wanted to quilt it and what thread to use. The Thermore was far too flat for the effect I want, so that convinced me I was on the right track thinking Hobbs wool would be the ticket. I used monofilament thread and used the edge of the presser foot as a guide to run lines about 1/4" out from the couched thread and edge of the foil. That makes those sections poof up. Click on the picture for a larger view that shows this better. I greatly reduced my presser foot tension so there wouldn't be problems with shifting. I think the spray baste holding the layers together really helped with that too. I started in the middle, ready to rip stitches and try something different if I didn't like the effect, but I pretty much had to quilt all four center areas before I had a good feel for the overall effect. I've said it before - I sure wish I could visualize the finished product better so there wouldn't be these moments of uncertainty, or downright disappointment. In this case, once I'd quilted around the outer squares, I knew this was exactly the look I wanted and that I wouldn't need to add any quilting elsewhere. And I was happy that I'd used the clear thread.

I was also pleased that although this started as such a secular rendition of a religious holiday, I got my crosses after all - don't know why I couldn't see in my mind's eye that my quilting lines would form them. Now to decide on binding...


Wednesday, May 03, 2006

Goals for May & Week of May 1st

In April, I had a vision of what I wanted to accomplish for the entire month and broke it down week by week in one sitting, which was new and exciting. Up until then, I literally could not think beyond the current week, nor felt compelled to try. I thought perhaps this was a sign of growth in the goal setting department, a promise of becoming adept at making long range plans. I figured my list was pretty ambitious so I wasn't depressed or frustrated (much) when things did not go to plan. I ended up setting a few goals aside to address a couple things I hadn't foreseen. So in the grand scheme of things, I think May went pretty well, even though I was left with some items to shift into May.

I don't have big plans for May. In fact, I thought about not setting any monthly goals at all. I know I'll be concentrating on non-studio things all month, so any quilting or experimenting I do will be catch as catch can, tying up of loose ends, working on projects needing little decision making. But after considering it for a few days, I decided I could lay out a monthly plan anyway, just a few things to have listed so that if a spare moment presents itself, I won't be wasting time wondering what to do with it. As I said, there's plenty left from the April list to get me rolling and one new thing that's been on my mind for awhile:
  1. Play with painting on fabric (and possibly other surface design techniques)
  2. Make "Irish Eyes" (long overdue gift for a friend's child)
  3. Finish "Easter in America"
  4. Finish journal version of Easter
  5. Make journal interpretation of Wisconsin Spring
As for this week, I opted for the painting and then quilting both versions of the Easter piece. Goal one is already done! Tuesday surprised me with being not only sunny, but relatively calm, the first time sun has not been coupled by gusty winds since I bought the paints for sun printing. Certainly not what I planned for the day, but I decided to seize the moment. I had mixed success but now have some practical experience and samples to build on.

I used paints from a Setacolor Transparent kit for sunprinting. All recommendations were to thin the paint with water in a two to one ration. I chose 4 colors to work with: #11 Colbalt Blue, #23 Oriental Red, #49 Fuschia and #13 Buttercup. I didn't want to mix up very much of any of them so used some very small plastic vials with openings large enough for the 1" foam brushes I planned to use. I was hoping the paint would pour, but it is so thick that it really didn't do that very well. I had a very difficult time figuring out just how much water comprised the 2 parts so I'm sure some of the colors were thinned more than others. Also, the buttercup didn't want to dissolve as I stirred - either with a plastic spoon or a thin dowel. Perhaps this all would have been easier if I'd been willing to make up bigger batches but I wasn't confident that I had airtight containers to store the extra for another session that might be days or weeks away.


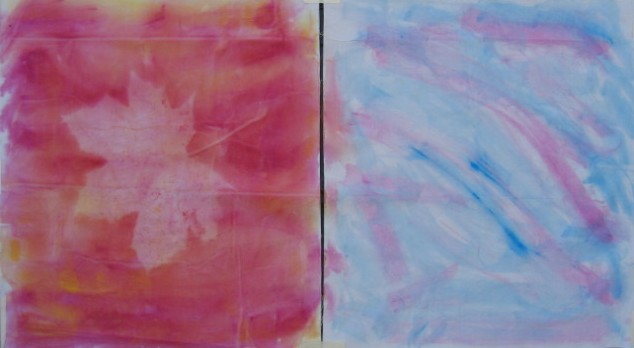
Here are two attempts at sunprinting. I used a tightweave pima cotton taped to a plastic-covered board and wet with water. I used a separate foam brush for each color, randomly stroking it on. The oriental red and buttercup were used on the left; after applying in horizontal strokes that only minimally overlapped, I went back over it with buttercup vertically. I was going for a more orange color but these two weren't giving me that. Ditto for what was going on in the piece on the left. My dyeing experience led me to believe that if I brushed the cobalt and then the fuschia, I'd get more of a purple effect. Both colors were lighter than I expected except for a few of the brush strokes. In the future I'll be more bold and try mixing the undiluted paint to the colors I want before diluting it for painting and perhaps be more careful about the proportions of water to paint

The left side got a rather large maple leaf centered on it; the right side had various seashells placed on it. Then out into the sun they went. I spritzed them once or twice with water as they seemed to be drying pretty fast. As you can see, the leaf sunprinted nicely but the seashells hardly show at all. (Click on any of the pictures for larger view.) Also, I noticed that the folds from the garbage bag I used to protect the board sunprinted. Didn't really want that but doesn't exactly ruin the piece either.


I had one more square of this fabric so I grabbed a plastic bag and slipped a box lid into it which was just about the right size. This time I dipped the brush for the oriental blue in the little bit of buttercup left to paint arcs alternating with blue arcs radiating out from the center. This struck me as pretty boring so I tried a few swathes of fuschia too. I took it outside, spritzed it a bit and arranged clumps of selvages over the top. The selvages didn't sunprint at all, but the spritzing caused the paints to run together a bit more and apparently pool in the uneven surface of the plastic bag. I think that's what caused the darker spots and streaks. On the top above is the front side and below it is the back. I rather like the back better - softer and more blended - but those spots show pretty badly. A design opportunity?

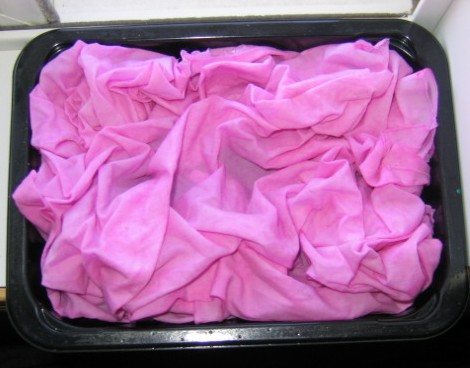
I obviously need more practice with my brushstrokes, controlling how much paint goes where. But for the rest of this session, I just wanted to try tinting with very diluted paint - using up what was left by dumping it into the container of water for wetting the brushes and fabric. I scoured some bleached muslin and while wet tore it into four squares. Starting with the blue, I pushed the fabric into the container getting it thoroughly saturated, squeezed out the excess, arranged it in offset accordion folds and laid it out in the sun. I dumped what was left of the fuschia in next, saturated another piece of muslin and squeezed out the excess and laid this one out flat in the sun with some of the seashells on top. At this point I added the end of the oriental red (all the buttercup had been used up) and saturated another piece of muslin, then arranged it slightly crumpled in the sun. All this to test the information I'd read that wrinkles and scrunches will also sunprint. Well, I did get some delicate veining, nothing very pronounced, so again, I think this would work better if the paint was darker and less thinned. However, I did end up with a pretty stack of pastels. In this picture they are sitting on my "wipe cloth" which was a piece of unbleached muslin wet in some places and dry in others. As I worked, I'd wipe off my hands or a brush on this cloth, then as I rinsed out my little vials when cleaning up, I poured the tinted water into a bigger cup and dipped the whole thing in that before drying in the sun. I'll keep using this that way until it becomes interesting.

I had one more piece of muslin left and a bit of the blue/fuschia/oriental red mixture so I dunked it and scrunched it much as the previous piece, leaving it pretty wet, sprinkled some salt on it and have left it inside to dry out of the sun. Just wanted a control piece to see how much difference drying in the sun was making. It's still drying.

My general sense is that all these pieces need more done to them to make them more interesting and worth the effort. And that I've got a lot to learn about working with textile paints. Somehow, I find myself yearning for the Procion dye methods I'm familiar with (but don't have a place to work with at the moment). Yes, I'm still out of my comfort zone here.

Sunday, April 30, 2006

Progress Report on Last Week


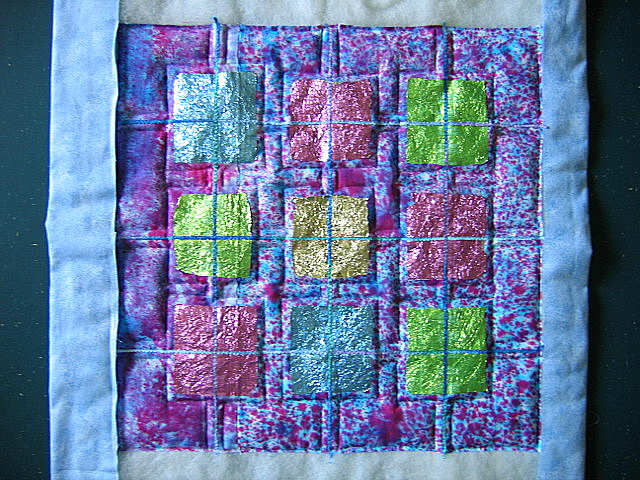
My goals for last week were simple: Bind the baby quilt, glue foil on Easter piece and mail off any entry forms. Wednesday saw completion of that last one (read saga here), and Thursday saw completion of the other two. Today was a bonus as I found a little time to couch the threads on the Easter piece, as you can see above.

I think I'm going to call this "Easter in America." I'm not sure if other countries put so much emphasis like we do on the Easter bunny and chocolates and all the pastel colors that seem to represent the season more so than the religious symbols. While I certainly think about Easter Lilies and the cross, not to mention the black many churches are shrouded in through Good Friday, I also think about brightly colored Easter outfits so refreshing after a long cold and dark winter, dyeing eggs in a variety of pinks, blues, yellows & greens, and spatter painting a stencil design of a bunny on pink construction paper. That's why the background fabric in "Easter" just says "Easter" to me. (For more information on this fabric click here.) The fact that in recent years the candy companies started packaging my favorite - Reece's Peanut Butter Cups - in these pastel foils reinforces the idea that this color scheme says "Easter" in the same way that red and green say "Christmas."

A little technical info: When I applied Beacon Gem-Tac to the back of the foil, I used a small stencil brush to get good coverage. When I was doing my samples, I was squeezing the glue directly from the bottle onto the foil and trying to spread it around with the tip. Then when I glued the larger pieces to the journal size version (which is still unquilted, incidentally), it occurred to me that I could use a brush once the glue was squeezed onto the foil. The brush I chose, though, had soft bristles so it didn't work all that well. In one of those "Duh" moments when I was assessing my collection of brushes for fabric painting, one of the stiffer bristled brushes presented itself as the solution to spreading the glue. I dipped the stencil brush directing into the glue, then used a combination of stroking and pouncing to get glue on the entire surface of the foil. Worked great.

The chenille thread is couched on with monofilament clear thread with a zigzag stitch set at 2.0 length & 3.0 width and newsprint pinned underneath as a stabilizer to prevent draw up.

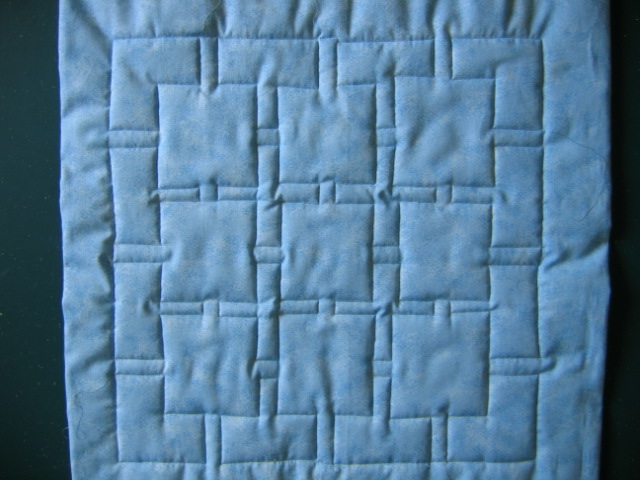
Next step will be to quilt it, and I'm wondering what batting to use. I want the thread and foil squares to be puffed up - I especially want the thread to look like it is floating. I'm not sure that Hobbs Thermore (a fairly thin polyester) will give the amount of relief I'm looking for, yet I'm afraid that if I use Hobbs Wool (very springy and is sometimes used for pseudo trapunto work), it will be too puffy. I'm also thinking that I'd like the batt to provide more stiffness than drape to be support under that foil. If the piece needs to be rolled or folded, I don't want the foil to crease or conform to a shape other than flat. Guess I need to try a few samples.


Saturday, April 29, 2006

Afterthoughts on Knowledge & Creativity

In my post on "Cycles," I stated, "Knowledge helps suppress the anxiety which holds my creativity hostage," referring to the fact that I often need to research and gather technical information before I am comfortable attacking a new method of working. The next day I was reading from Rollo May's "The Courage to Create" and ran across this thought:
The fact that talent is plentiful but passion is lacking seems to me to be a fundamental facet of the problem of creativity in many fields today, and our ways of approaching creativity by evading the encounter have played directly into this trend. We worship technique - talent - as a way of evading the anxiety of the direct encounter.
I have often suspected that my penchant for obsessive research before beginning a technically challenging piece had a lot to do with procrastination, or as May puts it, "evading the anxiety of the direct encounter." But I stand by my original premise that a little advance knowledge goes a long way toward giving me the courage to overcome my anxiety in order to make that direct encounter. Or perhaps more precisely, to ensure a more successful and less frustrating encounter.

Still no matter how many facts one amasses, there's no substitution for experience. A deeper understanding is gained in the doing, and problem solving is never as effective in theory as in action. At some point I realize I'm just prolonging the inevitable, the leap into the abyss. I guess I'm thinking all that reading will be my parachute in case the abyss is deeper than I thought.

This quotation also struck me because it is similar in tone to the criticisms being made of the art quilt movement today which often seems to be technique driven. Yet it was made in the early 1970's. Do I hear a chorus of "The more things change, the more they stay the same?"


Thursday, April 27, 2006

More confidence building & a little freedom

Wednesday was a great day. I was ready take my last guild newsletter to be printed and processed for mailing. Although this monthly task has been a good learning experience and gave me a forum for sharing information and insights, now two years later, I'm very ready to be free of the responsibility. The sense of release was palpable as I stuffed them into the mailbox.

I'd also made a decision about entering two more juried shows, both with deadlines this week. Although very last minute, I pulled together what I needed for the entry packet to Images 2006 - no awards, but a chance to have a piece for sale - and resisted the urge to try for Quilt Odyssey - some prize money but no opportunity to sell.
I've had pieces in Quilt Odyssey before, and in recent years, the restrictive hoops a successful entrant must jump through have become more of a pain than they are worth. Not to say that the organizers are not justified in what they ask; I'm sure they've had some bad experiences that have led them to this point. But the rewards and prestige just aren't there for me anymore, I'd need to take better pictures of the piece I'd submit and I think it is the type of venue I'm trying to get away from but instinctively lean towards out of habit.

Actually, I didn't have to make my final decision on Quilt Odyssey until Friday, so on Wednesday, I was still considering it but it was not foremost on my mind. Putting together the entry packet for Images 2006 and getting it in the mail was the goal. It required learning another function of my imaging software and coming up with a quick solution to producing a 4 x 6 print when at midnight I discovered my printer low on ink. It required believing in myself enough to follow through in the face of adversity.

As I drove off to the post office, I found myself thinking, "This is the new me. This is my new life. This is who I want to be." I've been slowly making the break from traditional quilter to contemporary or even art quilter, a break which is more mental and emotional than anything, a break of habit to pursue a form that more closely represents where my interests have wandered. Breaks like this come easily to some people, but I struggle with giving up anything I've invested a lot of time and emotion in, as I have my traditional quilting. It's scary striking out on a new path, but each step along helps build the confidence that I can do this and that I indeed want to do this.

By the time I got home, it was easy to drop the Quilt Odyssey entry information into the trash. I could clearly see now that it did not meet the criteria for where I want to go with my quilting at the moment. And that realization was nearly as freeing as being done with my newsletter responsibilities.

Tuesday, April 25, 2006

Cycles

I definitely go in cycles. Overall, I try to balance my activities but there are times when I definitely "binge" on something until I'm good and sated. Something or someone piques my interest and the next thing I know, I'm reading everything I can about it. Eventually, I reach a point where I'm tired of the subject or at least reading about it, my brain saturated like a sponge raised dripping from the dish pan. Time to give it a rest or put the information to use. Sometimes between research and practical application, I go through a buying stage, adding references to my collection and supplies to my stores.

Right now I'm at the end of a reading and research cycle. I binged on 8 or 10 library books on surface design, comparing them to a few books I own. I'm not the sort of personality that jumps into new things comfortably unless I have some background knowledge first. I've been dabbling a bit with paints on fabric, but had so many basic questions that I felt I needed a crash course to avoid stumbling and bumbling along, wasting time and materials. This range of books certainly gave me that.

Now I understand about the different types of paint and how to use them, the types of brushes I should buy, how to set up my work surface, the pitfalls to avoid. Now I have ideas of how to play with the basic rules to achieve interesting results. I've ramped up some confidence and added a few paints and brushes and such to my "surface design" cart. And suddenly, I find I don't want to read another word or look at another picture on the subject. I'm ready to squeeze some information out of my saturated brain and get on with the play!

This is an ongoing theme in my creative journey: Knowledge helps suppress the anxiety which holds my creativity hostage.

Monday, April 24, 2006

Goals for Week of April 24th

It's guild newsletter time again (but the last one I have to do), so the first part of the week is devoted to that...and a little catch-up on housework and such. After my successful push last week to finish two pieces (see previous post), I'm not feeling particularly compelled to do great things this week, but should try to tie up some loose ends:
  1. Bind Cobblestones baby quilt and ship.
  2. Glue foil to Easter piece
  3. Check for any entry forms that might need mailing
If I find time or motivation to do more, I'll check my master list of goals for the month for guidance and consider anything else accomplished a bonus.

Sunday, April 23, 2006

Insufferably Pleased With Myself


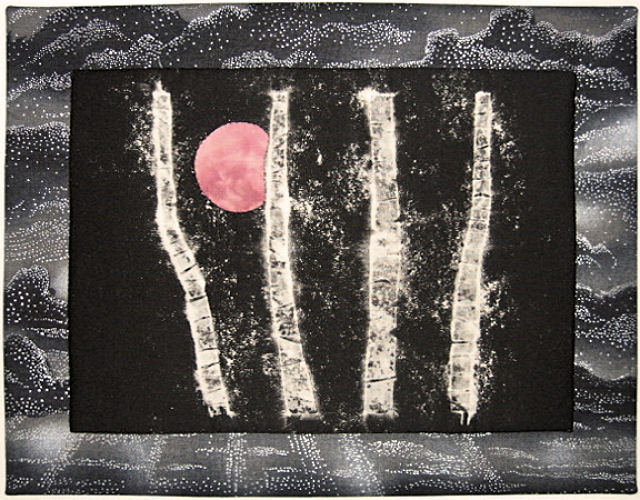
In my goals for the week, I stated that I only wanted to finish up Strawberry Moon and perhaps a second piece for submission to Small Works II. I knew the first could be done and here it is. It was that second piece that was questionable. Also, upon closer scrutiny of the directions, I needed to get the paperwork in the mail a few days earlier than my mind was telling me. In other words, both quilts finished and photocopied, and the paperwork filled out and mailed no later than Monday.

I guess I always need this panic push deadline business as motivation, as much as I hate to admit it. What I hate about working that way is that sometimes I don't leave myself enough time and short change the work. This time, it merely made me get moving.

Friday was a great day in the studio. I'd thought through how I wanted to do the second piece so when I entered my studio it was just a matter of doing it. No floundering, wondering, speculation, time-wasting. All the particulars had been worked out in my mind while doing other things, fabric picked, master pattern found the previous day. Everything went according to plan, I didn't feel rushed and the work was enjoyable. I love days like that. Although based on the same design as Strawberry Moon, this companion piece, Silver Birches, has a much different feel to it. A friend remarked it had a more "industrial" look with all the satin stitching than Strawberry Moon which is all hand stitching. (Click on either pictures for a larger view.) Now there's a comment you probably won't find on any judge's sheet! But I thought it was a good observation. I'd like to try this again with a different technique and softer look, something a bit more ethereal.


Saturday I got my photocopies made, entry form completed and all in the mail. Now if one or both pieces can make it past the jury into the exhibit, I will be even more insufferably pleased!

A few tech notes for those interested in process:

Strawberry Moon's tree trunks were discharged with bleach, using a freezer paper stencil to delineate the areas effected. The moon area had fusible web on the wrong side, then the area was cut away. A small piece of hand dyed cotton was placed underneath and fused in place - effectively, reverse applique. It was then layered with Thermore batting and hand quilted with black rayon thread along the tree trunks and with an Oliver Twist hand dyed cotton thread around the moon. The turning line was marked in chalk and I ran a line of hand basting over it through both layers, then centered it over a pre-made "mount." A few touches of fabric glue were applied to the batting to keep the center from sagging away from the mount. Then I turned under the edges (including the batting) along the basting line, pinned, and slip stitched it to the mount through all layers.

Silver Birches started with a piece of batik cut slightly larger than finished size. Using a light box, I traced the trunks from the master pattern onto the right side of the batik, then cut them out. I spray basted the back of this and then centered it over the silver fabric which became the tree trunks (essentially, reverse applique). I free cut bias "wisps" from a sheer for the fog and played with arrangement, marking with a white pencil the final positioning. These also got a little spray baste on the back so I could stick them in place and cut away sections that would be "behind" a trunk, allowing those raw edges to be caught when the trunks were appliqued. Next I spray basted one side of a piece of Thermore batting and centered the "top" over it. Then I trimmed this to the exact finished size, spray basted the back and centered it over a pre-made "mount." Using a walking foot and black rayon thread, I zigzagged around the outside raw edges first, then along the raw edges of the applique (trunks). Finally, I used a looser zigzag stitch and clear monofilament thread to secure the edges of the sheer "fog."

The "mounts" were made by bonding Decor-Bond cut to the exact finished dimension of the mount to the wrong side of the "top" fabric and fusing a 1-3/4 x 6 inch rectangle of WonderUnder to the wrong side of the "back" fabric. (These two fabrics were cut about 1/2 inch larger all way around than the finished size.) A slit was made through the WonderUnder to within 1/2 inch of either end for turning later. Then the front and back were pinned right sides together, running the pins parallel to the Decor-Bond. Then I stitched all the way around next to but not through the Decor-bond, trimmed the seam allowances to 1/4 inch and clipped the corners, and turned the piece inside out, poking out the corners until they were square. Pressing from the front, I gently rolled the back slightly under the edge so it wouldn't show from the front, creating a perfect knife-edge finish. Finally, I flipped the mount back side up so I could smooth the slit together and fuse it in place.

Finished size of both pieces is 14" x 11"

Thursday, April 20, 2006

Adhesive Trials

I promised to post the results of my search for a glue to adhere metal to fabric, and then promptly forgot to do it. Hell to get old, as my father used to say.

First, my criteria: The adhesive needs to bond without using an iron. It must dry clear and flexible and be supple enough to allow machine stitching through it once dry. It must work on a relatively large piece of medium weight foil like candies are wrapped in ( not as heavy as aluminum foil and not the product used for "foiling") without the foil needing to be wrinkle free. I must be able to apply it to the entire surface as there will be no sheer overlay to hold things in place. And it should be safe to use on fabric - i.e. archival.

Some of the results were predictable as in, yeah, I didn't really expect that to work. Others surprised me, as I expected them to work based on the description that came with the adhesive, but they didn't. In retrospect, I may have skewed some of the results because I didn't think to rinse the foil before bonding trials. One glue was very specific about both surfaces needing to be clean and free from oils - makes perfect sense. So for the last few tests, the foil had been soaked in an ammonia solution, rinsed and left to dry. It also occurred to me that I might not be getting an even application of the adhesives on the foil which would result in what might look like failed adhesion, so was more careful about that in the last samples. Almost all of the glues required lengthy drying time - at least 24 hours - which I think was mostly (but not entirely) related to, how soon they could be immersed in water and still hold.

I should also note that Vicky Taylor-Hood from the Surfacing Yahoo Group recommend I try Jones Tones Plexi Glue, stating, "It's available all over the place," but I couldn't find it in my area. If I ever run across it, I will buy some, because Vicky has used it a lot with excellent results.

  • Permanent Glue Stic: Not specifically for fabric but rated acid free. Loved the way it went on, foil peeled right up.
  • Fabri-Tac by Beacon: This works so great fabric to fabric, but here peeled even more easily than Glue Stic. Clear adhesive that dries clear.
  • Aleene's Tacky Glue: I found a reference suggesting this for foiling, but it doesn't work here. Lack of heat? Should have let it dried some before pressing together? White glue that dries clear.
  • Mrs. Glue: Supposed to attach glitter, sequins, beads (& more!). Took longer than the 24 hours suggested to dry and still the foil peeled off. Also is thicker and stiffer than others tried so far. White glue that dries clear.
  • Loctite Super Glue: Yeah, it works...no surprise. Also no surprise that it dries rock hard and was difficult to apply partly because it dries so fast. Clear adhesive.
  • Gem-Tac by Beacon: I really liked the ease with which this glue applied. I didn't press the foil down very firmly on the fabric so it didn't soak into the fabric as much as some of the other glues. That may account for why the foil reluctantly peeled back in some places but held firm in others. Or perhaps I didn't get it spread evenly enough on the foil. Nice & flexible. I want this one to work. White glue that dries clear.
  • Quick Grip by Beacon: This was more like a super glue - clear with lots of fumes - but it didn't set instantly making it easier to apply than I anticipated. Dries clear and flexible, although it felt a little stiffer than Gem-Tac. Best of all, the foil is Really Stuck Tight to the fabric! Not clear how it might effect fabric over time although it definitely says it is for use with fabric.
I have to say I'm quite impressed with the Beacon line of adhesives now that I've run these tests. They really do what they say they will do. (Plus, for those for which this is important, it is made in America.) Since both the Gem-Tac and Quick Grip were the only glues in these trials that work, they were the only ones that I tried sewing through. I put together a small sample to test couching threads over the glued down foil using metallic thread through a #80 Metallic needle and a zig-zag stitch. Absolutely no problem sewing through either whether it was through a single layer of fabric or layered with backing and a thin poly batt. I also was more careful about good coverage over the foil on these samples and got a better result with the Gem-Tac. Since it is odorless and Quick Grip is not, Gem-Tac won out as my choice for this particular application.

Tuesday, April 18, 2006

Signs of Spring


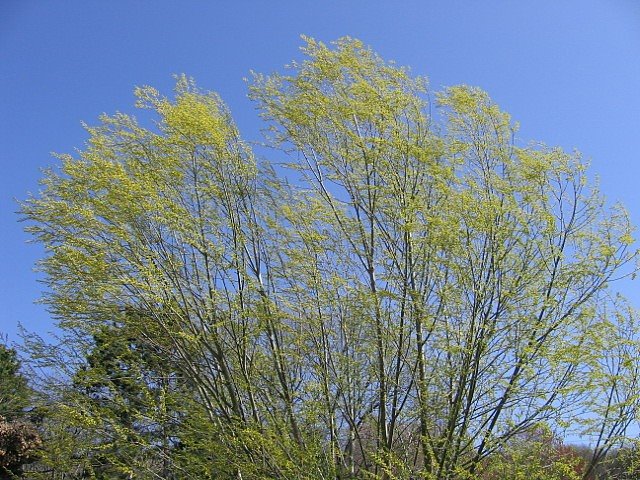
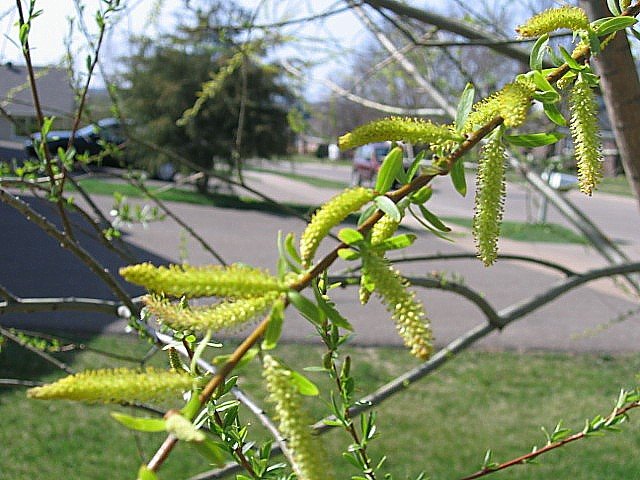
I remembered to grab the camera this morning so I could record how spring is shaping up in my neck of the woods. I apologize for the quality of some of these pictures; it was a bit breezy and I was one-handing it for the most part since I had the dog along on a leash, occupying the other hand. As I predicted, the above average warm weather of last week coaxed the flora to show signs of life by Saturday. The willows seemed to be the first to take notice, and by today they are fairly leafed out. On closer inspection, I found they also had their seed pods unfurled.


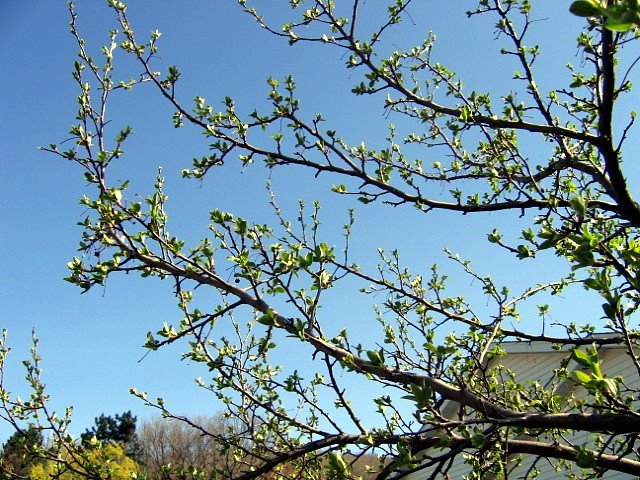
Near this willow are some young flowering plums. They are not so sure that spring is really here.


I'm not sure what this tree is, but it is willing to believe it's time to leaf out.


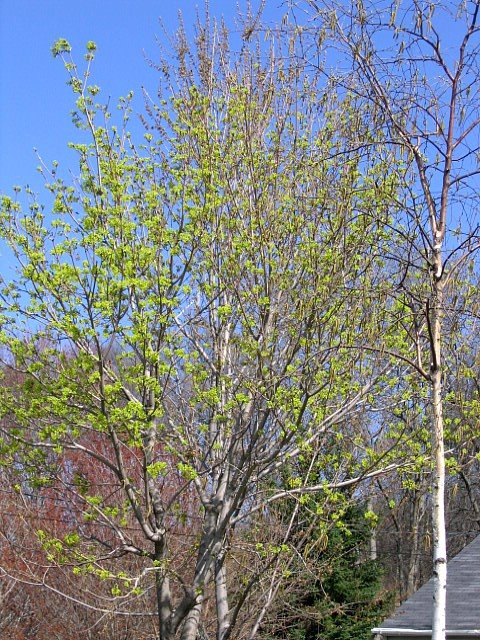
I don't know what this tree is either but it's ready to get on with it too.


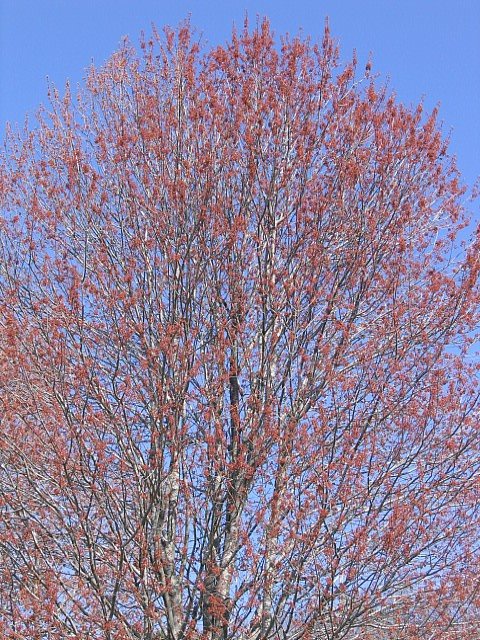
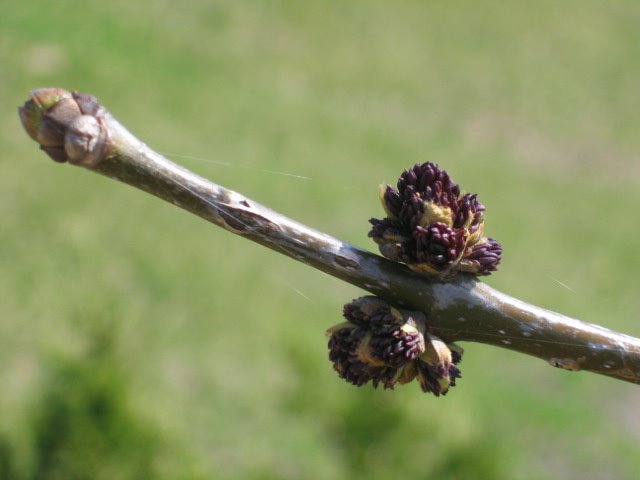
Not all trees bud out in green. It's easy to spot these red ones which may be maples.


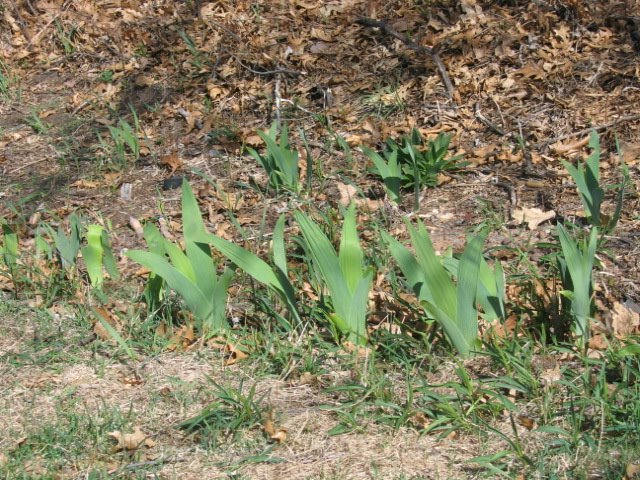
Bulbs are pushing their way through the warming ground...these are iris I think.


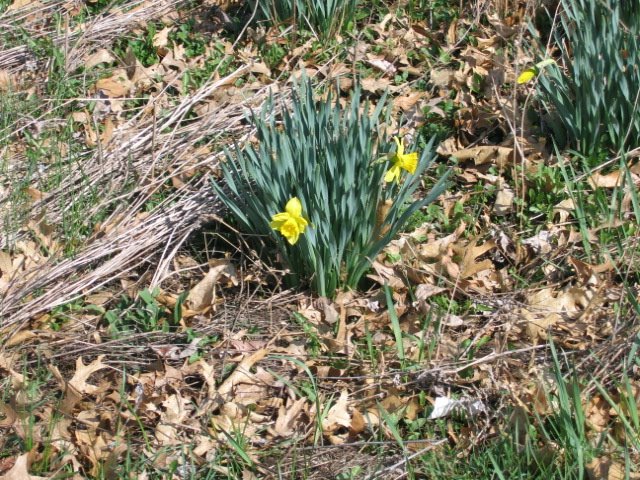
And look! I didn't think we had anything blooming yet, but here are some early daffodils.


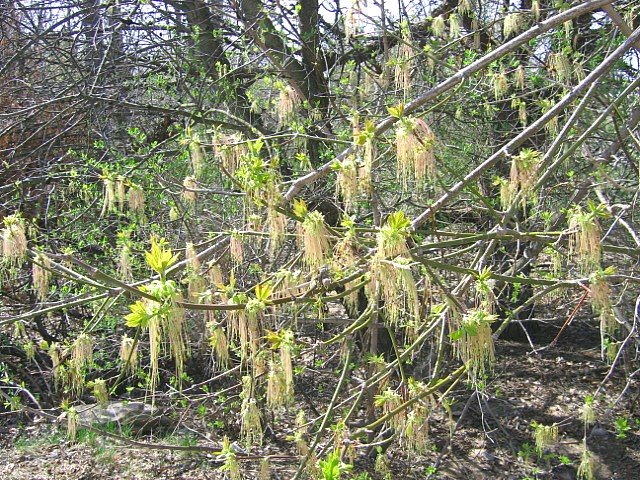
By now you must realize I don't know my trees very well. So I can only say about this one that I was fascinated by these delicate wispy seed pods. They are about 3 to 4 inches long and the branches are quite thick with them.


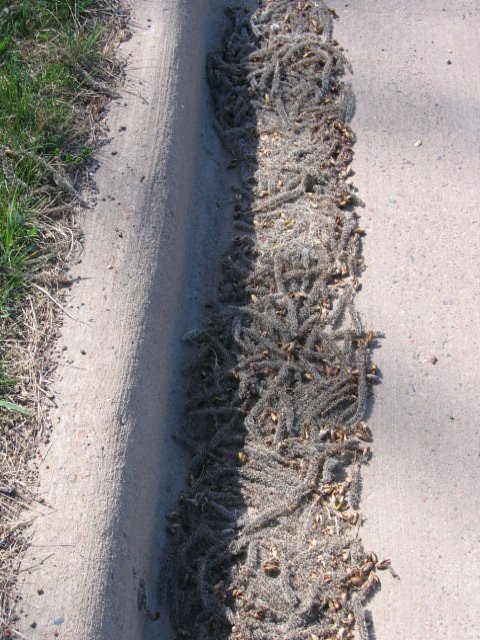
Lying in the gutter are pods blown off by our recent gusty winds. Which trees they came from I do not know.


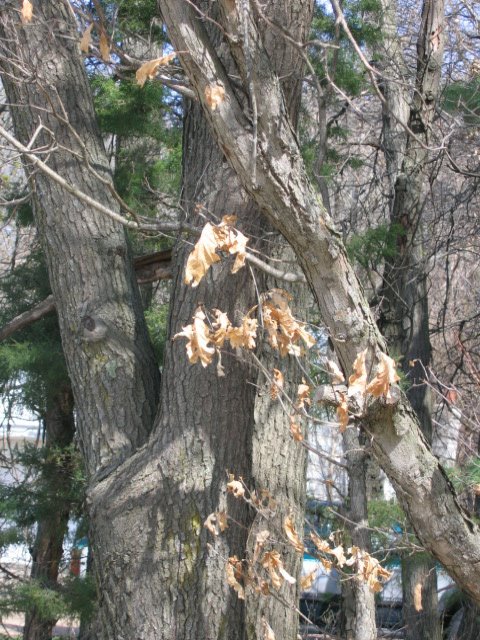
The oaks are the biggest holdouts. They are still tenaciously holding on to their dry and bittle leaves from last year. They rattle in the wind.

Of course, the truest sign of spring are all the "For Sale" signs going up in front of houses all over town.

Monday, April 17, 2006

Goals for Week of April 17th

I'm trying, trying, trying to get myself back on track. Last week was a disaster in terms of accomplishing its list of goals. I find myself back in the situation of feeling slightly panicked and needing to set everything else on hold in order to meet an entry deadline. Fortunately, the items I'd slotted into this week when I made my master list of goals for April are ones of such low priority I have no guilt or remorse associated with ignoring them for now. In fact, it's almost as if I subconsciously knew I'd need the time for something else.

I worked on a few things last week but didn't complete anything as I'd hoped. Cobblestones got quilted but not bound. The Easter piece still sits waiting for me to glue down the foil so threads can be couched, and the journal size version still needs to be quilted. I let my fear of "ruining it in the quilting" keep me from proceeding at all on my Small Works II entry - Strawberry Moon.

Besides all the interruptions and distractions of last week, part of this can be blamed on the season itself. Easter has not been easy for me since my mother died many years ago. We shared a special bond on Easter, much of it tied up in the music sung on that special day, the rest in little traditions like sharing tea we'd drink from mom's collection of china tea cups. I plain old get cranky and depressed, some years more so than others. I'd done pretty well this Lenten season, but it began unraveling last Thursday. Recognizing the mood for what it was, I stayed out of the studio and attended to other things, including a bit of purging, filing and shredding of various things, a precursor to the real cleaning out I need to do prior to moving later this year. Amazing how good it felt to be shed of those bits of papers I don't need any more.

I gave myself a stern talking to last night, sensing that if I didn't take control back soon, I'd risk making the downward spiral of last fall again. I was alarmed that the disinterest in my work had returned and all I seemed to want to do was read my novel or spend time on the computer. Taking the necessary steps to bring my work to completion felt like more effort than I had energy or desire to exert. Time to close myself off from the outside world, pick one focus and then force myself into action. Experience tells me that taking one step past any spot where I've frozen is all it takes to get rolling again, and suspending my interaction with others allows my mind to function.

So this week it is all about Strawberry Moon. I must quit dawdling about how to quilt it, how to mount it; I must just jump in and do it. I decided to go with my original thought to run a few lines of hand quilting through the discharge piece and batting only. Later it will be trimmed and attached to the base fabric (exactly how I will do that is still in question but I'm narrowing down the options). I tried three different threads before settling on a black polyneon. Once the stitches began to flow beneath my fingers, calm set in, my interest returned, my confidence came back. Relief is the best way to describe how I felt. Renewed excitement carried me through the next thought processes for the steps to be taken tomorrow.

I remembered that I hoped to have time to make another small piece so I would have more than one thing to enter. Harrumph, I thought, I've screwed that up. But now my inner self wouldn't listen to my negativity. These pieces are so small, surely you could get something else made, it encouraged. How about your idea for "Silver Birches" based on the same design? I got out the fabric set aside for that and yes, I think it might be possible to do that too and finish it out in the same way as Strawberry Moon. Ooo, a series??? Now let's not get too excited. We'll see how it goes.

The key to this week, indeed to all the weeks ahead, will be controlling anxiety. I say this because of something I gleaned while reading Julie K Norem's "Positive Power of Negative Thinking:"

"Anxiety is no fun, and it can get in the way of our efforts to reach our goals. It impairs our cognitive performance because it makes it hard to concentrate on a task - or indeed, on anything except ourselves and our subjective state. Anxiety can make us forget what we've learned, lose the thread of a conversation, or miss key pieces of information that we need to understand a situation."

And this, I decided, is what is happening when I stand in front of my work and freeze up. I let my anxiety about my abilities, about the next step to take, make me forget what I've learned and know how to do. Control anxiety and I control what I can accomplish.


Thursday, April 13, 2006

Erika Carter

The week is getting away from me and has been full of one interruption and distraction after another. So, list or no list of goals, I'm struggling to stay on track and accomplish what I'd hope to this week. Today was a total wash, my mood - unmotivated, my desire to do anything productive non-existent. In other words, I have nothing to show for today except a little fabric brought back from the shopping trip with my neighbor. So instead, I thought I'd send you to look at some work by Erika Carter.
I run across her work now and then in books, and did so again last week. It goes like this: I'm scanning the pages of a book or magazine and spot a work that makes me stop and linger, admire and feel calm, at peace. I check to see who made it, and it's one by Erika. I know one of the reasons I enjoy her is that so many of her pieces include trees, the kind of trees I enjoy working with. The thing that always strikes me is the level of sophistication of her designs, something I've come to think of as "quiet sophistication."
One of my goals for this year is to elevate my own work to a more sophisticated level, and I got an inkling of what that might be when I made "Changing Seasons." But since then, I can't say I've made much progress that direction. Seeing one of Erika's pieces last week reminded me that I meant to emulate her and develop my own style of "quiet sophistication."

I notice in the biographical info on this website showing Erika's work, she is a year younger than I am. For some reason, I've always thought of her as much older than me. Guess I should have started applying my self much earlier if I expected success by now! However, she says, "My sense of success is fleeting...I don't stay comfortable for long. The times when I feel the next step is almost impossible is when is when I am closest to making it successful. This journey, this exploration, this process is evidence of the creative life within." I may not have her level of recognition and success, but I certainly share that sentiment.