Tuesday, February 07, 2017

Getting In Gear

Round 1 of weekend snow
I've been meaning to do some dyeing, maybe even snow dyeing, for awhile. I even bought 25 yards of mercerized cotton and three new dyes (totally unneeded when one views my stash of gifted old dyes) late last year so there'd be no excuses. It took this additional sequence of events to get me there: 1. While doing my January tidy-up, I unearthed Wil's directions for Parfait snow dyeing that I had printed out from the And Then They Set It On Fire blog (a terrific resource for all kinds of interesting textile techniques and surface design ideas), and  Beth's general instructions for snow/ice-dyeing printed from her blog (she ice-dyes the most extraordinary mandalas and is so generous in sharing her knowledge). Oh yeah, plenty of snow stacked up outside, lots of dye powder languishing in the garage and yards of fabric at the ready. 2. Friend Mary posted this new prairie-style art quilt on her blog, made from her own experiments with ice-dyeing (close cousin to snow-dyeing). So in love with this quilt and what an excellent way to use those interesting fabrics. 3. Then friend Chris blogged about snow-dyeing last week. Alright already! I'll probably do some snow dyeing over the weekend, I thought. And then... 4. We got about 10 inches of fresh snow Friday into Saturday. What else is a gal to do when life gives her that much snow?


I started with Wil's parfait method. If you're not familiar with parfait dyeing, it's basically laying out a piece of fabric, pouring dye over it, adding another piece of fabric on top and pouring a different dye over it, continuing in this manner with as many layers as you want. The dyes seep through to the underlying layers creating interesting and unexpected results. In this case, snow is added on top of the fabric and dye powder is sprinkled on top followed by a little more snow before adding the next fabric. Wil did her demo inside a glass vase so we could see the layers, each fabric scrunched as opposed to laid flat. She also notes that you can substitute ice cubes; she got beautiful results from both.) I didn't have a vase big enough so used a big plastic bucket. 


It wasn't until I was trying to get the snow to stay on the top of my precarious stack that I realized I'd failed to fill in the space around each layer with snow. I tried to rectify it after the fact. I think it skewed my results some as my fabrics did not come out anything like Wil's. The snow I used was very light and powdery, very little water content as visible from the small amount of liquid at the bottom of the bucket once the snow had melted. On either side of the container at the bottom that kept the fat quarters out of that melt, I'd placed a fat eighth of white muslin. Waste not, want not.


Each snow-covered fat quarter got a sprinkling of one dye color only. From bottom to top, I used seafoam, tangerine, basic blue, and maroon - all ProChem dyes. As these are quite old, some may not be available anymore. I was just tapping the dye out from the jars which worked pretty well until that last one when a big bunch let loose on my first tap. Well, not as critical as when I've done the same thing measuring a spice from a bottle right over my bowl, but it did cascade down one side which probably explains why the blue and seafoam layers have so much red. I was hoping the blue and maroon would blend into something more purple or lavender, that the tangerine would pick up some of the blue to create some greens and that the seafoam would also blend nicely into a yellow/green piece. The maroon didn't look to pick up any of the blue below it and is the only piece out of the four that as I whole looks good. The others though, all have areas on them that on their own will be usable. They are definitely cutters. And I don't think I've used basic blue before, so was happy to see what it looked like, and I like how it looks.


Here are some close-ups of the great texturing in the maroon piece. The browns in there are the dye separating into the two dye powders mixed to come up with maroon.


As long as I was at it and had so much snow at my disposal, I set up the more standard snow-dyeing process per Beth, and experimented with manipulating the fabric by folding rather than just scrunching it up. I tried two different triangle folds and two loose accordion folds, one rolled after folding, the other bound with twist ties in four places and coiled to fit the remaining space. That's a tray from a garden center, nearly taken back for recycling after it carried my pots of plants home. I realized it might come in handy for sun-printing or such, but it works pretty well set on top of a bin for this snow-dyeing. Again, waste not, want not; I laid another fat eighth of white muslin flat in the bottom of the bin to soak in the dyes that would drip down as the snow melted.


One of the things that I didn't like the last time I snow-dyed was sprinkling on the dye - either by tapping straight from the jar or by tapping it off a measuring spoon. I'd been thinking about these old salt and pepper shakers I'd put in with my dye supplies just in case they might come in handy, and now was my chance to see how handy they might be for distributing dye powder more evenly and with less of it flying around in the air. Goodness - they worked even better than I anticipated!


Here's that folded fabric covered with snow and sprinkled with dye - first ProChem golden yellow over the entire surface, then Dharma Better Blue Green in places that I hoped might hit the outer edges of some of the folds. I used a measuring spoon to add here and there some Dharma Cobalt Blue. Again, old dyes and I'm not sure if the Dharma ones are still available under those names. It always looks so gruesome to me at this stage.


But after the snow had melted off, it looked very promising! After rinsing, definitely promising!


Ahhhh - basking in my success! I love these! (click on any picture for a larger view)


These are the fat eighths that soaked in the run-off. Kind of fighting with my camera to pick up the actual colors but I think I've manipulated them fairly closely. Okay and usable somewhere, but not in the "precious" category. I actually have plans for these sparked by a textile artist I follow on Facebook - stay tuned.

Overall, my outcomes were more successful than my first try at this and here are some of the reasons I think why. I still don't quite have the scrunching down like I would like but folding the fabric really produced exciting results. I don't think I've tried this mercerized print cloth before but am very pleased with it. It barely raveled during the washing process, it's a weight and weave I like working with better than Pimatex, and the dye color looks rich and really taken up in the threads. I also tried Beth's method of heating the wet dyed fabric in the microwave prior to using a cold water soak before starting to rinse out the excess dyes in warm soaks. I've read of this method before but this is the first time I used it and I think it made a difference.

By Sunday night my dyeing was all done, new fabric ironed and tickling my imagination. By Monday morning, round two of ten inches of snow had stacked up, wet heavy stuff this time, and demanding I spend my time removing it from my driveway and path to the front door. I hear your snow-dyeing results can be affected by how much moisture is trapped in the snow you use. Will I try this wetter snow to see? Naw - I have other things to shift my attention to. But gosh, I have so many talented women to thank for getting me off my duff to give this snow dyeing another go. Be sure to check out their blogs and art.  

Monday, January 30, 2017

Slower Than I Thought

It's almost February and I just finished the February coloring page in my pocket calendar (scroll to the bottom of the link for the uncolored version). Normally I would not be drawn to this sort of design - a bit reminiscent of the 60's flower power motifs. But instead, it has reminded me of an annual I bought last spring to add to my pots on the back deck, and I dipped into my memory banks for images of similar flowers I have enjoyed over the years. This is such a different design than January's in that there is no obvious repeat of various motifs, but instead, the same motif scattered and overlapped across the page. So instead of picking a repeat design and coloring each repeat before choosing the next design repeat, this one called for completing a flower in one color scheme before choosing the next and its color scheme in order to get a good balance across the page. I decided to stick with the orange, orange-red, and  yellow pencils for the petals, with green, brown and red overlayed with brown for the centers. This one took more time than expected and again, gave more satisfaction and enjoyment than I expected. In the dead of winter, it is a harbinger of the splashes of color to come. A peek at March has me a tad overwhelmed again - it is a very in your face design with lots going on and not much repeated.


Also taking more time than expected is my cleaning and tidying project. I've let my documenting go for over a year, yet the things I put on my pages like fabric samples linger on my work space. I knew I had photos to print - I know, I know, in this digital world, who prints out photos? But it's hard for me to believe that after I'm gone someone will come upon my external hard drive backup where all my quilt photos are stored and "leaf" through it. Yet they might find one of my binders of documentation files and discover not only photos of my work but many details about it. At any rate, I'd lost track of what needed printing so started by getting out the current binder to see where I'd left off and going through the engagement calendar I use to track my progress on projects to see what I'd finished since then. Good grief - I discovered padfolios from May of 2015 was where I needed to start! So I made a list noting dates and then sat down at the computer to find the pictures to print (some get printed on 4 x 6 photo paper, others like the padfolios can be grouped on 8-1/2 x 11 photo paper). Of course, I ran out of ink in the middle of the project, and my order got delayed, but as of yesterday, everything is printed and waiting for me to pair it up with its details on a documentation sheet. I will feel so much better when this is caught up, and once done, a lot of the clutter on my workspace will have disappeared.

And during all this, I have been reading through some books I ran across at the library. It started as a search for information on fountain pens, believe it or not. I didn't find too much of interest in the "Organic Artist," not really looking to make my own charcoal sticks or writing implements from sticks or feathers, for instance, but it did have an interesting section on making paper from plants and adding sizing. I've wanted to try making paper by recycling my morning pages notebooks and recently stumbled across a great video explaining the process with simpler "tools" than I've seen before. I may be giving that a go fairly soon. I'm also feeling pulled closer to working with a book I salvaged with the thought of altering it. It's taken me a very long time to get comfortable with the idea of altering a book, getting beyond the feeling of defacing and destroying rather than saving and enhancing (I'm the daughter of a teacher, niece of a librarian), but I am finally there, and those two books on the left are doing their best to show me the way. Have only flipped quickly through the colored pencil collage book, but it looks to have good and inspiring information in it too. And you know how I love my colored pencils and keep trying to figure out how best to use them.

So fiber, textiles, yeah . . . you may not be seeing much of me in the coming month. Although I have to admit that the combination of snow piled up outside and the mercerized cotton bought near the end of 2016 are reminding me I meant to use up some old dyes on a different approach to snow dyeing than I've tried in the past. Maybe it's just the sewing machines that will be missing me... 

Saturday, January 21, 2017

Focus

Willow Leaves II - Sheila Mahanke Barnes 2007
Brace yourself - this is a long one. I had several lightbulb moments last year. I find these can be one of two kinds, either an "aha!" moment when a bit of information or visual input helps all the other pieces fall into place such that I finally understand what ever it is I've been struggling with, or the head-slap "duh!" one when I realize the information was right in front of me the whole time, and I can't believe I did not see this before.

The one I'm sharing today is of the later. I was reading yet another blog post about the basics of good design when it hit. The author stated that even abstract art needs a focal point, maybe several, be it a shape, a color, something. But of course (head-slap). And how many times have I read that same advice about creating a focal point? Numerous, to be sure.

As the lightbulb glowed, I realized this answered two questions I'd been struggling with for years: 1. What is it about so many art quilts that leave me cold and unimpressed as I view what looks like whatever was on the floor tossed on a background and stitched down, or a dozen clever techniques combined with little rhyme or reason? 2. What is it about several of my own quilts that leaves me uneasy and unsatisfied? The answer to both being, NO FOCAL POINT. 

In the case of my own problematic quilts, I realized that without focal point, what I had created was not so much a piece of art as a pleasing piece of wallpaper. And sure enough, when I went searching for that post mentioned above, I discovered that someone had already made this connection and blogged about it back in 2015 - Elizabeth Barton - who gives excellent advice on how to avoid the wallpaper look. I'm sure I read it when first posted but didn't make the connection to my own pieces. My years as a traditional quilter may be partly to blame. It's rare that a bed quilt really needs a focal point, although medallion-style designs create one by virtue of a centered main motif surrounded by one or more borders. Things that might fall into the category of decorative art also might not need a focal point - think wearable art, hand-bags and totes, padfolios and fabric bowls, placemats and tablerunners. Again, they might have a focal point but it isn't necessary to their visual appeal. But if it is going up on the wall as a piece of art, whether representational or abstract, it will really benefit from having a focal point.

Willow Leaves I - 2005
I think I've been more concerned with other aspects when creating my more abstract pieces, primarily balance. Years ago I worked on an idea inspired by willow leaves scattered on the pavement after a rain. I'm fuzzy on the details of this first one but I'm pretty sure I marked leaf placements on the background before freemotion embroidering them. I know I spent a lot of time and angst on arrangement to avoid repeats in angles, then equal time in color placement. The leaves certainly do look scattered, but I don't think you can say there's a focal point. This piece did sell, and I was glad to see it go because I was never fully happy with my composition. My second try seen at the beginning of this post, came out better I think, and I do really like this version, done by using actual willow leaves to stamp the image onto the background with acrylic paint. Still, I've always viewed it with furrowed brow, sensing something was lacking. Oh yes, a focal point.

Bishop's Close Meditations 2009
Here's my other piece that always bugged me. I was attempting to do an abstract of a painting of Bishop's Close in Portland OR by June Underwood. We had challenged each other to create original works that then would be the inspiration to the other for a second piece. I was so dissatisfied with this piece that I did a second, more representational piece to counter my disappointment. You can read about both of the quilts and find links to the challenge here and here. I don't know if anything could have saved this piece, but if nothing else, I think if I'd grouped together smaller versions of the "meditations" floating upward, I could have created a focal point to make it more interesting and less wall-papery.

So really, abstract art isn't easy to design. Wassily Kandinsky said, "Of all the arts, abstract painting is the most difficult. It demands that you know how to draw well, that you have a heightened sensitivity for composition and for color, and that you be a true poet. This last is essential." David Hockney goes farther: "All painting, no matter what you are painting, is abstract in that it's got to be organized." In other words, as Sara Genn continued in an e-newsletter in 2014, "Balance, vibration, weighting, form and eye control, mastery of colour, areas of visual excitement and areas of paucity, grey to rest the eye and gradations: These design elements, when intuitively understood, can create a stand-alone magic. In abstraction, this intuition gets your work into the "best" pile." Oh, my poor Meditations quilt is so lacking in these!    

I more recently ran across a link that sent me to this: 5 Art Lessons from Bauhaus Master Paul Klee. Although the following quotation doesn't reference focus per se, it does once again, reinforce that abstract art isn't anything goes, but needs thought and observation from the real world. 
When Klee hosted classes in his home, he often required that students spend time observing the tropical fish in his large aquarium. The artist would turn the lights on and off, coaxing the fish to swim and hide, while encouraging students to carefully take note of their activity.

For those who know Klee as the “father of abstract art,” this lesson may seem surprising. However, Klee was deeply concerned with creating movement in his compositions. And he asserted that all artworks—even the most abstract—should be inspired by nature. “Follow the ways of natural creation, the becoming, the functioning of forms,” he taught his students. “Then perhaps starting from nature you will achieve formations of your own, and one day you may even become like nature yourself and start creating.”
I love this idea of learning how to create movement in a design by observing nature. If nothing else it validates all the time I spend taking photos and looking closely and sketching the natural world around me. This also reminds me of something Picasso said along the lines of you have to know what something looks like and can draw a realistic version before you can draw an abstract version of it. Whether that thing becomes your focal point or not, your composition best include one (or more) somewhere.

Azalea Mosaic 3 - In The Garden - Sheila Mahanke Barnes 2009
As I've written this post, I've taken a look through my quilt files to remind me of my abstract efforts. I have many that I think work fairly well, partly based on whether my initial reaction when the photo pops up is one of cringe or unease, or relaxed and smiling. I've tried then to take the ones that please me the most and see how they stand up to the design criteria mentioned throughout this post. I think my most successful are from my Azalea Mosaics series (1: still in progress; 2: Garden Path; 3: In The Garden; 4: Broken Promises - below; 5: Slippery Slope). I love how each turned out, but especially "In The Garden" and "Broken Promises". It was intuitive work which doesn't always end well for me, but with each one, I felt like I knew where I was going and when I'd arrived. I'd love to capture that again, maybe in my long dreamed of water series, and avoid making just wallpaper!

Broken Promises - Sheila Mahanke Barnes 2009


Thursday, January 12, 2017

The Slowness of January

I've been doing the slow putter of straightening, not just in the studio where it takes on the characteristics of an archeological dig, but in other rooms of the house, and I suppose, in my life in general. To some extent, I enjoy this process, this sorting through and filing/putting away or tossing, the rediscovery of things I'd forgotten about, the reminder of loose ends that I now have time to tie up. It does mean, though, that there is little creative progress or productivity to share for now, save my "coloring book" pocket calendar.

It too has been a kind of slow putter, taking a break now and then to study the design and settle on the next color to add. It's been an interesting endeavor, pointing up something I have known for some time is a weakness of mine, the attitude at times that a thing has to be done all at once, and if I don't have that big of a chunk of time, not starting it at all. All or nothing, which in some cases is necessary, but in  most is not. This no pressure coloring has been more enjoyable than I anticipated, and although I likely could finish a page in one long sitting, it has helped me see the value of not doing that, of taking instead a slow, thoughtful and extended approach. Those few minutes I'd steal before setting off on the next task of the day were little treasures. And I must admit, when I've pulled out the calendar when out and about, and it falls open to this first page, even in its incomplete state, it gave me a surge of joy - so colorful! And any thought of wasted effort, I decided, has not come into play because this is an item that I actually use, unlike a coloring book that would only sit on a shelf.

So January is done and I'm fairly pleased with my color choices and particularly like this swirling design. What do you think? And here is February, waiting for me to make that first color choice. I'll admit, it's overwhelming me a bit!


Thursday, January 05, 2017

The Christmas Gift

Master pattern for Silhouette Trees

Remember the silhouette trees I was working on for a Christmas gift? Well, it didn't get done in time to be received by Christmas. Heck, it didn't get DONE by Christmas. In fact, I just barely got it to my friend before the year ended, the package arriving around 6 p.m. on New Year's Eve - that's cutting it close. But he loves it (and the candle) as I knew he would, and I am very pleased with how it turned out, very glad I opted for the photo view looking up through the branches at the sky. That's my master in the photo above, the areas of the photo to be used all blacked in with a Sharpie pen.

Traced Steam-a-Seam on fabric ready to cut out

I also did some blackening on the reverse so I could see better to trace the shapes onto Steam-a-Seam, my fusible of choice for this sort of thing. It has a tackiness to it that holds applique pieces onto the background as you arrange them but not so much that you can't reposition pieces. It also does not require stitching along the edges once fused in place. I knew I would not be stitching on these pieces, many of which would be very small and narrow, so this was a must.

Karen Kay Buckley's "Perfect Scissors"

I remembered how tedious and somewhat difficult cutting the zig zagging reflection pieces for my Sailing the Wine-Dark Sea quilts was and had taken someone's suggestion to try a pair of applique scissors with serrated edges. I tracked a pair down, Karen Kay Buckley's "Perfect Scissors", in a small applique size that also had Teflon coating, but I had not yet had the opportunity to try them. Oh, what a difference! I could definitely tell that the serrated edges were making the cuts with more ease and precision, and I found the large openings in the handles so much more comfortable - no rubbing after extended sessions of cutting.


Just goes to show that the right tool can make all the difference. I could easily get into all those tight spots and small curves. And these "Perfect Scissors" were not very expensive as good quality scissors go.


My master pattern slipped under the piece of hand-dye for the background, and I could just make out the shapes to help guide me with placement of the applique pieces. Did not have to be exact but boy, did that help move things along.

When I'd traced the very small openings in the parts of the trees that would be in opposite corners, I wasn't sure I'd be able to get in there and cut them out, and I was willing to live with that if that was the case. But the very sharp points and thin blades of these scissors allowed me to get in there and remove even the tiniest of them, even through the fusible and its paper backing. Very different from the Teflon Fiskars applique scissors I've been using.


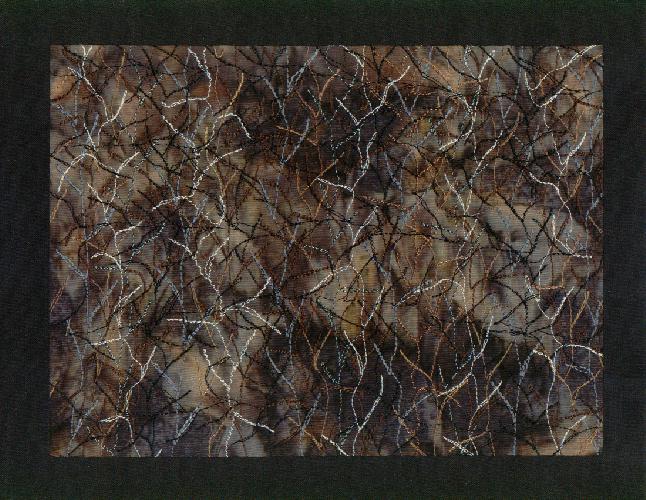
Once all pieces were in place and permanently fused, I penciled in the rest of the branches that were too small for applique and would be stitched. I used basting spray to hold it to the felt taking the place of batting, and the stitching began. I stitched alongside but not through each branch and out onto the background to make the spindly branches. This quilting of the little branches reminded me of a journal quilt I made many years ago, an abstraction of sorts of a winter scene looking into a thick wooded area that was all bare branches. I found it very enjoyable stitching.


Here it is all done and from the back so you can see just how much stitching I put in it. The color of the felt, by the way, ended up to be important as the hand-dye was transparent enough to be altered by what color was underneath it. I tried several and like this brown the best.


Now for the mount and attaching the quilted section to it. After all those batiks I had strewn about the table as possibilities, I soon realized I just needed to go with black, either the same hand-dyed black of the trees or... I looked through my commercial black stash and found this wood grain print which read just the slightest bit lighter than the tree black. No need for fussing with the thread either. I used the same Aurofil 40 wt cotton thread as in the quilting to satin stitch the edges before centering on the mount and attaching it with a straight stitch right next to the edge of satin stitching.


Here's another view of some of the stitching. While I was working away, wouldn't you know I kept running across other people's photos of bare trees in silhouette against sunset skies - on blogs, on Facebook, in books. In fact, if you are a tree nut like me, you might like to track down my latest find at the library, taunting me from the "new books" display: Ancient Skies, Ancient Trees by Beth Moon.

"Silhouette Trees" by Sheila Mahanke Barnes ©2016

Once mounted the quilt measured 13-1/2 x 15-1/2 inches, and in my mind is the perfect compliment to the candle, just as I had envisioned. Whether or not they will be displayed near each other is in question, but I'm so happy that candle inspired me to work up this design, and that I chose a photo that did not duplicate the candle itself. (Click on photo for a larger view.)

I ended up not working with the second piece of hand-dye concurrently as I thought I might so can make another of these right away if I choose. But I'm thinking I won't want to make an exact copy after all, but choose another photo and view to work from. I'm quite pulled to a photo with a vertical orientation but also like one of the landscape oriented ones too. We'll have to see what strikes my fancy when I get organized and back to serious studio work. 

Sunday, January 01, 2017

Another Year Begins


It occurred to me, as I thought back on 2016, that it had been a year of enduring for me. My resolution word for the year had been "light" and I did try to remember to bring light into not just my immediate world but the broader world as well. But for much of the year, light abandoned me as circumstances arose leaving me unable to do much more than endure these unexpected things. Endure symptoms from unresolved and new medical issues. Endure the side effects of drugs meant to make things better, waiting for them to kick in. Endure the frustration of my limitations that kept me out of the studio so much, from traveling, from the trails I love to hike. Even the sudden popularity of padfolios, which surprised and pleased me, became a matter of enduring because health issues and drugs made it so difficult to ramp up the energy and focus to make them. Then beyond myself, endure the empathetic sadness for others' losses, my heart breaking for the people I love, a weighty sorrow for strangers all over the world. And let's not forget, endure the toxic and crazy political campaigns and the aftermath of the election. Days and days when sending light into the world was the last thing on my mind, and all I could do was endure until the light came back to me. And it would come back, but it was difficult to hold onto. Many would agree, even with its bright spots, 2016 was a tough year.

And I'm not so sure that 2017 won't be more of the same for me as well as the rest of the world, a raft of things that can't be predicted or changed but only endured. And while that may sound pessimistic if you only consider the first definition of endure (suffer something painful or difficult patiently), I knew at once it was the perfect resolution word for me as I saw a certain optimism in it and a means to survive. I believe optimism is the way we are going to get through the coming year in the face of so much negativity, refusing to succumb to the doom and gloom we are constantly barraged with, not giving up when confronted with personal trials and challenges, but enduring through it all as in the second definition (remain in existence; last). I find this idea of enduring inspirational because really, is that not what life is about, understanding that, good or bad, if we endure in terms of this other meaning of to last, we have won at least one battle? And while much that bothers us on a daily basis comes and goes, the important thing is that we remain, steady and calm and enduring.


This may also sound pessimistic, but I am keeping my expectations low this year. I know that goes against all the inspirational hype about setting goals and shooting high, but it was quite discouraging to set out into 2016 with such high hopes for my health and modest goals that never panned out. It almost made enduring more difficult, thinking of the things I'd hoped to be able to do and couldn't. This year I will still hope for the best but not set the bar very high. That way whatever does get done, whatever progress gets made, whatever improvements come along will feel like a gift, and that which stays the same will not feel like such a defeat. I think I can be more at peace with how the year plays out if I approach it this way. And I intend to remain in existence, to last, to endure to the end.

*   *   *   *   *   *   *   *
Previous resolution words:
2008 - Freedom
2009 - Calm
2010 - Focus
2011 - Refocus
2013 - Perseverance
2014 - Explore
2015 - Fearless
2016 - Light
 

Saturday, December 24, 2016

Wednesday, December 14, 2016

Fads and Crazes

As a general rule, I have never been one to jump on the latest bandwagon, go gaga over the latest fad. So my reaction to the adult coloring book craze has been lukewarm. Oh pulleeze, I remember thinking. And yet the enthusiasm for this craze has not waned. My initial feelings about it have not changed either, as I see others hoping to get in on the monetary gains to be made by offering coloring opportunities beyond the basic coloring book. Just...not...interested... mostly because I don't need someone else's designs to color in, have plenty of creative outlets to keep me busy. And yet, I have recently purchased a pocket planner with blank designs to meditatively color in. My excuse is that I only had three designs to choose from - one with horses, one of Italy and this one. Nothing against horses or Italy but they were not compelling. The flowers, even left black and white, at least appealed.

I still can't figure out why this craze suddenly took off like it did as similar coloring books have always been available, just not marketed to adults. I remember back to 2012 when I accompanied my friend Judi to the Mayo Clinic. We had both brought along some things to fill the time with something a bit creative - yarn for knitting, sketchbooks for drawing, things like that. We were both ripped from our studios with this trip and could not create like we would at home. One of Judi's friends understood this and gave her a coloring book, pages of flowers as I recall, thinking it would fill that need to be working on something. Judi tried a page or two and then threw it down in disgust. I sensed it felt like busywork to her and she stated that it was boring just coloring in someone else's designs. I could see her point. One of my gal's in the art group told a similar story about her daughter who as a child would take a page she was supposed to be coloring in, flip it to the back, draw her own version and then color that in. 

I've been trying to remember my own feelings as a child working with coloring books. I mostly remember designs with children in them, perhaps flying a kite or playing with a dog or picking flowers or standing near a house. I remember carefully choosing the right color for the knowns like blue for the sky, green for the grass, flesh color for the skin. I don't remember how my mind worked for the parts where there were options. I do remember keeping the colors within the lines. See? These are the same traits I exhibit to this day, an aesthetic possibly in my genes, and I'm sure I argued with or at least looked with disapproval at classmates' work that broke the rules I was adhering to. At any rate, perhaps the adult craze is so popular because people have good memories about their coloring days and have not allowed themselves to pursue anything very creative for awhile. Or don't feel they are talented enough to work without guides. Or recognize the therapeutic value of working with a drawing and coloring it in and this is a quick way to access that.


Whatever the reason, I guess I need to ease up a bit on my eye-rolling whenever I see yet another product geared toward adult coloring. I told myself I didn't have to color in those pages (one design for each month). Then again . . . I had this set of cheap colored pencils bought years ago with the idea they could be used to try out different color schemes when drafting out designs on paper. Only twelve colors rather frustrated me and they've been sitting unused ever since I started investing in good quality Prismacolor pencils in many colors. I wouldn't "waste" those good pencils on something like this, but perhaps the limited selection of the Crayolas would be a challenge and they'd finally get some use. And in my usual meticulous way, I am working through the motifs that will be green, which in this case are in repeats of four, in odd moments here and there, before choosing the next motif and color to attack. Yes, there is something oddly meditative in the movement of the pencil laying down the color. There's also something a little guilty about it too. I really should be working on something else. But I am rather enjoying working with these shapes. And I have lots of time to finish this prelude to January.  

Saturday, December 10, 2016

Hatching A Plan

Once I have a design in mind, all sorts of questions arise, usually starting with what size will the piece be, what shape (square, rectangular, odd) and in what orientation (landscape or portrait). When starting from a photo, my brain gets stuck on the dimensions of the photo, unless I've played around with cropping it. And often I can't see beyond the image on the screen to envision the quilt finished any way but borderless. So while I studied my photos and chose a few to work with, I sensed panic about deciding the proper size to make this so that it proportionally worked nicely with that candle and then whether to face or bind it. I also mulled what technique to use, generally the second question that arises. And what about batting? How much texture might I want as I quilted around trees and extended branch lines? Would outlined branches puff up while the narrow ones represented by a single line of stitching sink into the surface? These are the kinds of questions that can immobilize me.

And then I realize the answer was right under my nose - or rather on the wall of the vary room where I sat studying photos on the computer. The photo above is of a pair of highly stitched images of The Palouse in southeastern Washington; instead of batting, I used an ECO-FI felt (which gives some but not a great deal of texture) and then attached the finished design to an interfaced fabric mount. Goodness - size, shape, "batting" and finishing questions all answered at once! I could move on.


I've decided to go with the photo looking up through the branches, although I printed out a second one for later use. I reduced both photos to 2 color (merely changing to black and white does not give you a black and white image, but one with too many values of grey for my needs). To save ink, I printed them as drafts - I just need some kind of road map. I quickly realized that the original photo had a major branch running nearly up the center which was very distracting (see first photo). I played around in my photo-manipulation program until I had it moved farther off-center, as you can see above.


Then I spent some time with the print-out, tracing around major branches and thinking about which of the smaller ones would just be lines of stitching. Getting familiar with the design with the idea that I will not necessarily use this as a pattern but as a guide. I'm considering free-cutting some of the shapes - I've done that before with success.


Inevitably, one must stop tweaking the design and start auditioning fabrics. The brown piece at the top is the felt and I'm still deciding about which orangish fabric to use. I thought using a solid black for the trees was a no brainer, but it seemed too stark and things started leaning a bit Halloweenish. As I pulled possibilities for the border mount, it became clear that I needed a black that wasn't so black and found a hand-dyed that I think will give me the subtle difference I was looking for. By the way, most of the border fabrics in this picture have now been rejected for half a dozen better options! The final decision will have to wait until the center is done and ready to attach. Oh, and I can't really decide between the two oranges so I have cut a piece of each and will work them up simultaneously. Hey - I always need new pieces for the local exhibits - it will be time well spent and give me options.   

Friday, December 09, 2016

A Small Bowl & A Not So Small Revelation


I finished up this small bowl yesterday, same basic design and fabrics as the previous Sea And Sand bowl, except this time I wanted to make a shorter version with just two fabrics. When all the rounds were sewn, I meant to finish in the simplest way, grading the end of the closeline before the final rapping with fabric strips so it would blend into the beginning of the round and not leave a noticeable raise or bump along the rim. This is a little tricky and I did not do the best job of it on the other basket, hiding the imperfection with that handle.


I actually left the bowl in the machine overnight while I thought about this, mostly because as I studied the basket, I wasn't sure that where I had planned to end would make a smooth transition. But I think it was more than that. I think it was a bit of boredom. I just wanted to do something different from a plain finish. And so I played with continuing to wrap and stitch the clothesline but not to the basket, then looping and spiraling that length of line into something decorative. It required hand-stitching, which I've been avoiding but no other way to do this, and it was as tedious and awkward as I'd anticipated. I like the results though, and was pleased to find a bead to attach at the center of the spiral.

Approximately 6-1/2" across & 2" high. Still love the look hand-dyed fabric gives.

I think a lot of what I've been doing in the last year or so can be traced back to boredom. I've always thought of my impulses to try new things as more curiosity, but lately these urges to do something different have not always risen out of that excitement of "oh - what would it be like to try this idea" - that "what if" part of creativity. Instead, the feeling is more one of truly not interested in doing the same thing over and over or working with the same medium over and over. I think this is the first time I've been aware that my restlessness may indeed have roots in boredom. And boredom may be a good thing if it pushes me along in my explorations. 

I'm delighted with the way this bowl turned out. I enjoyed the process, finding it relaxing and meditative as I always do. I'm sure I would have been a little disappointed had I not put in that effort to create a more interesting finish. But I do wonder a bit why boredom has been stalking me. And I can hear my English & Latin teacher mother now, as she stood in front of her class responding to students complaining they were bored. "Bored? I'm not here to entertain you - you're here to learn!" 

Right mom. And learning I am . . .