 |
| Proof of how easily dye powder migrates |
Snow dyeing has never appealed to me; it struck me as one of those jump on the band wagon fads which was enough to make me disinterested. Still, I've read the articles, studied pictures of results, tried to figure out its appeal, came to the same conclusion every time: puzzlement at its appeal and no interest in trying it myself. Really. I'm not interested. So many other things I'm more interested in trying. Perfectly happy with how I normally dye although there are some variations I'm curious to try. But not snow dyeing.
So why did I find myself last week with this sudden itch to give it a go? Well, there was the Quilting Arts Episode 1303 that I watched which demonstrated faux snow dyeing. Something about actually watching someone do it... Then I saw some fabulous results by a couple of bloggers I follow. I was beginning to see how their results differed from other ways of dyeing. And of course, there was the snow outside my door and an abundance of dye powders gifted to me over the past year. What did I have to lose?
Even with printed instructions from the Quilting Arts website in hand, I did a little research to see how others were going about this. Frankly, I questioned those first directions, knowing what I know about dyeing. Anyway, I discovered there are two ways people are approaching this. There are those who soak their fabric in soda ash and mix their dye powder with water and process their dyed fabrics pretty much as soon as the snow has melted. Then there's the other school that soak their fabric in soda ash and mix their dye powder with a water/urea mixture and batch the dyed fabric for up to 24 hours after the snow melts. I found instructions for the latter method on Pro Chemical & Dyes website. Now there's a trusted name. And I have a ridiculous amount of urea on hand. So I used these instructions as my guide.

Now I've seen some pretty ugly (in my eyes) snow dyes and some very beautiful ones as well. The ones striking me as not so great often seem to be the result of throwing too many colors together, or perhaps just not thinking through what the colors might look like together. I decided to consult my dye records to help me choose a direction. I just love the orangey rusts of the run on the right and could use some of it in my stash. That recipe called for strongest red, golden yellow and a bit of chino. I didn't have strongest red on hand so substituted basic red. The dye recipe on the left includes fuschia, bright blue and black, all on hand. No matter how these turn out, I should at least like the color combinations.
There are other variables to snow-dyeing. Pro Chem covers two of them. You can mix your dye stock into snow before covering your fabric with it, or you can squirt or pour the dye stock directly onto the snow after it has been mounded over the fabric. I was not in the mood to be mixing dye stock into snow in a big bowl or bucket, so I just squirted it on. Another method is to sprinkle dye powder onto the mounded snow. I wanted to try that method too. I decided not to make a big production out of this, but just do a few fat quarters to test things out. Always bothered by waste, I was happy to find in my research that many lay a piece of fabric in the bottom of the catch basin to soak up the dripping dye.
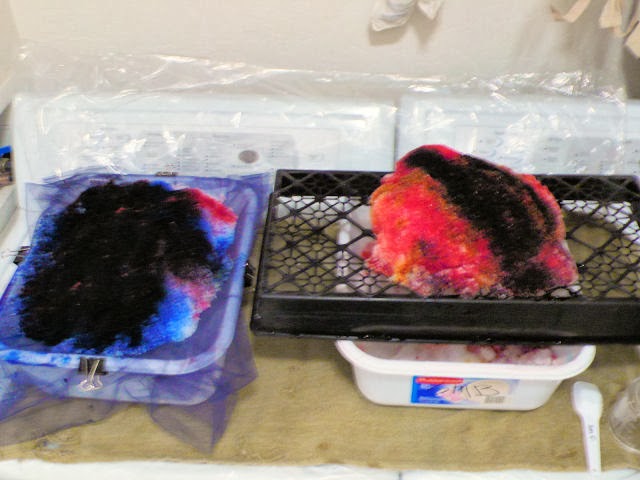 |
| Tulle support on left, garden store tray support on right |
Once my fabric was soaked, I moved the whole operation outside, and I am so glad I did. Even if I had not been sprinkling dye powder over the snow-mounded fabric (you can see in the top photo how that went), I still would have made a mess as the snow shifted and dribble past the edge of my tubs. Should have used larger receptacles. I must note that I really like the way the tulle (held on with binder clips) supported the fabric/snow. And for the first time, I used squirt bottles to mix the dye solutions, discovering as I vigorously shook the red that the top was leaking. Oops - can't believe I didn't get any on me but the snow looked like a crime scene with drops of blood. What must the neighbors think? I found it hard to know how much of the dye solution and powders to use but I eventually got everything squirted and sprinkled and wiped up enough around the edges to move inside for the slow melting process.

Before going to bed, enough snow had melted to cover all with plastic to keep the fabric from drying out while batching. All directions I read said this batching needed to be done at a minimum of 70 degrees. I barely keep my house at 70 degrees during the day, let alone at night. The one room that is warmer and has a floor vent is upstairs. No way I'm hauling this potential accident waiting to happen through the house and up there. I'll just have to trust that time and the barely bare minimum will be sufficient.


Ok, these look promising. Note the fabric lurking in the run-off in the bottom of the bins. Time to rinse, rinse, wash with Synthropal, set with Retayne and iron. And I was equal parts disappointed and happy.

This is the red and golden yellow dye solution result (I also sprinkled a little chino powder over the top). Pale, not very interesting textures, not unlike I could have gotten some other way, I'm thinking, and very pink. Some of the tanness I think can be attributed to the unbleached muslin that I used. They do warn that the dyes get quite diluted with the snow, but I did mix them about double strength. Perhaps I just didn't put enough solution on. Or perhaps it's that the dye powders are quite old.

Or not. Look at this great piece, the white cotton that was in the bottom of the bin. I just love this one.

On to the sprinkle technique, again done on unbleached muslin. If I remember correctly, I sprinkled the fuschia on first, then the bright blue over it, and topped it off with a little black. Again, pretty pale, pretty uninteresting to my eye (especially if you'd seen the successful snow dyes I'd seen on line).

There were only a few spots that remotely exhibited the texture I'd seen covering whole yards of snow dyes. There are so many variables with this process, including the water content of the snow you use, that I can't begin to analyze any of this in the hopes of better results should I try this again.

But oh my - look at what came out of the bottom of this second bin. I am in LOVE! And I have no idea why those places in the fabric that were not totally submerged came out pure blue. I would have thought some of the fuchsia would have wicked up into them.

This was the white cotton again. I might have gotten better results on the pieces directly under the snow had I stuck with white fabric, but that was one of the things I wanted to explore - how using an off-white instead of pure white base fabric will effect how the dye color reads. I'm most puzzled though, that none of these came out very close to the colors I was going for. I think that first piece is headed for an over-dye.
Will I do more snow dyeing? I'm thinking not. I really don't enjoy messy processes, let alone ones where I feel I have no control, and this snow dyeing was both. On the other hand, I have quite a bit of dye stock left, I'm catching my subconscious working out what ifs in terms of adding other colors, and it IS snowing outside...
6 comments:
Beautiful results! No snow here, so I can't try this.
LOL it can become addictive you know. When we have snow - not every winter - I sprinkle dye powder on the soda soaked fabric. I never measure exactly how much I use, but it is more than double the normal quantity. And I have used old dyes for it as well, they still work. After all you can not duplicate an earlier result.
Nice informative tutorial with I think are good results. One ingredient you missed....actually two: buddies and wine to do the dyeing with! Grinning...
Some of your results turned out nice, but it is a very, very iffy process. I sprinkle my powdered dyes right onto the snow. I do wear a mask during that process. Next time I do it I will put a piece of fabric under it to catch the runoff dyes instead of wasting them. We are having snow again tomorrow so I might be trying it again.
I guess my windmill background fabric was a lucky piece. EB said that it was the best snow dyed piece she ever saw! I did use white fabric for that and only did a half yard.
Dyeing can be very unpredictable and sometimes we eat the bear and sometimes the bear eats us!
Chris
Wil, you are the first one I've heard say to sprinkle the powder on the fabric rather than the snow. I know I've liked your snow dyes, not sure if the ones I've seen were produced that way. Do I also remember you using dye stock frozen into ice cubes?
Lots more fresh snow today, but I was shoveling it, not dyeing with it. ;-)
Welcome to the world of Snow Dyes! I haven't done any in a few years--It's just too cold! I do like the lighter ones. So many of my hand dyes are so saturated, it's kinda nice to have the lighter, more muted colors in the stash. You can always over-dye them. Or not.
Post a Comment