I'm referring to that brief few days between Christmas and taking off for my New Year's getaway, when I was tempted not to do anything in the studio, yet wanted to get something done. What I most wanted to accomplish was getting the pinwheel quilt ready for machine quilting, and I nearly did. Just needed to do that basting around the outside but ran out of time. Was in the mood to do some hand stitching today, so in I went, and not only is that one ready to go, I stitched around the outside of Grid 2 so it can be quilted as well. I should be able to get both done next week, fingers crossed.
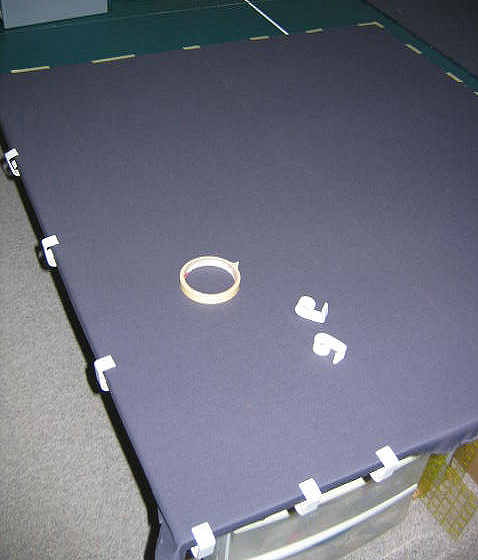
 For you process-oriented readers, I took pictures of my layering and basting sequence. We begin by laying out the backing, wrong side up, and securing it to the table. I use a combination of masking tape and clips for pieces that are smaller than my table. I got the clips from a mail order source quite a few years ago and have only seen them advertised again once more - some quilt shop in Texas I believe that was highlighted in a magazine. They are plastic and slip over the edge of the table, flexing just enough to hold fabric firmly in place. Another clip people use is the "bulldog" binder clips, but they don't open wide enough to work on my table. I take care to position the backing with one straight edge (like a selvage edge) parallel with an edge of the table. I let the backing overhang the edge enough to wrap under so those clips get a good grip. I start by putting a few clips along the sides from the center out, then smooth the backing out to the other edges and tape them in the same way. The backing needs to be slightly taut, but not stretched unduly. Otherwise, when it is released from the clips, it will spring back to its original size which will be smaller than the layers on top. This could cause problems when quilting.
Next I smooth the batting over the backing. Here I'm using Hobbs 80/20 Black batting which is mostly cotton, so it sticks to the backing and doesn't need to be secured to the table. Some battings stretch more one direction than the other, just like fabric, so I try to position it so that the least stretchy direction is running vertically, especially for a quilt that will be hung. I always cut my backing so there is 3 to 6 inches extending beyond all edges of the top, and the batting several inches bigger on each side than the top.
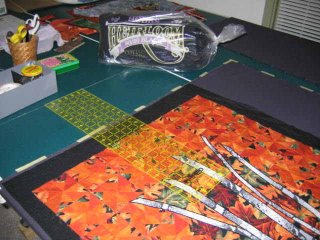 The top goes on last, centered on the batting and smoothed into place. Here you see how I use a ruler to make sure it is square. I keep smoothing and checking, using the edge of the table and vertical and horizontal seam lines for guides, until I'm satisfied with the straightness of the top. Again, because of the cotton batting, there's no need to secure the top along the edges.
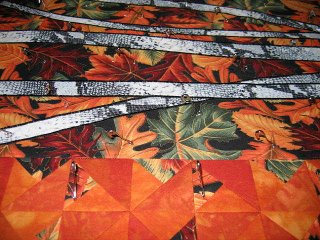
Since this will be machine quilted, I'm using safety pins to baste the layers together. If I were hand quilting, I'd thread baste at this point. I start in the middle and place pins about 3 to 4 inches apart, avoiding places where I know I will be stitching. I'm also avoiding placing pins in the hand-dyed fabric because it is a very tight weave and shows pinholes that do not readily come out.
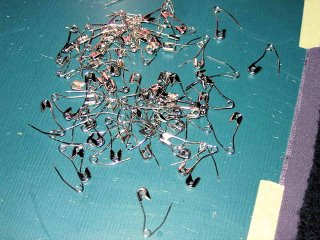
 I use special safety pins made for this purpose. They don't rust and they have a bend in them that make them easier to put in and close. I use the shorter ones since I'm usually using a fairly thin batting.
 At this point, many people would remove the tape and clips and get to quilting, but I take two more steps to avoid potential problems. First I run a basting stitch through all three layers about 3/8" from the raw edge of the top. This stabilizes the edge and keeps it in place while quilting, and keeps all three layers in place when applying the binding. Before I started doing this, it was not unusual for me to finish sewing on the binding only to discover that here or there the edge of the backing had turned under leaving a stitched down fold and a bit of raw edge exposed beyond the seam line. I find that if I take the time to baste the edges together, the next steps go more smoothly.
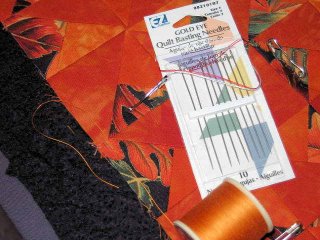
The basting will be left in, and doesn't have to be neat and even. I use a thread that matches if I have it on hand. Anything will do, so I often use cotton covered polyester thread from my garment sewing days, or the somewhat old cotton thread my mother-in-law gave me when she decided her sewing days were over. I used to use a regular large needle until I got on to these basting needles. They are long, relatively thin and have some flex in them, which makes the basting so much easier.
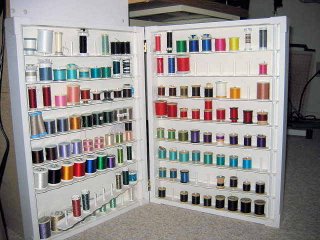
A brief digression - couldn't resist showing you my thread cabinet. It sits on the floor, but supposedly could be hung on the wall. It's really heavy, even without the thread, so it would have to be well bolted to a stud to work on the wall. I'm perfectly happy with it on the floor. On the right side, starting with the 3rd row down, are all those old cotton threads, so you can see why I can pick close matches. Above them are different cotton threads that I use for machine quilting and embroidery. On the left, the top three rows are my old cotton covered poly threads, then two rows of different weight silk threads, and the rest are rayons and metallic. These aren't all my threads, by the way, but these are the ones that would fit in this style of storage unit.
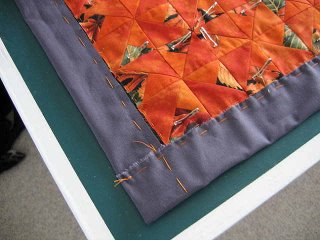
Back to my quilt preparation. The final step is to remove the tape and clips so that I can turn the excess backing over the batting and baste it down. Sometimes I use safety pins for this but on this one I continued with the thread basting. This makes sure that the backing doesn't fold back under and accidentally get quilted into the quilt. Yes, every time I've decided not to take the time for this step, I end up taking out quilting stitches to release an edge of backing. There are several other advantages, though. It keeps the batting from leaving lint on the quilt top or getting snagged by the presser feet or needle when maneuvering the quilt into position. It also gives me a place to try out thread and check my tension.
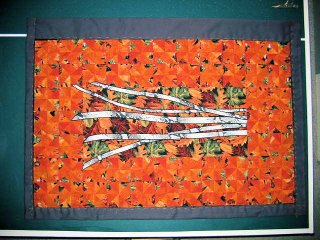
So here's my neat and tidy package ready to go under the needle.
 For you process-oriented readers, I took pictures of my layering and basting sequence. We begin by laying out the backing, wrong side up, and securing it to the table. I use a combination of masking tape and clips for pieces that are smaller than my table. I got the clips from a mail order source quite a few years ago and have only seen them advertised again once more - some quilt shop in Texas I believe that was highlighted in a magazine. They are plastic and slip over the edge of the table, flexing just enough to hold fabric firmly in place. Another clip people use is the "bulldog" binder clips, but they don't open wide enough to work on my table. I take care to position the backing with one straight edge (like a selvage edge) parallel with an edge of the table. I let the backing overhang the edge enough to wrap under so those clips get a good grip. I start by putting a few clips along the sides from the center out, then smooth the backing out to the other edges and tape them in the same way. The backing needs to be slightly taut, but not stretched unduly. Otherwise, when it is released from the clips, it will spring back to its original size which will be smaller than the layers on top. This could cause problems when quilting.
Next I smooth the batting over the backing. Here I'm using Hobbs 80/20 Black batting which is mostly cotton, so it sticks to the backing and doesn't need to be secured to the table. Some battings stretch more one direction than the other, just like fabric, so I try to position it so that the least stretchy direction is running vertically, especially for a quilt that will be hung. I always cut my backing so there is 3 to 6 inches extending beyond all edges of the top, and the batting several inches bigger on each side than the top.
 The top goes on last, centered on the batting and smoothed into place. Here you see how I use a ruler to make sure it is square. I keep smoothing and checking, using the edge of the table and vertical and horizontal seam lines for guides, until I'm satisfied with the straightness of the top. Again, because of the cotton batting, there's no need to secure the top along the edges.
Since this will be machine quilted, I'm using safety pins to baste the layers together. If I were hand quilting, I'd thread baste at this point. I start in the middle and place pins about 3 to 4 inches apart, avoiding places where I know I will be stitching. I'm also avoiding placing pins in the hand-dyed fabric because it is a very tight weave and shows pinholes that do not readily come out.
 I use special safety pins made for this purpose. They don't rust and they have a bend in them that make them easier to put in and close. I use the shorter ones since I'm usually using a fairly thin batting.
 At this point, many people would remove the tape and clips and get to quilting, but I take two more steps to avoid potential problems. First I run a basting stitch through all three layers about 3/8" from the raw edge of the top. This stabilizes the edge and keeps it in place while quilting, and keeps all three layers in place when applying the binding. Before I started doing this, it was not unusual for me to finish sewing on the binding only to discover that here or there the edge of the backing had turned under leaving a stitched down fold and a bit of raw edge exposed beyond the seam line. I find that if I take the time to baste the edges together, the next steps go more smoothly.
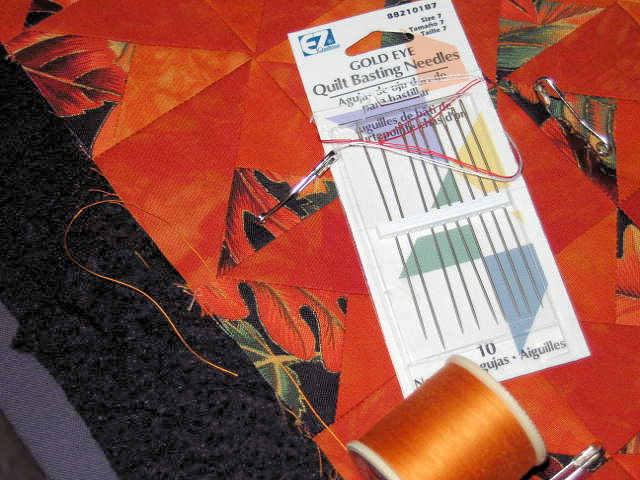
The basting will be left in, and doesn't have to be neat and even. I use a thread that matches if I have it on hand. Anything will do, so I often use cotton covered polyester thread from my garment sewing days, or the somewhat old cotton thread my mother-in-law gave me when she decided her sewing days were over. I used to use a regular large needle until I got on to these basting needles. They are long, relatively thin and have some flex in them, which makes the basting so much easier.

A brief digression - couldn't resist showing you my thread cabinet. It sits on the floor, but supposedly could be hung on the wall. It's really heavy, even without the thread, so it would have to be well bolted to a stud to work on the wall. I'm perfectly happy with it on the floor. On the right side, starting with the 3rd row down, are all those old cotton threads, so you can see why I can pick close matches. Above them are different cotton threads that I use for machine quilting and embroidery. On the left, the top three rows are my old cotton covered poly threads, then two rows of different weight silk threads, and the rest are rayons and metallic. These aren't all my threads, by the way, but these are the ones that would fit in this style of storage unit.

Back to my quilt preparation. The final step is to remove the tape and clips so that I can turn the excess backing over the batting and baste it down. Sometimes I use safety pins for this but on this one I continued with the thread basting. This makes sure that the backing doesn't fold back under and accidentally get quilted into the quilt. Yes, every time I've decided not to take the time for this step, I end up taking out quilting stitches to release an edge of backing. There are several other advantages, though. It keeps the batting from leaving lint on the quilt top or getting snagged by the presser feet or needle when maneuvering the quilt into position. It also gives me a place to try out thread and check my tension.

So here's my neat and tidy package ready to go under the needle.
No comments:
Post a Comment