Sunday, August 10, 2014

POAC Arts & Crafts Fair

Every August Pend Oreille Arts Council puts on a fantastic Arts and Crafts Fair in Sandpoint's beautiful City Beach Park. And since I can pretty much depend on some birthday money showing up later in the month, I enjoy perusing the booths, knowing that if I find something, I don't have to feel guilty about buying it - it'll be paid for eventually by that birthday check. Some years nothing stands out as something I want to take home while other years I really have to control myself. As you can see, this was a good fair! Four pieces of jewelry is a bit much for me but they all have a reason for ending up in my bag. The small leaf in the right forefront may actually end up sewn like a charm onto something textile related but I also might wear it. It is an actual birch leaf that has been put through an electroplating process and according to the tag stands for good fortune. I have two other pins similarly capturing bits of nature with this process, but you know how I feel about birches - they are my artistic muse and at one point, an integral part of emotional healing. Ironically, I have recently discovered that their pollen (along with cottonwood and oak) is number one on my allergy sensitivity test and may be partly responsible for the medical issues I've been sorting out for so long. Allergic or not, I vowed I'm not giving up my birches (just being more careful around them). Buying the leaf from Gray's Tree Leaves of Tucson AZ was definitely my way of rebelling, a way to show I am going to fight this and not let it get the better of me. We all need our symbols!

Dichroic Glass pendents by Elizabeth Dunlop

Less controversial are these pendents by Elizabeth Dunlop of Mesa, AR. It is so difficult to capture the color and sparkle of glass in a photo, especially this glass that seems lit by an inner glow. These are actually her test pieces of the dichroic glass she uses in her larger abstract wall sculptures, transformed into affordable jewelry in a variety of colors, sizes and shapes. By far my favorite booth at the fair, and as you can see, I couldn't decide between these two so took both - they were that affordable! Be sure to check out her website to see those wall sculptures, but I have to say, the pictures do not do them justice.


I managed to get away from this vendor of jewelry without info about them, other than that they are based just south of here in Hayden. I snagged this out of a basket of "show special" bracelets for two reasons (other than its very reasonable price). First, it reminds me of a bracelet my dad gave me when I was little - squares of shaped elk teeth (or maybe it was horn) strung on elastic. But the second reason was the real pull - this is tiger eye which I've always loved. I once had a very pretty tiger eye pendant that disappeared during a move. All these years later, I still can't fathom how it didn't make it from one house to the next, and I still mourn its loss. You'd think there was some sentimental attachment involved, or that it was an expensive piece; neither is the case. I just really liked it and have never found anything similar to replace it, though I am always on the lookout. I decided this bracelet was a start. The vendor did dig out a couple of necklaces she had under the table but neither were anything like my lost pendant nor anything I'd really wear. This will do.

Oregon Big Leaf Maple bowl by Thomas Leonard

I hardly need this bowl crafted by Thomas Leonard of Square Peg Products in Bonners Ferry just north of here, but I am a sucker for beautifully turned ones with interesting shapes and grains. I wish I could afford some of his more intricate pieces. In the meantime, this one goes well with the group I bought from Eric von Bargen of Walla Walla Wood Works back in 2009. Both artists believe in reclaiming and recycling wood for their products - no live trees were injured in pursuit of their passion. This piece has very delicate grain lines including a wing-like pattern appearing to caress the sides of the bowl.

So you see, I had a lovely time at the fair. Perfect weather, perfect views of the lake, and perfectly wonderful arts and crafts!

Thursday, August 07, 2014

Restart

I finished filling out all my documentation sheets early this week, clearing off even more space on the worktable, readying to fill it again with new projects! I put a fresh blade in my rotary cutter and got to work. This Ghana batik is going into the first baby quilt.


As is this snow dye I was less than thrilled with. But it is a good pairing with that batik


I'm freewheeling here, hoping to capture an idea that popped into my head awhile back. I decided not to try to sketch out the image that came to me, but just have faith that as I work with the strips, I can reconstruct it. The strips are cut 2 inches wide with this arrangement just a start to get me going. The blue batik further to the right will also be cut into strips to fill in. This is what I was referring to when I said I was done with circles for awhile, being siren sung by rectangles.


But before I do more to that, I also cut strips for another basket to be given as a housewarming gift. The recipient's favorite color is red and what is left of this very old print should look good as the accent.


Oh, I am SO pleased with how this turned out. I wanted to try another oval basket since my first try didn't turn out quite like I'd envisioned. I really like the baskets with the more vertical sides and I definitely got that with this one.


Another improvement - I managed the sides better to avoid the dip I got with the other one and also did a better job of tapering the end of the clothesline at the finish.


The particular pattern I was using as a guide did not call for the base to be done in the same fabric as the accent band but the red hand-dye I'd chosen was in short supply - not enough of it to do the base too. I actually like this better - a little surprise when you look inside.


This one is a bit smaller than the other oval basket (partly because the sides do not slope out) - I'm tempted to say, not too big and not too small: 9" x 6" and about 4 inches deep. And no need for handles or embellishment to improve it - it's pretty darn perfect as is. I just love it!

Friday, August 01, 2014

July Wrap

Leaf Padfolios soon for sale
I know I'm not alone in wondering where July went off to. Still, as I look at my July plan of attack, I did get a lot crossed off. I did think I'd be well into the first baby quilt by now, an idea sparked by that African batik and a couple of my hand-dyes. Instead, I traded that work time for making more padfolios than were on my list. These three use up the rest of the printed bands so I've been able to put away where they belong a bolt of fabric and several smaller cuts as well as the peltex, steam-a-seam, directions and other odds and ends I've left out until I felt well and truly done with padfolios for awhile. Clear space is emerging on the work table, and I'll soon be cutting into the fabric for the baby quilt.


I also started the documentation process on the last 6 quilts I finished for ArtWalk but have a ways to go to be done. I'm pretty old school about this, still using the printed out forms I developed years ago, printing out photos to attach and leaving on the table fabric from each which will be added as swatches to the page. What takes a bit longer is tracking down start and end dates and tallying up how many days I spent on each piece. Not sure how important that last thing is anymore, but I DO still get asked now and then how long it takes for me to make my pieces. Without my tracking system, I'd have no idea. Once filled out and filed, even more work space will emerge.


While putting the fusible away, I finally had it with this storage unit. It's been around for quite awhile and over time the plastic sides have bowed out, making it impossible to keep some of the drawers in their track, and no place for the trackless drawer to go but into the drawer below. This has always been an issue even when new, depending on how heavy the things were in the drawers. I've been halfheartedly searching for a replacement, but when I could no longer get that top drawer of fusibles and stabilizers to stay in the tracks, it was time to do something about it.


So yesterday I decided between two Sterilite units I'd been eying, neither very expensive in the grand scheme of things. It is the same depth and height as the old stacking units but a little wider, with deeper drawers so only three. I nearly got the one with two more shallow drawers on top but thought better of it as I worked the drawers and observed the side to side wobble. These drawers do not run in a track but just slide along the bottom of each slot. I'd rather have a unit like what you see sitting beside it - wood laminate that I've had since the 80's and still hanging in there - but I couldn't find the size and configuration I need within my price range. Well, I think this will do for quite awhile.

I don't get into these drawers much except for the fusibles one and it was a bit of a shock to see what was stored in the bottom two which I consolidated into one drawer of the new unit. I tossed a few things and should have jettisoned more but I quickly got overwhelmed. There's fabric for a couple of specific projects I can't imagine getting back to so the fabric really should get filed into my regular stash. But that would mean admitting I won't continue with the idea and wondering what to do with the blocks that are completed. Also a few "orphan" blocks and leftover pieces of stripsets and their fabric leftovers, other odds and ends. I just moved it all for another day. The other drawer is full of small pieces suitable for paper piecing (which I do very little of these days) and string quilts (which I make from time to time for charity). Now I'm eying those long thin pieces for fabric baskets. This is why I have such a hard time getting rid of things. If I wait long enough, I'm often happy to still have these things around!

As far as the other things on the July list, I finished stamping the piece of ugly art cloth but didn't get it made into a bag, although I think I've tracked down a purse pattern like what I had in mind. I ironed the pile of green hand-dyes from my friends stash that had been waiting for me to finish up with ArtWalk and folded/put them away along with others that I'd been stacking up. I didn't get to the half a bag that's left to wash/iron and put away so that task will continue to be carried forward. And finally, I mocked up a design requested by my niece-in-law who is expecting in September. She had some specific colors in mind which were harder to find in print fabric than I anticipated. She's in CA so we've been collaborating through e-mail - me sending her links and she letting me know what she likes. With size and fabrics agreed upon, the ordering began. I now have everything I need for her baby's quilt, but it must wait until the other one is done. The baby it is for is already here!

Fabric for a "modern" quilt for the California baby to come
 

Friday, July 25, 2014

Try Me Thread

Donna from my art group is a big fan of Superior Threads. While I am partial to Superior's King Tut thread, I'd not bothered trying any of the others, happy with the brands I had on hand. She mentioned I could join their thread club, but the last thing I feel I need at the moment is packages of thread arriving on a regular basis. I did that for years with Keepsake Quilting's fabric medley of the month. I built up quite the stash of reproduction fabrics, more than I'll ever use, and I found it hard to finally stop the automatic shipments. Ok then, she countered, you can just try a few you're curious about without having to pay full price (try me specials). No, I'm just fine with what I've got, I decided. That was until 1) I saw an ad that led me to believe Superior is now producing my beloved but discontinued Sulky Ultra Twist rayon thread, and 2) I got an e-mail offer from Superior announcing a July special of additional discounts off their "try me" page of threads (scroll down to the bottom of the newsletter for details and promotional code). Ok fine - count me in!

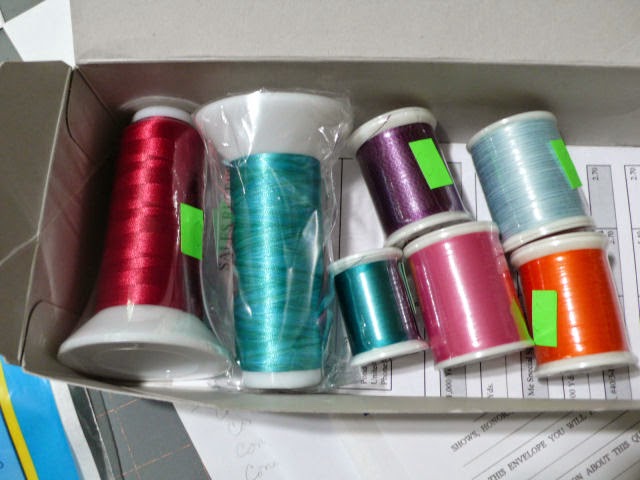
Give me a good deal and I go a little crazy. I ordered a few more than I really needed to, but the pricing was so good! Of course, you have to take whatever color they send - potluck there - but it was as if they already knew my preference. TWO teal threads, a King Tut not in  my stash and perhaps just what I need for one of the upcoming baby quilts, an orange that I know from past experience I wouldn't buy but has turned out to be just what I needed, and a couple of other strong colors I normally shy away from. There's trilobal and their extra-long staple cotton as well as a 100 wt silk that I'm anxious to compare with YLI's that I'm so attached to. Oh, and the Twist that started this all off is the purple one, I don't currently have a Sulky ultra twist in purple and it's a color I can really use. It looks to be just like the old Sulky product except instead of rayon, it's a trilobal which should be even better. I'm actually glad I didn't have to choose the colors on this try me! I'd probably still be sitting at the computer trying to decide what to put in my cart. 

Thursday, July 24, 2014

Padfolio Progress

Geez, I took the pictures, then got sidetracked, forgetting I hadn't shared what I did about closures on these latest padfolios. Just couldn't bring myself to add a button to the flap as it would interfere with that nicely placed leaf on the band. While velcro is one solution, I personally tire of the ripping sound. Sometimes you have to give quite a tug to release the flap and then you have the grabby side exposed to catch on clothing or whatever. I have a journal that I purchased for a guest book that uses the magic of embedded magnets to keep the flap closed. I've experimented with this in the past, but it is tricky getting the magnet placed properly under the fabric, and the magnet must be thin, which means it often isn't strong enough to work well through the fabric. This time I decided to try it without embedding. After all, what's the problem with it showing, since the velcro shows too?


These are self-adhesive strips which appear to stay stuck to the fabric pretty well after weighting them down overnight. I didn't do that weighting thing with the first one, and when I sprayed it with my favorite uv/repellent spray, the moisture seeped under and the magnets fell right off. Hmmm. Those were reattached with the help of a little Gem-Tac glue. The second one seemed to do alright with the weight and wait. I still would prefer for this type of closure to be invisible, but I very much like how the magnets work to keep the flap in place.


I gave June her choice of these two padfolios, secretly feeling this one should be hers but not wanting to second guess her preference. Have you received a gift from someone who obviously thinks you will love it, but you can't imagine why they would think that? Well, in this case, I was right - June did want this one, and for the moment, I've set the other one aside for myself. Remember I said I'd never made one to keep? I grew very fond of this one and especially the lining and pockets I chose for it. I like the clean look both have by using the magnet closure - impressed that the part of the design that overlaps when the flap is closed nearly lines up with the part underneath.


So these two are spoken for, but I've fused the remaining three bands to that commercial fabric I mentioned. It's a Fossil Fern that works so well with my skeletal leaves (which in this picture look a bit washed out). These with the mirror image design will be for sale, and I'll post them here when done.

Thursday, July 17, 2014

Printing and Padfolios

I've been working on padfolios this week. Tuesday started off with a bang - literally. I'd changed thread in preparation for stitching the closure on a second Autumn Trees padfolio, holding the top thread to pull up the bottom thread. I had the stitch on a setting that had the needle swung to one side, and I pulled just a little too firmly on that top thread - enough that the needle no longer angled into the hole but right into the throat plate - bam! Not the first time I've done this and usually the needle snaps, but this is a titanium one so I guess it only needed to bend itself into a bit of contortion. Never bodes well when this is how your studio day begins.


My first stitching through the elastic closure resulted in a bird's nest of thread on the underside. Taking a closer look, I'd managed to wrap the top thread around the needle. Or maybe it was the stitch I tried. I rethreaded, changed the stitch and had better success. This padfolio is pretty much identical to Michele's except for the button covering the elastic join and the stamp used in the first printing. On Michele's I used one that mimicked straight tree trunks; on this one I used one with more flowing lines - most visible on the lower part of the flap. Both were overstamped with a fan-like design in gold paint. This one is going off to June as part of our padfolio-for-painting exchange.

Top band from original jpg, bottom band from upped contrast jpg

However, I didn't think just ONE padfolio was a very fair exchange for the painting I received (Echoes From The Mongolian Rim), and I had another thought for a band that I wanted to experiment with, using a photo of a leaf I'd already played with back in 2011 (see this post). I took the tiled version and repeated it across the length of the band - a good start. Then not willing to let well enough alone, I tried a couple of mirror image repeats which gave a totally different effect. I printed these variations onto cotton sateen with my pigment ink Epson Workforce printer. Generally these things print exactly as I see them on my screen, so I ignore all suggestions about upping the contrast before printing. This time, I should have listened. The first set looked decidedly faded. I increased the contrast and printed again, getting a much more dynamic look.


I chose this image because I thought it might work well with the stamped fabric rejected for the Autumn Trees padfolios. And I was right. The faded one looked just right on one that had less bold impressions, and the upped contrast one held its own on the one where I had the stamp well-inked. The bands are attached with fusible web.


But both had lost some clarity to the outline of the leaf so some stitching was in order. I was so sure this grey and orangish/yellow King Tut variegated thread would be perfect for the faded one. Not only did it not define the leaves properly as the colors went from dark to light values and the stitch length I chose was actually too long, when I used it to satin stitch along the edge of the band, I discovered there was also GREEN in the variegation. Where did THAT come from? I tried convincing myself that it would look fine if I just stepped away from it for a bit. So I moved on to the other band.


The other thread I had out for consideration (but thought too dark for the first band) was a golden tan polyester - one of the first tri-lobals, or not your mother's polyester thread. I really do love it and it perfectly picked out the leaves and accented either side of the band. Success!


I'm not big on ripping out stitching but I knew I wouldn't be happy with this first one if I didn't. The satin stitching was easy (run a seam ripper under the wide stitches on the back and pull from the front - zip!), the other a little more tedious but worth it. The gold poly thread was not too dark to outline the leaves. It wasn't quite right for the satin stitching though, and I tried short runs of three other colors before settling on this Connecting Threads grey cotton. Actually, I'd ripped it out once, wishing for a grey slightly darker, but I had none. Black was just not right, the variegated grey/black too jarring with a striped effect. Once I got this on both sides, it looked perfect to my eye. So with fits and starts, Tuesday ended on a better note than it began.


Yesterday went much better as I moved on to choosing linings for the two. You would think a dark grey would work for both, but it didn't look right for my faded one. I found this fun batik instead that somewhat mimics the print of my stamp and whose brown is more similar to the color in the leaves than the picture would lead you to believe.


I also considered a black hand-dye for the lining - one that is the same tone as the grey of the cover and in the batik - but decided to use it just for the pockets. This one is done now, save for the closure, and tomorrow I should be able to finish the other. There are 4 more bands to work with but no more stamped fabric. Instead, I noted how good both the faded and stronger ones look on a commercial print I'd left out as a possible lining. Now I think I'll use it for covers instead.

Sunday, July 13, 2014

Summer in Sandpoint

We are in the midst of a heatwave - get into the 90's in Northern Idaho and while not unheard of, it is deemed a tad outside the range of normal. And so the tendency is to get out and take advantage of it while it lasts! So much going on this weekend in town and I decided to take some of it in. I started with the first annual Beerfest sponsored by one of our local breweries.


MickDuffs has moved their brewing facilities out of the space where they also run a brewpub and into the space recently vacated by Pend Oreille Winery. This is a favorite pastime of businesses in Sandpoint - a sort of musical chairs of available locations. The winery has moved across the street into an historic building they have been restoring. Anyway, this open lot next to the building is where specialty events are held, weather permitting. And boy, was the weather permitting this day - note people crowded into the only bit of shade save some canopies set up over some tables. Gotta love the mural on the side of the otherwise nondescript building.


Perhaps trying out various beers on one of the hottest days of the summer isn't the greatest idea, especially without a designated driver to get you home. Not to worry - it's been awhile since I'd wandered the downtown streets where there is plenty to look at. I'd crossed the street to check out the sign of a business I'd not heard of (another Sandpoint pastime - businesses opening and closing before you knew they were there) and found myself looking down at the foundations of the historic Farmin Building. Was I still a little tipsy or is this actually an interesting pattern of stone and mortar?


And was I seeing things as I passed by this alley? I thought I had caught a kid "tagging" - we've not had a lot of that here but some - but he seemed not a bit in a hurry or worried about getting caught. I'm pretty sure this is part of a project as I recognized the name of a local art teacher making claim to the astronaut scene.


Still feeling a bit of the effect of the beer, I made the dangerous decision to wander through Coldwater Creek - our local retail claim to fame that is in the last of its bankruptcy deep discount sales. I found a silk/cotton cardigan at 80% off - a real steal. Across the street, I snagged a flowing skirt off a sidewalk sale rack at not nearly as good a price, but on sale all the same. Not sure why I thought I needed retail therapy this day but I guess I was partly influenced by the fact I so seldom find things I like that fit and look good. Or maybe it was the heat...justify justify!


Coldwater Creek has a wine bar above its retail space and I've not heard what its fate is but a quick check showed it is still open and serving. Now here's something odd I could not resist capturing. First, one doesn't see a lot of men in suits around Sandpoint, especially on a Saturday, and especially on a super hot summer Saturday. Add the hat and I really have to wonder who this guy is and what's his story.


My story is to get back on the street and continue my wander, which led me to The Chocolate Bear and its sign advertising huckleberry icecream. Oh yes, must get one of those - so perfect on a summer's day.


Most of the stores were closing up by now so time to head back to the car. Still noting things to capture like this grouping of rocks gracing the facade of an otherwise plain bank building.


And by chance, I'd parked in front of the building I sketched not long ago - the one my guidebook indicated had gargoyles. I scanned the eaves to no avail, then realized this is what it was referring to. I guess technically it is right, but it wasn't what I was expecting.


Finally, what quilter could resisting snapping a pic of this cement planter at the stop of the stairs?

Thursday, July 10, 2014

More Scraps Off the Table

Another coiled fabric basket is done and so, a few more leftovers are off the work table. Still working in a bit of chaos but the padfolios I'm completing have been contributing to that. Bit by bit, the things left out for months because I knew I'd be getting back to them are getting tended to.


This time I chose the basic round bowl pattern with sloping sides. I was hoping the dark purple strips would go a bit farther but they end on the first round that starts up the sides. I searched through my batiks for something that would compliment that sort of odd hand-dye and came up with a muted plum I've had forever. It's an odd color too and I've found it difficult to work into my designs. Thus, I don't feel too badly about stripping some of it for this. I was careful to cut as I went so there'd be no leftover strips to start me down the road to yet another purple basket.


And then when it was done, I felt iffy about that combination, especially with the slightly different purple in the center. I still had some of that fabric and perhaps should have done a row or two of it before ending. But the bowl was done and what to do about the oddness and off-balance I sensed? More handles? Couched decorative yarn along the rim? No, I decided to try the book's suggestion of adding a binding - with that same fabric as the bowl was started with.


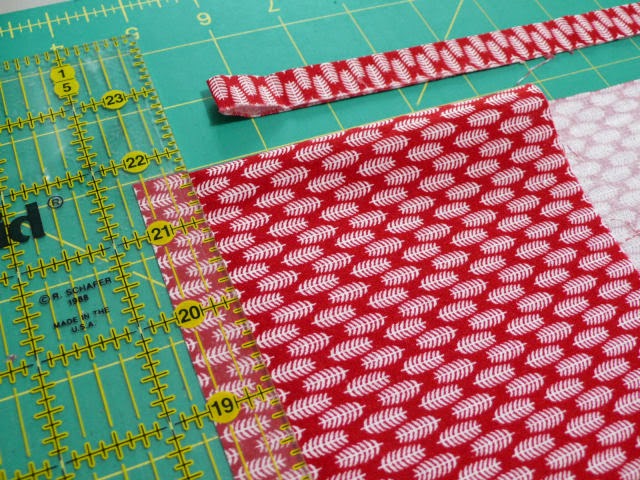
This was easier than I thought it might be. It is added just like any binding - starting with a 2 inch strip folded the long way, raw edge lined up with the rim, stitched with 1/4" seam and turned to the inside. I balked once again at the suggestion that it must be hand-stitched into place - any hand-stitching on these strikes me as awkward and testing my patience. Couldn't see any reason why I couldn't machine stitch it down. Using a 2 x 2 zig zag stitch seemed logical, what with all the zig zag stitching to hold the rows together. It worked quite nicely.


I'm still iffy about the whole color scheme, but I guess this is part of what I hope to practice and improve upon as I make more of these (oh yes, there will be more) - good exercise that should carry over to my other work. This is about 2-1/4 inches high and 7 inch across at the top. I've been treating these with Scotchguard - something I have on hand and want to use up.

Tuesday, July 08, 2014

Tying Up Loose Ends

It's hot out there so the air-conditioned studio has become a bit of a haven. A good time to pick up the pieces set aside for the "ArtWalk Push" and get some pleasant work done.


Overstamping the cover for June's padfolio - she already sent me the painting she wanted to exchange for it.


Adding a floral motif to the ugly art cloth now transforming into fabric for a bag of some kind. I'm trying out a little wooden stamp Robin (from my art group) watched being carved during her visit to India. If you click for a larger view, you can see the stamp in the upper right. Not sure about the color of the paint I chose but it was the third one I tried.


Test printing new photo manipulation designs for padfolios. Looks like I'll be making more than the one for June this month.


Using up the leftover purple strips from the last fabric basket. This one is destined for another birthday girl who celebrates at the end of July.

Feels like a pretty productive couple of days...

Sunday, July 06, 2014

On My Mind

I mentioned that I had another padfolio to finish up, next on the list. But as I work on that, my mind will be wandering over to what's next in line on the design wall: Two of my hand-dyes, an African batik, and finding myself drawn to work with rectangles. Circles be gone!.

Saturday, July 05, 2014

My Sweetie - Long Time Passing

F. Allen Barnes III circa 1975
It's that time of year again, for remembering a dear one long gone but hardly forgotten. This marks year 14 without my friend, muse, and husband who supported my quilting efforts, tolerated all my idiosyncrasies and loved me anyway. The picture is from our college days where we met. The Allen-shaped hole in my heart is still there...and it should be. Oh, but the memories! We made over 25 years of them - a good run.