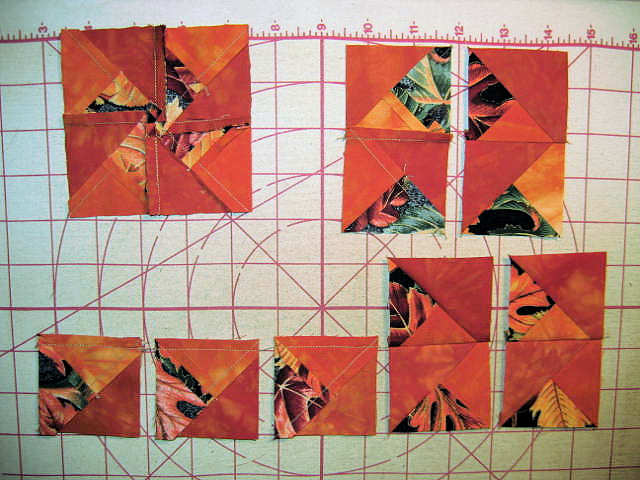
...Clipping and joining the pieced units from last week. When you sew triangles together, you get these "dog ears" that jut out beyond the seam edge and basically get in the way. Some people trim these after the block is all together, or as seams are joined and pressed. Others trim the points off triangles as they are cutting them out, usually with the help of a specialty tool. Most of the time I don't trim until after seaming or when squaring up the block. Since I'm using the post-it note pad as a guide, dog ears will keep me from butting the seam edge along the guide, so I trimmed all the units with scissors today before going to the next step.
A pinwheel block is basically a four-patch - a block that can be divided into a grid of four squares. The pieced units that make up the four quadrants of the block rotate to form the pinwheel and two seams will complete construction. Today I sewed the first seam. Up until now, I haven't used any pins to hold pieces together while sewing; there haven't been any seam intersections to match and the seams have been short. Now however, there are seams at one end to match, so I took care to snug the intersection together (note that the seam allowances are pressed in opposite directions to facilitate this) and held it in place with a single pin.

This seam is pressed to one side again, but not towards the side with the least number of seams as would be preferable. In order to have all seams that come together in the middle of the block pressed the same direction, I must break that "rule."
Next session I'll sew the two halves together which will require a few more pins. That center seam is critical to have matched up just right.
A pinwheel block is basically a four-patch - a block that can be divided into a grid of four squares. The pieced units that make up the four quadrants of the block rotate to form the pinwheel and two seams will complete construction. Today I sewed the first seam. Up until now, I haven't used any pins to hold pieces together while sewing; there haven't been any seam intersections to match and the seams have been short. Now however, there are seams at one end to match, so I took care to snug the intersection together (note that the seam allowances are pressed in opposite directions to facilitate this) and held it in place with a single pin.
This seam is pressed to one side again, but not towards the side with the least number of seams as would be preferable. In order to have all seams that come together in the middle of the block pressed the same direction, I must break that "rule."
Next session I'll sew the two halves together which will require a few more pins. That center seam is critical to have matched up just right.
No comments:
Post a Comment